Thursday, January 26, 2006

Countdown to Adventure


After considerable delay while I mixed in other things, here is the final (probably) segment on the Adventure Team Near Space Vehicle, a model rocket designed to launch a 3 3/4" GI Joe (or compatible) Astronaut in Adventure Team style. Today's installment covers launch-pad, flight, and recovery pictures.

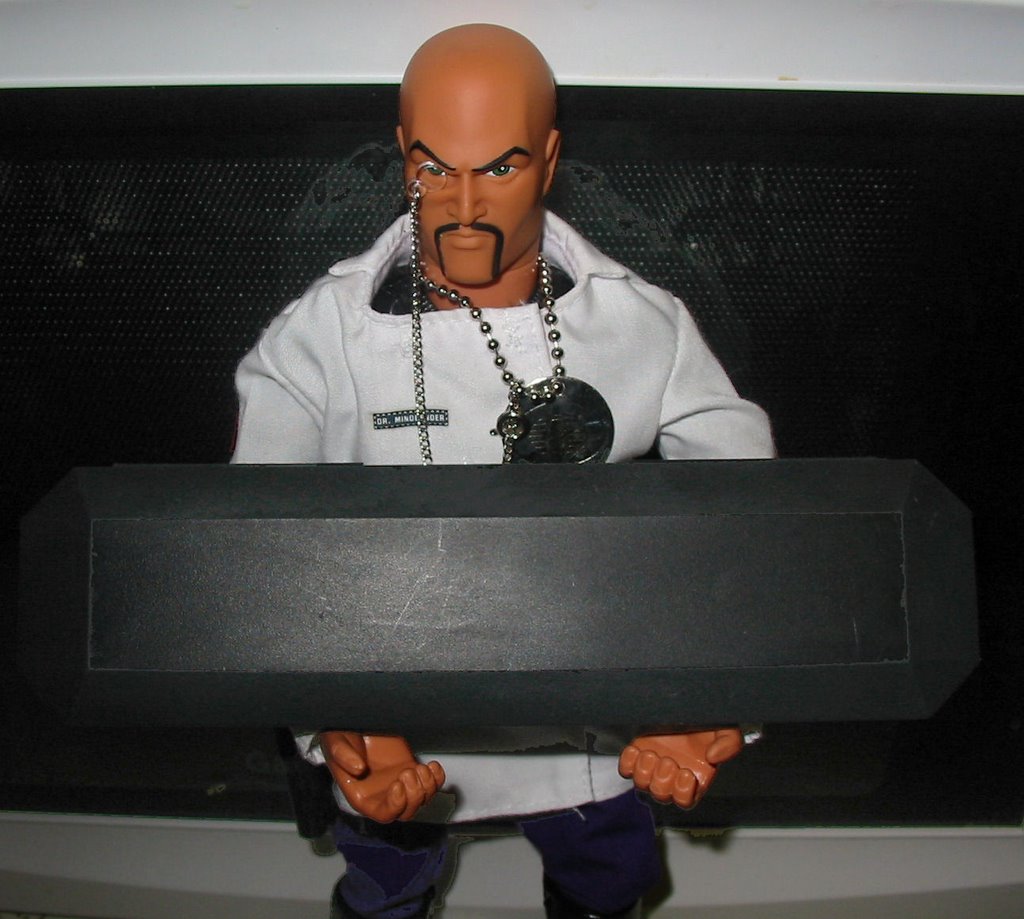
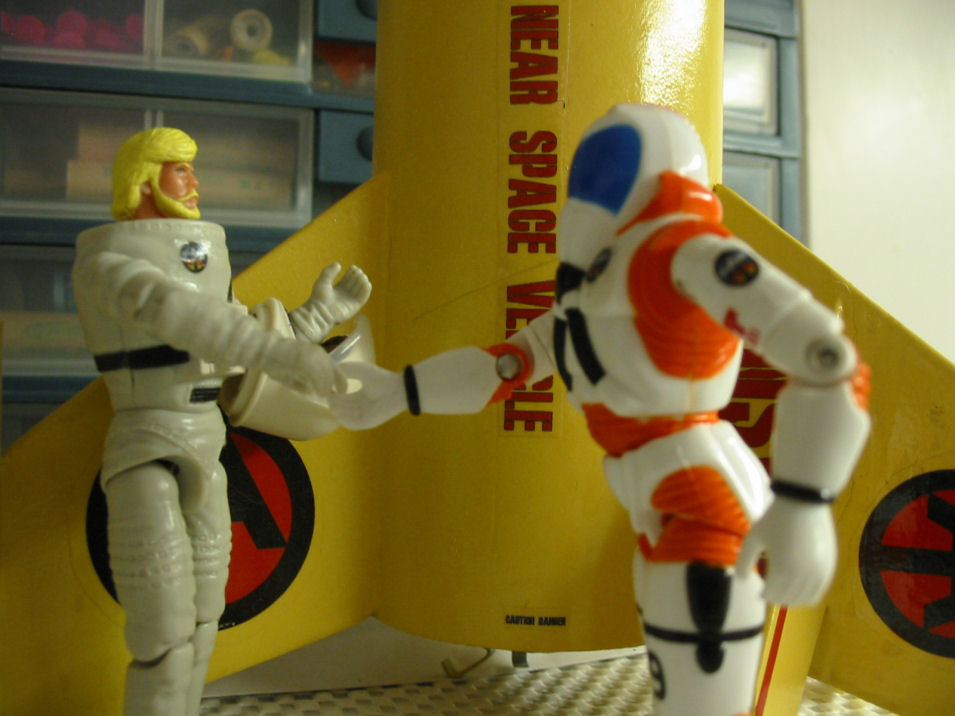
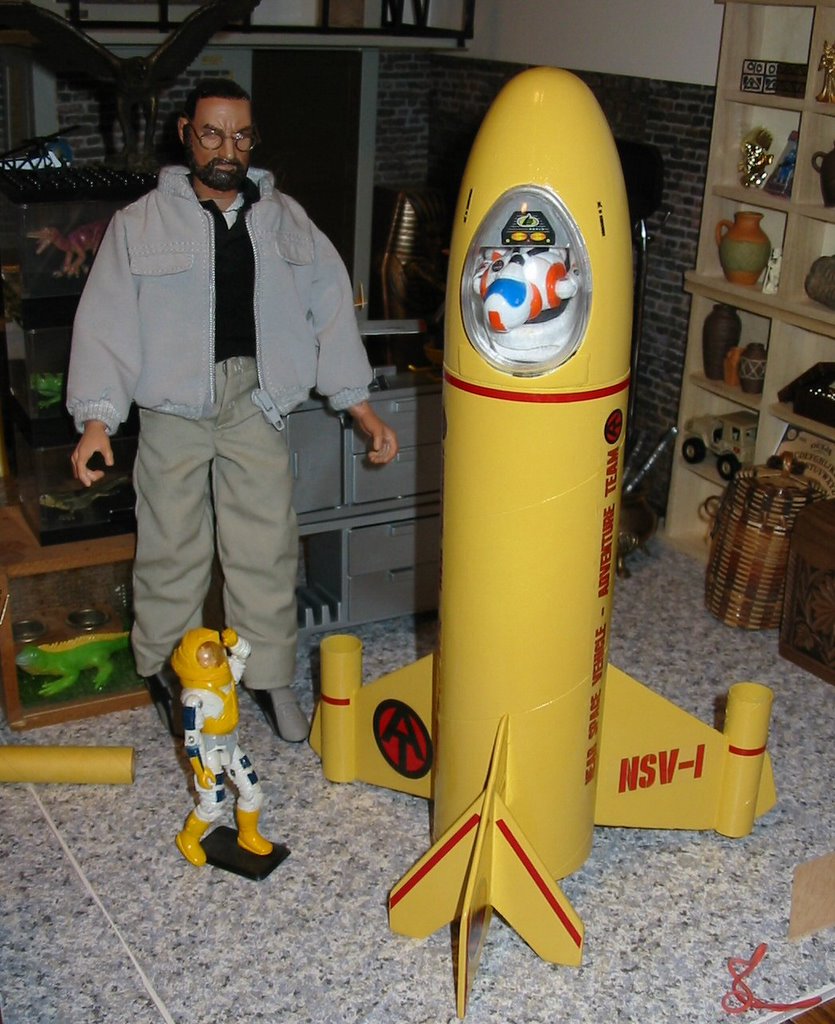
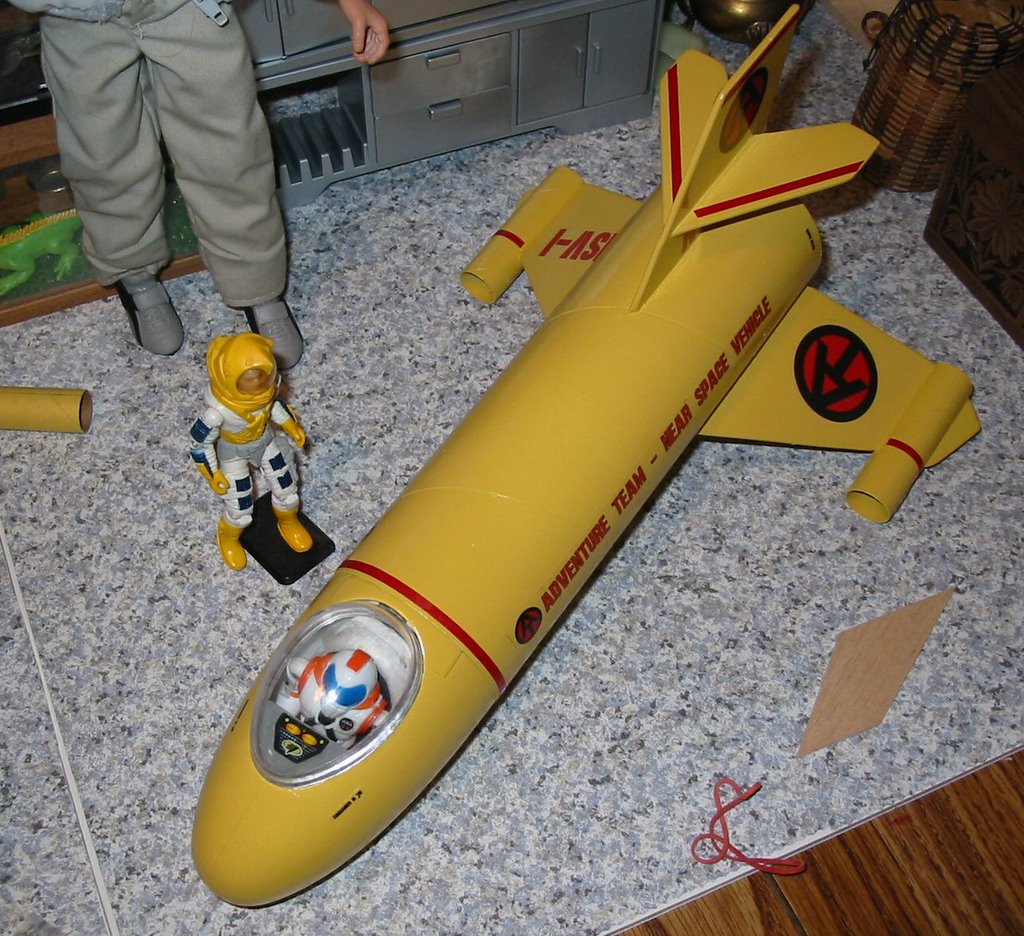
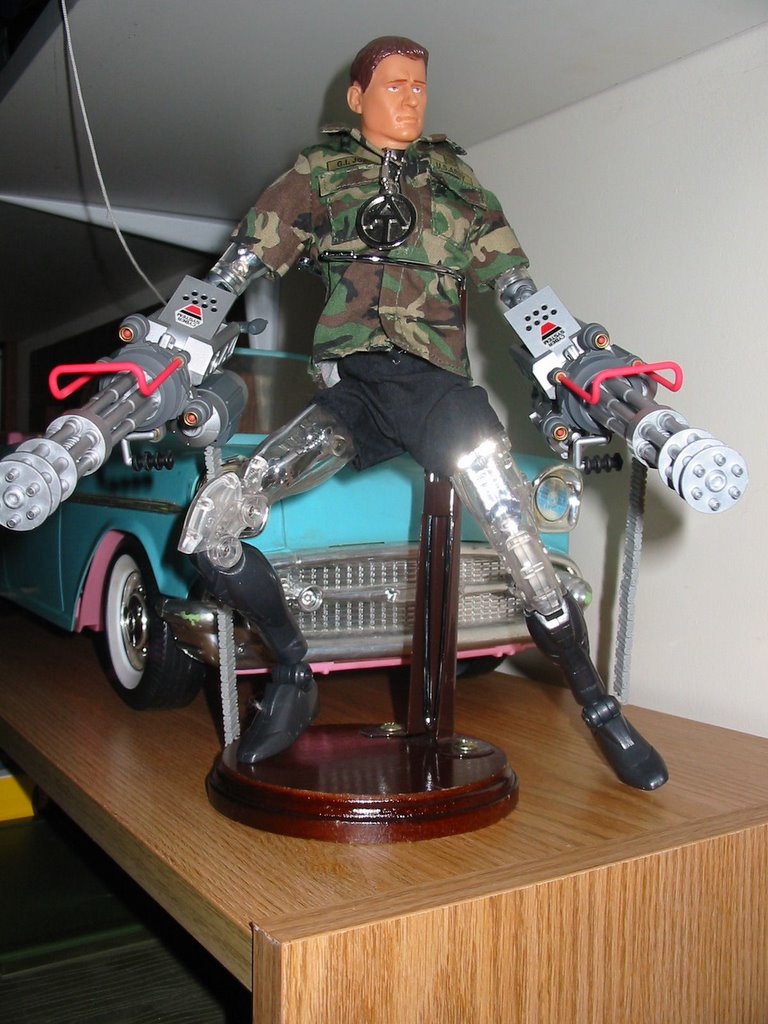
First, one more shot of "Captain Lanard" as we prepare the night before the launch. What a go getter! Already suited up and ready to go! Note the tiny Adventure Team astronaut patches on his chest and shoulder.

The launch was held on a grass farm outside Sheridan, Oregon, about 35 miles from where I live on the coast. The launch is focused on high-power rockets, which the NSV is decidedly not, so the size of the launch area is vast, and the distances between the safety ropes and the launch pads is considerably longer than is absolutely necessary for such a rocket. Keep that in mind when you see my launch photos. My zoom only goes so far, and I was a long way from this little foot-tall rocket. Good thing it's bright yellow!

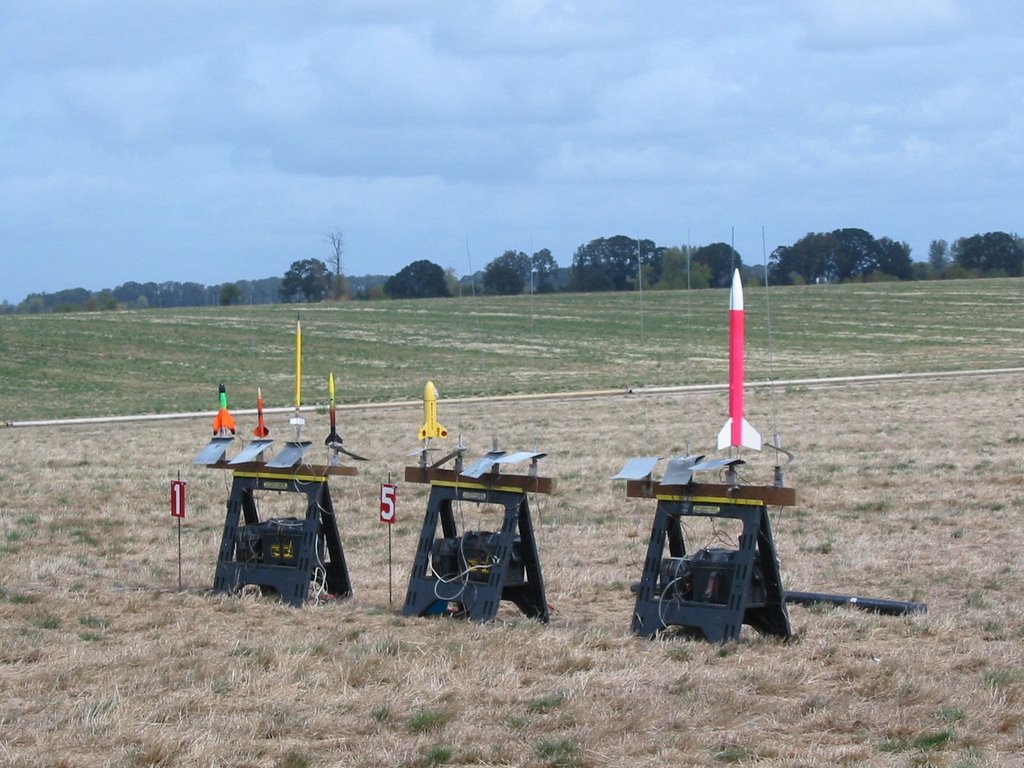
This first shot is taken at the launch pad, as the rockets are being placed and hooked up for ignition. For those not familiar with model rockets, the metal rods guide the rocket until it is going fast enough for its fins to keep it going straight. Rockets are remotely fired using an electric igniter placed in the engine nozzle. The boxes underneath the launch pads are automotive batteries, which power the whole thing. The metal plates under each pads are blast deflectors, used to direct hot rocket exhaust away from the launcher itself, and to direct it away from the ground. (Given that it's a grass farm and often dry, grass fires are a real concern).

No, that's not me in the picture. The man and his daughter are hooking up an Estes kit rocket on the pad next to mine.


Here we see the fully loaded rack, waiting to fly. As you can see, the NSV isn't very big as model rockets go. In fact, the large white and pink (nothing Freudian here!) rocket is still what is considered "mid-power." "High power" rockets fly from a separate series of pads much further from the crowd line. They're out of sight to the right of the frame.

The first flight of the NSV was made using an Estes "C6-3" rocket motor. For a little motor, that's pretty big, a maximum of 3 pounds of thrust, and a burn time of 1.7 seconds. The "3" is the number of seconds in the coasting delay, which allows the rocket to reach maximum altitude before the parachute is deployed.

The C6-3 has an 18mm case diameter. The motor mount on the NSV was modified to use 24mm diameter motors, and therefore I had to use an adapter to use the smaller diameter engine.


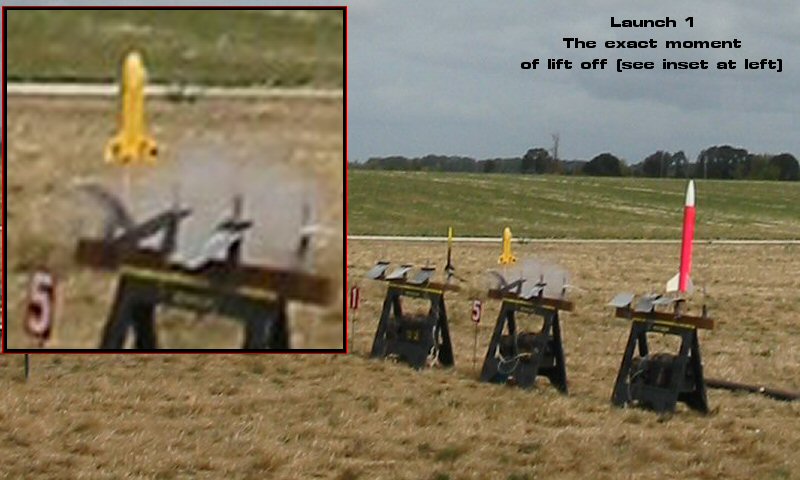
Here's the actual lift-off. As I said, I was a long way away from the pad, and I've pulled out a detail and magnified it so you can see what is happening.

The small, light-colored line pointing straight down from the rocket is actually flame from the motor exhaust. It doesn't look like much, but concentrated on one point, it's very intense. I've seen rockets hang up on the launch rod, and burn a hole in the sheet-steel blast deflector.

Model rocketry has an amazing safety record (you're probably in far more danger going to a Little League game, much less actually playing in one), but the potential for injury and property damage is always there. Organized launches like this follow strict safety rules.


From this point, the rocket was moving too fast and high to follow with the camera. The flight was straight and near perfect. It actually got a lot more altitude out of the C6-3 than I had expected.

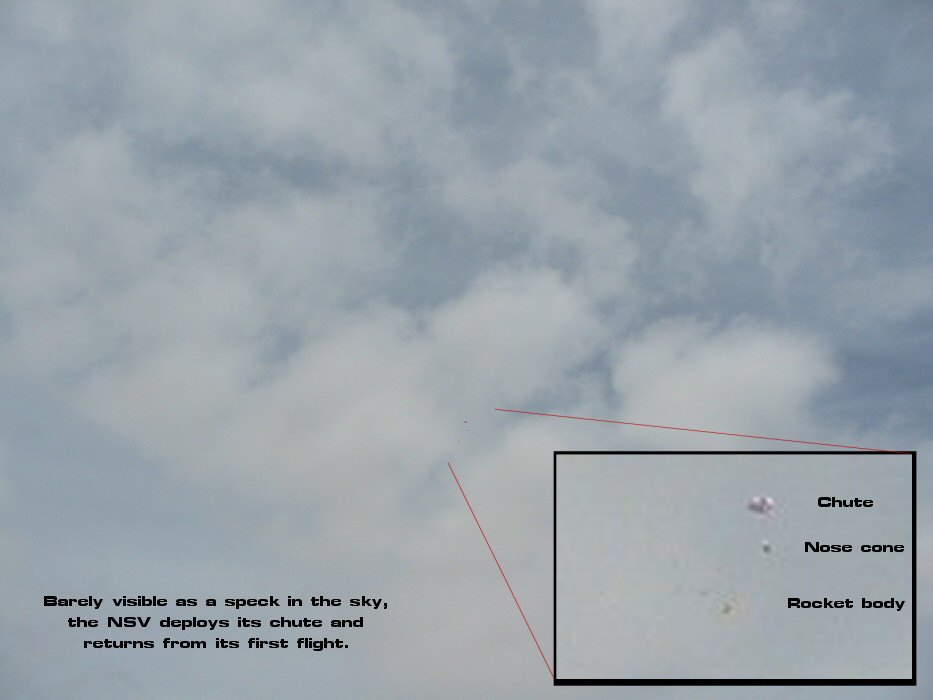
I did manage to pick it up with the camera after the recovery system had been deployed, though it wasn't much more than a speck in the sky. Again, there's an inset so you can actually see the rocket.

The nose cone separates from the rocket, and remains connected through a long, elastic, shock cord. A plastic parachute is connected to the nose cone, and (hopefully) slows the rocket for a soft landing.

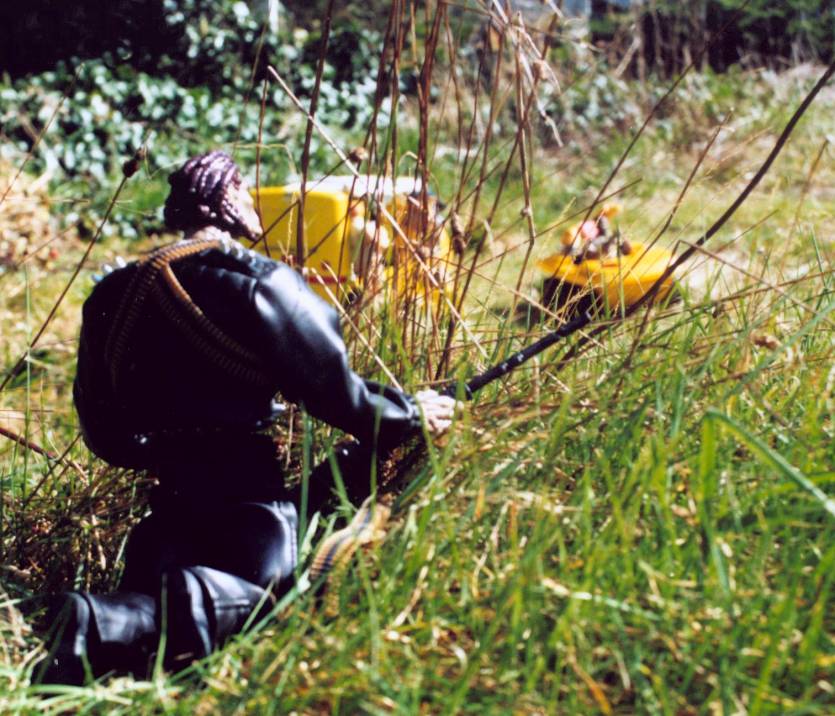
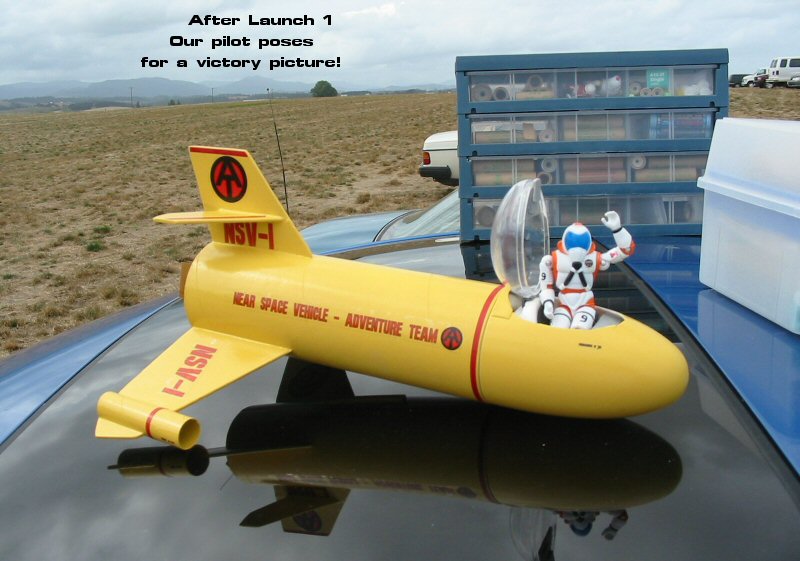
To be honest, at this point, I had half expected that the cockpit had been ripped open and that Captain Lanard would be lost in the grass somewhere, never to be seen again. Fortunately, I'd built the cockpit well. The canopy remained in place, and Captain Lanard lives to fly another day.

Here we see a posed, post-flight, victory wave. The parachute has already been packed back inside, and we've opened the cockpit so that Captain Lanard can take his bow.

Really, for me, this was an important part of the process. This wasn't some fake pilot head glued into a fake cockpit, as you sometimes see on model airplanes. This was a true action figure, able to be removed from his cockpit, played with and posed.

Encouraged by the success, I decided to pull out the 18mm motor adapter and fly on a more powerful 24mm motor. I chose an Estes D12-5. At a maximum of 6.4 pounds of thrust, this was a big step up from the "C" motor, and that changes a lot of things.

As I tried to explain to people over in the Sandbox recently, as they discussed the idea of building a working rocket pack for a 12" GI Joe, getting any rocket powered object to fly straight is -- well -- rocket science. Actually, for things that actually look like rockets, the rocket science doesn't have to be that hard. The general rules of thumb:

1. The longer (and to some extent, thinner) a rocket is, the more stable it is.
2. Weight in the front of the rocket (moving the center-of-gravity forward) makes a rocket more stable. Weight in the back of the rocket (moving the center-of-gravity backwards) makes a rocket less stable.
3. Fins behind the center-of-gravity make a rocket more stable. Fins in front of the center-of-gravity make it less stable. (Military guided missiles often have fins in the front because they use active, rather than passive stability systems like model rockets, and because instability makes it easy to turn on a dime when you need to, not a desirable characteristic for a model rocket).

The NSV has rule 1 working against it. It isn't long and thin, it's short and thick. Rule 2 is fairly good though, as the astronaut ads some weight to the front. Unfortunately, nose weight works better on long rockets, where it's way out in front and has lots of leverage. Not possible with the NSV. Rule 3 can be a problem too. It's easy to let the center of gravity slip so far back that part of the rear fins is actually on the wrong side of the CG.


So, why are we talking about this when the NSV flew perfectly on it's first flight? Well, as I said, that big motor changes things. For one thing, it's much heavier. It shifts the center of gravity backwards, and on a short rocket, a little shift can make a big difference.

Now on a simple rocket like the others you see in most of these shots, a rocket is pretty much either stable, or it isn't. But the NSV isn't a simple rocket. It's asymmetrical, what with the cockpit bubble, the fin-tip pods, the horizontal tail, the aerodynamics are suddenly dozens, maybe thousands of times more complicated. It's possible to have a rocket that's stable along one axis of rotation, and not along another. It's possible for stability to change under under other circumstances too, such as depending on the "angle-of-attack" at which it hits the oncoming air. Now we're getting into serious rocket science.

Mind you, the NSV did get tested before flight. I slung it around on a string. Seriously, that's an accepted test. You put a loop of string around the rocket, sling it in a circle around your head, and if it flies nose forward, it's theoretically stable. Along that one axis of rotation anyway. On a rocket like this, you rotate the rocket to multiple positions and retest each time. The test seemed to show was stable, even with the D motor. So off to the launch pad it went...

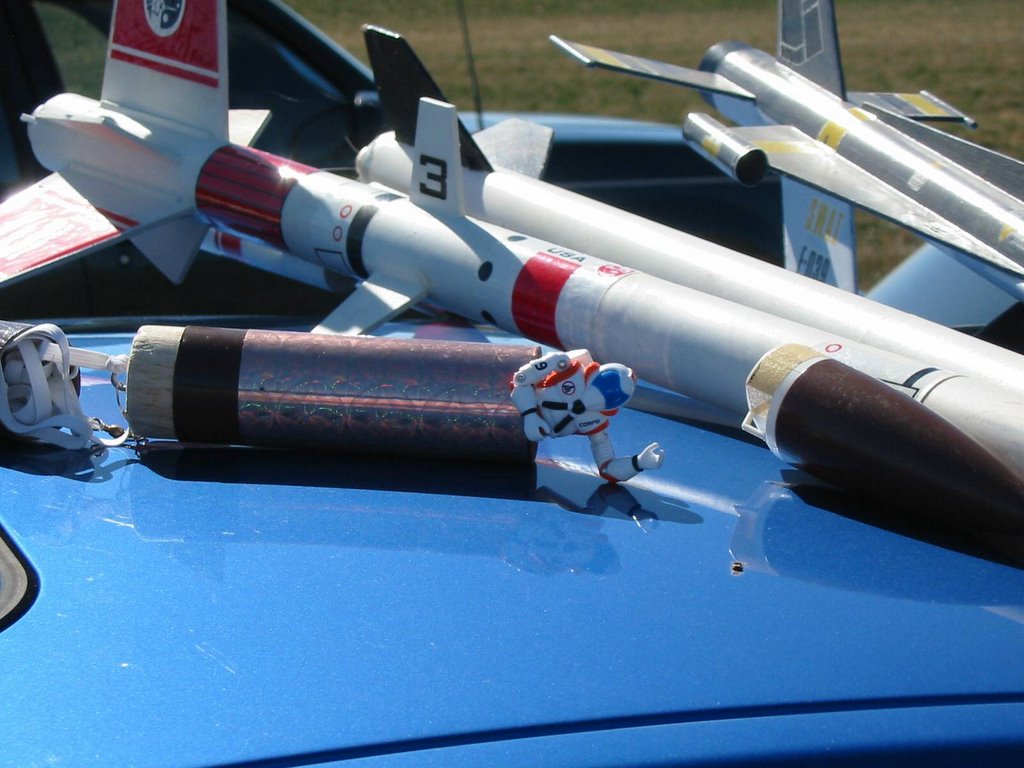
Now, here's some irony for you. The NSV project was inspired by the "Mercury Joe" program, an ongoing effort to launch high-power rockets with 12" GI Joe space capsules and astronauts on top. The launch vehicles are made to look like Redstone boosters, and the capsules are equipped with escape towers and multiple on-board video cameras. Wonderful stuff. If you haven't already, go visit the Vidroc site and watch their Mercury Joe videos. The Gumby rocket videos are also entertaining.

So anyway, it was interesting that I ended up on the pad next to a very nice scale model of a Mercury Redstone rocket.
Here's a closer short of the NSV on the pad. You can see the astronaut and cockpit in launch position. One of my concerns in designing the rocket was that the acceleration is actually pushing the astronaut back into the canopy, and that this might pop it off from inside. I actually considered giving the astronaut his own, small, emergency chute in case he accidently "ejected," but I didn't have time. Fortunately, it was never an issue.

But here we have yet more stability issues. Joe's off-center position throws the CG of the rocket off to one side, and as the rocket moves, he has enough room to shift around the cockpit, shifting the center of gravity on the fly. Now we need one of NASA's super-computers to know quite what is going on. Some things, you just have to try.


So here's what happened. Fortunately, the NSV wasn't completely unstable. If it had have been it could have looped and become a "cruise missile" headed for spectators, launch officials, or other rockets. Dangerous and embarrassing.

But it wasn't entirely stable either. Like I said, I think it had one "lobe" of insufficient stability. This cause the rocket to cork-screw its way into the air, wasting most of the increased thrust. In fact, I'd guess this D motor flight only went about 2/3s as high as the C motor flight, despite the increased thrust.

Fortunately, all ended well. As the motor burned, it became lighter. The rocket straightened out, and flew high enough to safely deploy its parachute and come to a safe landing (well, I think maybe we broke a fin, but it was an easy fix).


So, that was the end of that series of flights. The NSV returned the next year, repaired and improved, with a new Adventure Team astronaut (see previous posts) at the controls. Unfortunately, I was too busy flying to take many pictures that time, but the AT astronaut racked up several successful flights (though minor fin damage on landing continued to be a problem).

The NSV is in sad shape at the moment. It suffered some accidental damage here in my office, and needs major fin repairs. I'll do that eventually, but I'm thinking about retiring the rocket to static display. It's the fate of all rockets, it seems, that if you fly them long enough, either you lose them, or something eventually goes wrong. I'd like the NSV to survive long enough to serve as a reminder of its own glory days.

Now, that doesn't mean that we won't eventually build another Joe rocket...

Wednesday, January 25, 2006

Simple, for a change

After so many heavy-duty features in a row, I thought it was time to step back and do something simple about doing something simple. Not every Joe project has to be a major operation. Sometimes some of the best fun can be found in the kind of simple project that can be done in an evening, or maybe even in a hour while watching your favorite TV program. I'm going to share one of these now, and just incidentally, another.


This plastic box showed up at my house a while ago, and immediately got tossed into my Joe project box. It's just a black plastic clamshell box that some kind of ball-point pen came in, and I knew it would have some kind of use.

Okay, black-on-black is not my best choice of photo backgrounds, but to be honest, there isn't much to see. This thing is angular and kind of plain except for the beveled edges. Just a flat box.

Then one night while watching TV, I had an inspiration, grabbed some craft foam, a hobby knife, a pencil, and a box of 1/6th weapons, and went to work. Before the program was over, I had this:


Step-by-step, here's how to make your own fitted equipment case:

Supply list -
Box or other container
Thick craft foam, black or your choice of color (sold at Wal-Mart and most craft stores)
Weapon or gear of your choice

Tool list -
Small hobby knife with a fresh blade (the pointed triangular kind works best for this)
Safe cutting surface
Pencil

Instructions:

1. Cut a sheet of foam to fit tightly in your box of container. If the box is deep, you way want to cut more than one sheet to provide a "filler" layer in the bottom of the box. My example only needed a single layer of foam.

2. Select your weapon(s) or gear to fit the box. Experiment with layout and decide how you want to position them in the box. If you have space, you can make some extra cut-outs for shells, clips, grenades, scopes, accessories, etc.

3. Once you've decided how things should be laid out, hold each piece in place and trace the outline onto the craft foam.

4. Remove the foam from the box. If you have one or more filler layers, set them aside or leave them in the box. You probably just want to cut the top layer.

5. Place the foam on a safe, flat, cutting surface (a plastic or wood cutting board from a kitchen store works well) and carefully cut along the inside of the pencil lines. Don't try to reproduce every detail, and try to err in the direction of cutting the hole too small. The foam will stretch and compress, and you can always trim more later. But once you cut foam, you can't put it back. Try to make a clean cut, and be sure to cut all the way through to the bottom. It will be easier to cut multiple cut-outs if you leave all the "plugs" from the holes in place until all cutting is finished.

6. One-by-one, starting with the largest, remove the "plugs" from your cut outs, and test-fit each item. It should insert easily, but stay firmly in place on its own. If necessary, remove the item and trim to fit.

7. Re-insert the foam in the box. Insert your weapons and gear. You're done!

Use your imagination in applying this. It can be used for weapons, bombs, spy gear, ancient artifacts, communications equipment, alien embryos, you name it. The foam can be in any kind of box or case, a briefcase, or even a Joe-sized picture frame to display some antique pistols on an office wall. You could even create an "armory wall" that displays dozens of weapons for easy selection and access.

Oh, I did say there was a second "easy project" here. If you have a Dr. Mindbender, compare the monocle on mine to yours. As you can see, I've replaced that lame black string with a piece of real chain. I think it's a huge improvement. I just used a piece of jewelry chain and a jump-ring (a C-shaped, bendable metal ring used to hook things up) picked up at a craft store (you can also salvage both items them from dollar-store jewelry). Rather than attach the other end of the chain to his ear (which seemed strange), I just put a necklace clasp on the other end, so that I could loop it around his dog-tag chain and clip it in place. Not a perfect solution, but it works.

Jewelry chain is another one of those very-useful things to have around. You can use it to make chains for ID tags, Jewelry for your Janes and Cy-girls, key-chains, or to cuff a briefcase to your 1/6th secret-agent's wrist. You can make a watch-chain, a chain for someone's glasses, or use it to keep a foot-locker lid from flopping all the way back when you open it. You could even get kinky with it, but I'm not going there. Get some, and a bag of matching jump rings, at your local craft store. Handy to have around.

Friday, January 20, 2006

Sand Rat Upgrade, Start to Finish

As I've made pretty clear, my very favorite 1/6th projects are vehicles. Maybe you've seen some of my heavily customized Adventure Team vehicles, like the MLV (Mobile Logistic Vehicle) and LMUTT (Light Mobile Utility Tow and Transport)that started as Barbie camper vehicles and were modified almost beyond recognition.

While I'm quite proud of these and really had fun doing them, I wonder sometimes if they put people off, simply because they're too involved and it just isn't obvious how I got from that pink monster to the nifty yellow vehicle at the end.

Look, a cool vehicle project doesn't have to be that elaborate. It's a lot of run to take a basic vehicle and, with a little paint, some odds-and-ends, some super-glue, and some imagination, improve it far beyond the basic product, making it your very own. Well, tonight I finished (for now) a long-in-the-works project, and upgrade of the obscure Lanard Ultra-Corps "Sand Rat" vehicle. (Remember, you can click on any of the small pictures to see a large version so you can examine the details.

Most of the materials here are easily found at your local craft or hardware store, or maybe you already have most of what you need in your house.


Here's the Sand Rat as I found it in the box last Christmas. I realize that this is a pretty obscure vehicle, and it's unlikely you'll be able to lay your hands on one. But think of it as an example, an "every-vehicle." You can take the lessons here and apply them to a trashed vintage AT vehicle, a 1/6 RC Snowmobile, a Bratz car, or any other not-quite-right vehicle you might lay your hands on.

The Sand Rat is both the best and the worst case in many ways. The best, in that I think it has great lines. It's clearly a knock-off of the Action Man dune-buggy, which was re-released in the US under the Joe vs. Cobra banner a couple years ago (and should be much easier to find). But while it lacks that vehicle's action features, I think it's better from my standpoint. I think it's more attractive, it's a bit larger, a bit more grounded, and it even has room for two figures (a second one can ride in the back, and the roof was clearly designed to mount a weapon of some sort, which wasn't included).


There is, of course, a machine gun in the front, and ammo cans in the cargo side-wells (another nifty feature that the Hasbro version is lacking). But there are many unused mounting points on the vehicle, the hole for the roof-weapon, the holes in the side of the roll bar, and the mysterious pins on the rear "sissy-bar," that make me think this vehicle was designed to have a lot more goodies on it, probably more paint-applications to some of the molded-on-accessories, and to sell at a higher price point than the $10 or so (including figure) that I paid.

My thinking is that when the 12" market imploded, Lanard cut this item to the bare bones, packed it with the ugly molded-shirt (and boots) figure shown, and blew it out cheap. So, while the lines are nice, it really has a unrealistic toy-like appearance right out of the box.


Rather than paint-apps, we got some rather heavy-handed weathering, as through the vehicle had just been driven through mud, rather than sand. I considered trying to remove the weathering, but elected to live with it. I may add some more realistic dry-brush weathering of my own at some point, and I may swap out the stock stickers for Adventure Team markings, but I haven't done that yet, and I'm not sure I'm going to.

From this rear angle, you can see how it really suffers from lack of paint-apps. Those molded on the seat, pedals, packs and grenades really look fake, as does the half-of-a-fire-extinguisher molded to the left side of the roll cage. Speaking of the cage, you can also see how the "tubing" is actually open on the back. The translucent green plastic really shows this flaw up, and hurts the realism.

From this angle you can also see a couple of other drawbacks. There are not lenses on the headlights and tail-lights. They're just stickers over flat plastic. You can also see the rather unconvincing "exhaust pipes" on the back.


So, what's the plan to upgrade the Sand Rat? Well, here's a shopping list for any vehicle:

1. Decide what your application for the vehicle will be. Change colors, markings, and accessories to match the new mission.

2. Target ugly colors and translucent fake-looking plastic for repainting.

3. Identify unrealistic details. Remove, repaint, or improve.

4. Add small details to increase realism. These don't have to be huge or fancy. Keep in mind that anything that increases the visible number of textures, colors, and surface types will add realism and apparent detail. Think in terms of paint details, things that can be inserted or added in (floor mats, fire-extinguishers, headlight lenses, etc.), or attached (trailer-hitches, gear-shifts, cargo racks, etc.)


So, here's our improved Sand Rat. The overall appearance hasn't changed that much, but there's a huge increase in realism and visual appeal. Notice that there are lots of small areas of color. There are new and functional-looking details, clearly using different and contrasting materials and colors. Obviously we tossed the ugly figure for a kitbashed AT member (never underestimate the value of a nice-looking driver figure in any vehicle). Given that this is an AT vehicle, the heavy machine gun is gone, replaced by a "sensor cluster" (actually, a weapon pod from some smaller-scale sci-fi toy).

The headlights now have real lenses. These are made from plastic rhinestones picked up at a craft store and stuck on with super-glue. These are clear with a silver backing. On the lower lights, that backing has been sanded off, and the lenses glued directly over the existing headlight stickers. On the upper lights, the sticker was removed and the stone, complete with silvered backing, simply glued in place. A pair of smaller amber stones have been glued on as "parking lights."

The biggest single improvement in appearance and realism came from one, relatively-easy, change. I removed the roll-bars and bumpers, and painted them gloss black using Krylon Fusion paint for plastics. The Fusion sticks just fine to the flexible plastic the bars are made from. It hides the translucent plastic, making it more realistic, and the dark color makes the open back-side of the roll-bars less obvious. (We also disguised this to some extent by adding "padding." More on that in a bit.) Black was also more appropriate to the AT than the semi-military looking green. While I was painting all the bars, I also repainted the ammo-boxes black as well.

Note too that the molded in packs, and grenades have been hand painted using acrylic craft paints. Don't forget to paint the buckles in metallic or contrasting colors to add to the realism. You can't see it, but the seat back and molded in pedals have also been painted dark-brown. This doesn't require a lot of artistic ability, just a fine-brush and a steady hand. Pretty much I followed the molded in lines. It's a coloring-book in three dimensions.


From this front angle, you can see one shortcoming of the Sand Rat that I didn't address, those wheels. They're simply hollow shells, open on the back. Getting some realistic wheels, perhaps salvaged from a smaller scale toy truck or construction vehicle would make a huge difference in appearance. But I haven't done this yet, and I'm not sure I will. I'm going for increased realism here, but not hyper-realism. For instance, where's the engine? There's literally almost no space here for an engine or fuel. A stickler would have fabricated an engine cover to go over that rear compartment, but I wanted to keep it available for cargo, or as a place for a second figure to stand.

In this and the previous picture, you can also see how I addressed the half-a-fire-extinguisher on the left (driver's left) of the roll cage. I simply found an ammo-belt-pack in the junk box that was about the size of the extinguisher, and attached it to the open back side using a small, black, wire-tie (sold in electronics and hardware stores).


From the back, you can see some other details I added. The tail-lights are replaced with glued-on colored stones, again from the craft store. The license plate is a plastic souvenir zipper-pull. These are sold in tourist spots across the country with hundreds of common names printed on them. I look for them when I travel, and always pick up a pare of "JOE" tags whenever I spot them. They look great glued on 1/6th vehicles. They really add some color and interest, with hardly any effort at all.

I also upgraded the exhaust pipes, by adding some bits of Aluminum tube purchased at a hardware store. I find that any place that you have a chance to use real, exposed, metal, it can really enhance a vehicle's realism. Bright, shiny surfaces are also nice interest-points. Look around a hardware store, looking at all the screws, nuts, brackets, screw-eyes, drawer pulls and other items, and you'll find lots of stuff that will work on your vehicles, as bumpers, trailer hitches, light-brackets, etc.

Finally, look around and see what interesting gear you can add to enhance the vehicle's mission. Considering this is a desert vehicle, it seemed natural to put a few canteens in the cargo trays on the side. I carefully chose a pair that had tan covers rather than the more common OD green, and that had the added advantage of some silver and black detail paint. More realism points, effectively for free, that wouldn't be gained by dumping molded mono-color canteens in there.

It's worth noting a few other improvements I've added as well. Though you can't see it in the pictures, the cargo well now has a black "floor mat" made simply out of thin craft foam. Craft form is sold in a variety of colors in any craft store, or in the craft section at Wal-Mart. It's cheap, versatile, and easy to work with (just cut it with scissors or a hobby knife). Often it will just stay where you put it (as in my floor-matt application), or you can glue it, or even buy a self-adhesive version with a peel-off backing. You can use this stuff as seat padding, floor mat's, linings for tool boxes, all kinds of things. I recommend keeping a variety of colors on hand, but especially black.

I had originally intended to do the roll-bar padding using craft-foam as well, but went with an alternate plan at the last minute. The padding is "mini-soaker hose," cheap stuff sold in garden departments for use in drip irrigation systems. I cut it to length with scissors, then cut a slit up one side of the hose. Then I spread it open at the slit, and snapped it over the open side of the roll-bar tubes. Finally, I fixed it in place using small, black, plastic wire-ties (see above). What's really nice about this is that it shows that black is not just black. The black of the painted roll bars, the black of the plastic wire-ties, and the black of the padding are completely different. This kind of contrast among things of similar color really adds to realism for some reason.


So, that's our conversion. Just for comparison, lets look at the finished result side-by-side with the mint-original. Looks better, doesn't it?


Of course, there's plenty more that could be done. Mount some science gear or a cargo rack on the roof. Paint the roof and body. Add some AT markings. Upgrade the wheels. Put in a rifle rack, or mount some kind of small seat to the rear bar for a standing passenger to lean on. Maybe even add working lights. That's the beauty of these projects. Anything you do will likely be an improvement, but there's really not limit to what you can do. All it takes is a little patience and imagination.

Sunday, January 15, 2006

Rocket pilots

Before we move on to the launch and flight photos of the Adventure Team Near Space Vehicle (NSV-1), let's get a closer look at the pilots.

As I said in my previous post, I gave the hazardous assignment of test pilot, not to a Joe, but to a Lanard Star Corps figure. "Captain Lanard" was actually an experienced astronaut by the time he climbed into the cockpit of the NSV. He'd already taken several high-altitude flights on my "D-Ranger," a modified (stretched with a payload bay, pointed nose-cone, and 24mm engine mount) Estes Ranger.

The rockets in the background, for those who are curious, are an Estes Super-Vega, an Estes D-Region Tomahawk (modified from a single 24mm motor mount, to 3 18mm motors), and an Estes S.W.A.T. As you can see, I have a strong preference for "futuristic" models.


This photo was taken at the launch site outside Sheridan, Oregon just after one of the flights. Captain Lanard can be seen climbing from the payload section of the D-Ranger, giving his "all okay" wave.


After these flights, I felt that Captain Lanard deserved to become an honorary member of the Adventure team, and I made him a small version of this AT astronaut patch. It is inspired by the vintage astronaut patch, and incorporates the astronaut flight wings. The symbol was printed on paper, carefully cut out, and affixed to the figure with a drop of super-glue.

But despite Captain Lanard's excellent service, I really wanted to fly with a "real" Joe, and my chance came with the release of the Comic 3-figure pack that included an astronaut (Flash), as well as Short Fuze and Rock N Roll. I initially planned to fly Flash stock, but he seemed a little plain and boring to me, so I had to modify him.


Since he was supposed to be an Adventure Team Astronaut, I figured a beard would be appropriate, and since Rock N Roll had a beard, out came the screwdriver for a quick head-transplant. The Rock N Roll hair is a little long, even for the AT, but I think he looks pretty good. I also used a Sharpie pen to darken in the "padding" around his helmet opening, and added an AT symbol to his chest. The result is my 3 3/4 AT Air-Adventurer Astronaut.


Finally, we see the hand-off as test pilot makes the official delivery and hand-off of the NSV-1 for regular Adventure Team operations. Who says Adventure Team and 3 3/4" Joes don't mix?

30th Joe Updated

(I posted this message with an error that I've since corrected. I said this was a 35th anniversary Joe, which didn't sound right. Checking, I see that It was a 30th anniverary Joe, and have made the correction. These were released before I got back into collecting, and I don't even remember seeing one at retail.)

First of all, if you've a mind, scoot over to my "public" writing blog and check out the newly-unveiled cover of my upcoming MechWarrior book, "Trial by Chaos."

And we'll get back to rocket Joe shortly. But first...

Over on the Sandbox, Patrick Stanton posted some photos of his transplant of a 50th Anniversary Target Joe (just to be clear, "50th" in this case is the 50th Anniversary of WWII, not of Joe) head onto a BBi 3.5 body.


This is my own transplant, don't a month or so back, of a 30th Anniversary (of Joe, not WWII, but essentially the same head and body as the 50th) head onto a Mattel Max Steel "Ultra Action" body. I like this body a lot. It's rugged, reasonably posable (it has double jointed elbows and knees, and unlike a standard Max body, the ankles rotate)body that takes a beating and holds poses well. On the down-side it has a molded-in wrist communicator, a non-standard neck mount, and large, rather unrealistic hands. But over all, I nice body, and I've had good luck collecting lots of them in thrift stores over the last couple years.

As it turns out, the non-standard head-mount on the Max is very similar to the one used on the 30th Joe. As I recall, all I had to do was enlarge the hold in the base of the head to fit the Max neck-post.

The uniform and accessories here are 40th Anniversary Joe. The spare sailor uniform was just what I happened to have on hand, so I put it on for fit. The snap-cuffs neatly hide the wrist gizmo, and unlike the BBI body, the Max arms aren't too-long for the sleeves on a vintage/TC/40th uniform. The cuffs were tight, but they fit, and the boots are loose (an easy fix, and not a problem at all for display). Overall, I thought the fit of the uniform was surprisingly good.


Now for the good, part. This Joe can do things that no vintage-style Joe ever could.

I confess, even as a child, I was never a fan of the vintage-style body. My first Joe had a stress crack when I got it home from the store. It was frustrating that he couldn't kneel or sit properly. And don't get me started on those "nose-picker" hands. I always thought they looked terrible, and what good is a soldier who can't hold his gun?

As a kid, Captain Action took over most of Joes uniforms and gear (with our two paint-head Joes becoming his supporting players). At least CA could hold a gun.

Well, so can my improved 30th Joe. He can also kneel and crouch and sit.


Of course, from this Joe's perspective, increased flexibility may not always be a good thing.

Swab that deck, sailor!

Thursday, January 12, 2006

Rocket Joe

First of all, some housekeeping. Thanks to those who have asked about our sick Cat, Banzai. He's still in a bad way, not obviously worse, but not obviously better either. We had an emergency run to the vets yesterday afternoon. I was afraid he had a bladder blockage (which can be quickly fatal in cats) but it turned out to be a false alarm. He got some more IV fluids and is back home again. Still struggling to get food into him, and hoping his other problems will correct themselves. We shall see.

Moving on to more pleasant matters, there's been some discussion over on the Sandbox about the idea of building a Joe launcher to loft parachute Joes to high altitudes. All sorts of systems have been proposed, but a lot of bandwidth has gone to the idea of strapping rockets to a Joe in some fashion.

I've tried to caution folks that this isn't nearly as easy as it might seem to the casual observer. First, Joe is a heavy (as model rockets go) and draggy object. You've got to come up with some way to make him fly straight, and come up with some way to deploy the parachute and you've got to do it while keeping it all light enough to fly (and to avoid the legal complications that going over 16 ounces of total weight will cause, Google "FAR 101" and "rocket" for details).

But this is a very attractive idea. I long ago decided that flying a 12" Joe was beyond both my current technical abilities and budget, so a couple years ago I decided to try my hand at launching something in the 3 3/4" Joe format. This is the result, the Adventure Team Near Space Vehicle (NSV-1).


This is modification of the Estes "Fat Boy" rocket kit. I chose it because it had sufficient diameter to put a small Joe inside in a seated position, and frankly, because you could get them cheaply at Wal-Mart at the time.

The original rocket had three identical fins. To these I added the tip extensions, pods (empty tubes) and horizontal stabilizers to increase the fin area (at it turned out, I didn't increase it quite enough, but more on that in a later post) and make it look more "X-Plane" like.


The cockpit was created by cutting a hole in the existing nose cone (blow-molded plastic) and attaching half of a plastic Easter-egg as a canopy. The seat is made from scrap foam, and the control panel from sheet plastic. Making the canopy latch securely (I had to hold the astronaut inside during boost, parachute deployment, and landing) while still being easily removable was actually a lot harder than it sounded. I ended up with a long tab in the back, and a short one in the front. Squeezing the nose side-to-side elongates the hold JUST enough to carefully snap the forward tab out and remove the canopy.

The other major modification was to the engine mount. The stock Fat Boy is designed for 18mm (A-C designation) motors. I changed the mount at accept the more powerful 24mm (D) motors. This was my main reason for the larger fins. The larger, heavier, motor would shift the center-of-gravity to the rear, making the rocket less stable. The astronaut in the front would counter-balance that somewhat, but I was still concerned (justifiably, as it happens). The 18mm motors could still be used with an adapter, and I always intended to use a smaller motor for the initial test flights.

The figure in the cockpit isn't actually a Joe, it's a Lanard "Star Corps" figure, a Joe knock-off. These figures were sold by the gazillions at Wal-Mart a while back, are easy to find in thrift stores, and not worth much to collectors. But I like the looks of them, and that made one an idea "cannon fodder" test pilot. I even super-glued tiny Adventure Team symbols to his space-suit.


The guy in the yellow space-suit was initially supposed to be my pilot. I found him in a thrift store too, but he's "Payload," the version packed only with the monster "Defiant Space Shuttle" GI Joe playset, and worth, as I discovered, a fair-chunk of change. I decided not to risk him on early flights (and at is turns out, that big helmet is too large to fit in my cockpit anyway!).

Yes, it did fly, and I have photos to prove it. I also later replaced my Star Corps pilot with a "real" Joe astronaut, as I'll show in a future post. Stay tuned.

Saturday, January 07, 2006

Herbie Rides Again (smaller this time)


A big thanks out to my good friends Sean and Rose Prescott from Eugene, OR, who tracked down one of the elusive 1/6th scale "Herbie Fully Loaded" 1/6th scale, radio-control beetles. They shower up yesterday with our nifty new toy, and today we had a chance to take it out for a quick test drive. Here's a "road report" with lots of photos.

This first shot shows "Lil Herbie" with our 1:1 scale New Beetle Herbie. Also shown for comparison are a New Bright 1/6th scale RC New Beetle, and a Meijer's exclusive Adventure Team GI Joe (Joe sharing 60s icon status with Herbie). As you can see, it's been raining today (hey, it's winter on the Oregon coast) so the pavement in front of the house was wet. Keep that in mind while reading the driving reports.


The first thing you'll notice is that although both vehicles are offered as "1/6th scale" the New Beetle is noticeably smaller than Herbie, even though the original Beetle is a smaller car.

The lesson here is that "1/6th" in this context has nothing to do with scale. "1/6th scale" is radio-controlled marking speak for "really big." Most things sold with that designation are under-sized, some vastly so. I suspect that the New Bright New Beetle is closer to proper scale than most so-called 1/6th vehicles.

So, while I haven't taken the measurements or done the math, I suspect that Herbie is actually larger than 1/6th scale. Maybe even 1/5th. You'll also notice that even through the New Bright vehicle is smaller, there's a Cy-Girl 1/6th action figure in the driver's seat. The doors on the New Beetle open (as do the hood and hatch), and there's room for two action figures or fashion dolls inside.

Not so for Herbie. The doors, trunk and engine cover are all molded shut, and as you'll see, there's no room inside for a figure anyway. Still, I do wish those doors opened. Still, if any car looked acceptable driving around with no driver, it's Herbie.

This higher angle gives you another point of comparison. Notice the rather delicate-looking scale bumpers, which are protected by a black "tray" bumper underneath. Given that a vehicle this size can build up a lot of momentum.

The scale side mirror is more of a worry. It looks rather fragile. Hopefully it's stronger than it looks, as the mirrors on these 1/6th vehicles can take quite a beating.

As a trade-off, those opening doors, hood, and hatch on the New Bright New Beetle are more fragile too, and sometimes pop open because of bumps and collisions. Herbie won't have that problem.

Here's a side comparison. It really is great to have any vintage Beetle, much less Herbie, offered in this large scale. The detail and realism of the exterior seem quite good, if not perfect. The white plastic has a slightly translucent look though, which reduces the realism a bit. Overall though, I'd give it a B+. The Herbie markings, by the way, are factory-applied stickers. Not as durable or realistic as if they'd been painted on, but not bad.

Note too that Herbie has stock VW tires and rims. No racing wheels or mods on this version.


This is Herbie's uniquely-styled controller, which is a nice touch. Note that there are a lot of buttons and levers. Herbie has a lot of different functions, which appropriately give him a lot of personality.

What kind of additional features? Well, Herbie has low-rider style hydraulic shocks! The two buttons at the ten-and-two positions rock the body left and right. The two levers inboard of the buttons raise the front and rear of the body.

The two large "buttons" are actually the driving toggles. The left button rocks front and rear for forward and reverse. The other button rocks left and right for steering.

The lower left button is the engine start (with sound effects) and park (with flashing four-ways, which of course, an early 60s bug didn't have!). The headlights light when moving forward, and tail-lights light when backing up. Turn signals actually flash while you're turning! The New Bright New Beetle has lights too, but none of the flasher or signal functions. This is a neat addition.

The button on the lower right is "reset," and returns Herbie's suspension to the lowered position.

I found the "toggle button" driving controls to be awkward compared to the New Beetle's more conventional joysticks, or the wheel and trigger-throttle used on some other cars.

Herbie lived up to his racing roots, proving to be much faster than the New Beetle, though it lacked the torque to handle the occasional run off-road or into the grass. It really needs pavement, concrete, or hard floors to run on.

A pleasant surprise though, was that (on the damp pavement at least) it was easily capable of slides, skids, and boot-leg turns.

You can't really tell, but this is exactly what is happening in this photo. The back end has broken loose, and is whipping around while the front-end remains relatively fixed. This was a lot of fun, and one of the best aspects of the car. It was controllable enough that with practice, you could turn the car around in little more than it's length. I don't know, however, if this would work on dry pavement.

Power is by an included side-terminal 9.6v NiMH battery (included, with AC charger). While the amp-hour capacity is higher than the New Bright batteries (meaning it will last longer), they're otherwise interchangeable. The New Beetle can also run on a 9.6v NiCad battery with a wire pigtail connection, but Herbie doesn't have that option. Considering the longer running time and faster charging of the NiMH battery, this isn't a disadvantage unless you already have a lot of them hanging around.

One disadvantage of Herbie is that the battery is located under a cover on the bottom, closed with two screws. So a battery change means turning the car over, and having a Phillips screwdriver handy. The battery on the New Beetle is located inside the rear hatch, and is easily accessible.

Here's a shot of me and RC Herbie, giving some sense of scale. However, if pays to remember that I'm 6' 6" and 300+ pounds. Herbie is larger than he may appear!

Note that I'm actually driving the New Beetle in this shot, not Herbie, which is why I seem to be paying attention to the wrong car. The purple New Beetle is 49mhz, and Herbie operates on 27mhz. Unfortunately, my other New Beetle and my New Bright H2 Hummer are all also 27mhz vehicles, so Herbie can only play with the purple New Beetle. Well, I suppose I could also use it with my 49mhz 21st Century Stuart tank, but that sounds kind of dangerous.

There is also a split-window VW bus offered as part of the Herbie Fully Loaded line. I'm assuming that vehicle operates on 49mhz for full Herbie compatibility.


This shot gives you a glimpse into the interior, and you can see part of why a figure would never fit inside. The front seats are shifted far forward, and the back seat is little more than a narrow shelf in front of a mysteriously thick back. Behind the rear seat is a huge shelf, with a rectangular "swimming pool" depression that seems to serve no function at all.

For those still interested in trying to adapt the vehicle for use with figures, the "rag top" is a separate piece of plastic, attached inside with four screws. You could remove the body, remove those screws, and have an open roof beetle. But there's still the problem of the hugely distorted seats, and a firewall that extends almost straight down from the dash, offering no leg room. Since the motors for the front suspension are located right behind the firewall, there's no chance you could cut leg openings. It might be possible to put a legless driver figure into the seat through.
These not-very-good shots show Herbie from the rear. Note that there is no front license plate, and the rear plate reads "Herbie" rather than the proper Herbie license plate number, "OFP 875."

That wraps up this Herbie road-test. Overall, despite some flaws, I was overall very impressed with the vehicle and its driving characteristics. Thanks again to my friends Sean and Rose for delivering Herbie to me, and my wife Chris for asking them track it down (and writing the all-important check).

Friday, January 06, 2006

A real Adventure Team Vehicle


Since I'm a little behind on picture posting, I'm going to break with format a little and give you something different to look at. I fell in love with this unique vehicle the first time I saw it driving along a street a few blocks from where I live on the Oregon coast.

By the time I got my jaw back up off the floor of my car, it was gone. I had no idea what it was, and figured (this being a tourist town, where many usual vehicles come to visit, but usually just for a day or so). But to my amazement, I saw it on the street again a few days later, and this time I noticed the "Volvo" on the grill, my one clue to the identity of my mystery vehicle.

I googled on "Volvo Four-Wheel Drive," and with a bit of poking around, discovered that this was a Volvo Laplander, a military vehicle used primarily in Europe back in the 70s, primarily by the Swiss. You can find more information on the Laplander here.

The Laplander is an all-terrain utility vehicle used in a number of different body styles and configurations. Like the more famous Humvee, it's four-wheel-drive and has offset axles for maximum suspension travel and ground clearance (a full 16"). Though they weren't used by the US military, a number have been imported for private use, including this one.

Shortly thereafter, I noticed that the Laplander was often parked at a medical clinic a few blocks from my house, and I mentioned it to my wife. Then she was good enough to slip on some ice in her employer's parking lot. It was just a bump, but they sent her to the clinic to get checked out, and she asked the doctor examining her, "do you know who owns the Laplander out there?" Simply by knowing what the Laplander was, she became his instant best friend, and provided much of the information I'm sharing with you here today.

As it turns out, I'm not the only one who saw his Laplander and liked it. Another local liked it so much, that the doctor helped hook him up and he bought his own. So our little town now has two of these unusual vehicles running around! Even more interesting, the new one is a former airport crash truck, and six-wheel-drive vehicle! I think I've spotted a regular parking place for this one (probably the owners place of employment) so I'll try and get some pictures to post here when I get the chance.

Meanwhile, wouldn't this little baby look great in 1/6th scale and Adventure Team markings? (It would look even better in 1/1 scale and Adventure Team markings. Drool. ) Given the relatively flat sides, the body wouldn't be that hard to scratch build. All I'd need is a suitably large 4x4 radio control chassis to mount it on...

Monday, January 02, 2006

No More Mister Nice Atomic Man


I while back I scored a deal on some silver Neo Henshin Cyborgs and used one of them to make an updated "Mike Power, Atomic Man" kitbash. It was pretty cool, but I haven't done much with it for a while (I'd still like a real Mike Power shirt for him). But then the Cy-com guys using Henshin Cyborg bodies showed up at KB Liquidator, and suddenly Mike had access to a whole new range of "special mission" upgrades and attachments. Here he has the lower legs from a Cy Colossus, and the gun-arms from two of them.

Oh, yeah. Who's laughing now? Bring on the Intruders!

(Remember, with any of my posts, you can click on the small image for a MUCH larger version. One reason for posting to the blog was to be able to post large pictures with no loss of detail.)

Bomber Jacket Mystery Art

I just stumbled across an unopened Hasbro "B-17 Bomber Mission" carded set at Goodwill today. A nice and unusual find there, and this
version jacket I didn't get when it was out in stores. I think there were two or three different jacket paintings sold in this set. The others were
authentic WWII (in fact, I've seen the actual jacket one of them is based on in the Air Force Museum at Wright Patterson), but this one
looks wrong. The style of the art doesn't seem WWII, but much later.

It looks to me like 70's vintage comic book art. The style of clothing on the "bomber girl" also looks 70s.

The art features a blonde woman with long hair, standing with feet apart. She has a mini-skirt, tight mid-calf boots, "cow-girl" cuff gloves, and a shirt tied under her breasts "Daisy Duke" style. She's holding the end of a bomb in her right hand, which is balanced on its
fins next to her. The bomb says "Texas Queen." A couple of WWII-looking single-engine fighters (they look vaguely like Mustangs, but no belly scoops, and they have "Flying Tiger" type teeth painted on the noses) are flying over her shoulders dropping bombs.

A curved banner behind her legs and the bomb is partially obscured and either
says 381st Bomber Group (which is a real WWII bomber group) or maybe 387th Bomber Group (which doesn't turn up any hits on Google).

Given that the art on the rest of this series was authentic, it seems strange if Hasbro just had an artist make this jacket art up. I consider it more likely that it's based on a real jacket, though
possibly not one from WWII. Of maybe my eye for art is just failing me, and this is just ahead of its time.

Does anybody know the story on this jacket art?

Sunday, January 01, 2006

Cut the danged grass!


This is part of a series of pictures I took in my back yard a few years ago. This may go a long way towards showing you why we had to hire a lawn guy. I'm highly allergic to grass pollen. Taking these shots (which involved crawling around in the grass) gave me a good case of the sniffles. Actually cutting the grass, though, could lay me up for days.

Still, the wild-old-days of my yard were great for GI Joe and the Adventure Team. I still miss being able to do serious outdoor photo shoots in my own back yard.