Saturday, June 24, 2006

Speaking of flying Joes


(Posting on the road from Lake Elsinore, California)
Did you know the GI Joe Irwin Helicopter from the 60s painthead era was based on a real aircraft? The Hiller Hornet was one of a family of simple and light helicopters built by Hiller aircraft in the 50s, with rotors driven not by an engine inside, but by ramjet engines in pods on the rotor tips. So not only is this aircraft the basis of the Irwin helicopter, but also the Adventure Team Turbocopter and, to a lesser extent, the AT Helicopter. Earlier this week, our vacation took us through the bay area where I visited the Hiller Museum, where I took these (and many more) pictures of the Hornet and it's near-kin. Hopefully these will be the basis of some articles I hope to write for the GI Joe Collector's Club newsletter.

Monday, June 19, 2006

You will believe a Joe can fly!

I broke down and bought a "Ken as Superman" doll at Wal-Mart the other day for the costume. It galled me a bit to buy a suit of unknown quality and fit for $14.95, but now that I have it home, it was a bargain. I tossed the Ken and replaced it with an SA Joe. The Gung-ho Grip hands are good for flying poses, and he has the small feet, which fit the boots just fine. The bottom of the Velcro doesn't quite close, but it's well-covered by the cape.

I like the textured logo and the logo-belt-buckle, and while I was initially put off by the dark red, it's really growing on me. This is just a really nice Superman costume, and I doubt an expensive collector's figure could have done much better.

So how did Superman get a scar on his face? Well, he cut himself shaving, of course!


Monday, June 12, 2006

Catwalk construction details


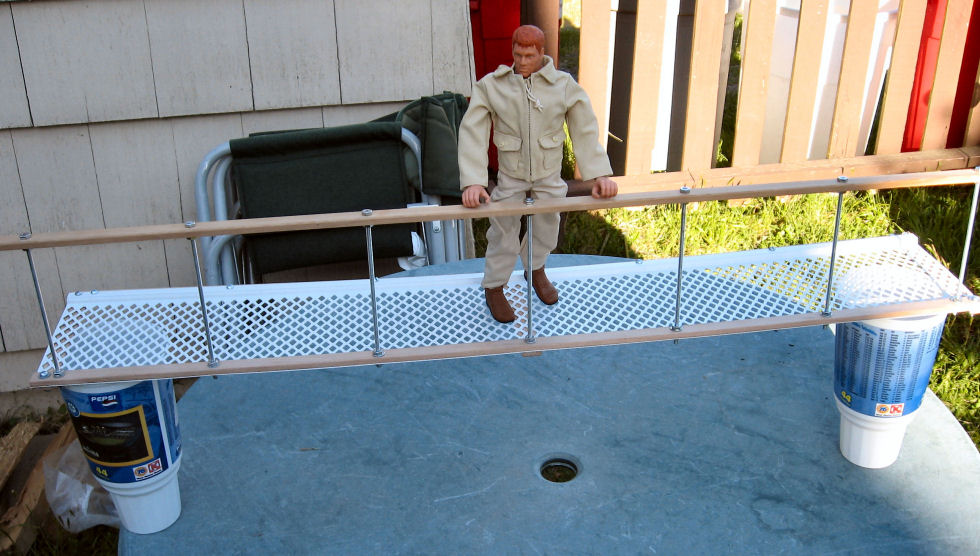
Here are some detailed construction shots on my catwalk accessory. It's constructed totally out of standard hardware-store materials. The most exotic stuff is the plastic "gutter guard" grating (meant to keep leaves and trash out of house gutters) that I used as the base of the catwalk.

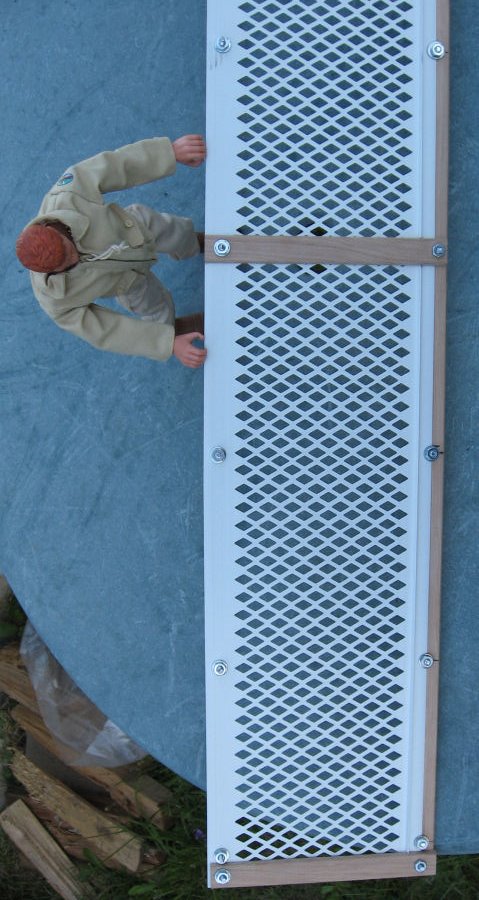
You can see in this photo that there's a bit of sag at this point. I hadn't decided if I should add the second railing or not, and if it should be a complete railing, or have a pass-through. The sag decided it. These railings contribute a huge part of the strength of the catwalk, turning it into a "U" shaped beam and keeping it stiff, despite its fragile appearance.

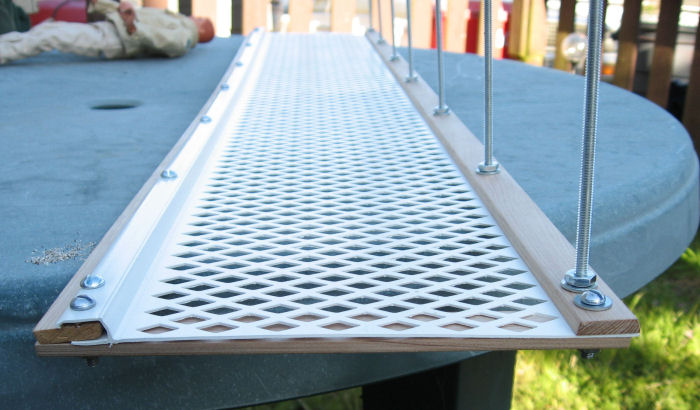
From this angle, you can see the railing and lower supports, all made from rectangular molding picked up in the lumber department. This stuff is cheap, easy to work with, and has all sorts of 1/6th applications. Most of the cutting (for precision, and so I didn't have to keep going back and forth to the shop while I worked on this) was done with an Xacto razor saw and miter box. I used the same tools to cut the threaded rod used for the railing uprights.

Here's a detail of the railing support. Threaded rod, nuts, washers, that's all they are. Note the nuts above and below the railing, and also above and below the bottom rail. To make sure the holes lined up between the bottom rail and the hand-rail, I clamped them together and drilled them both at once.


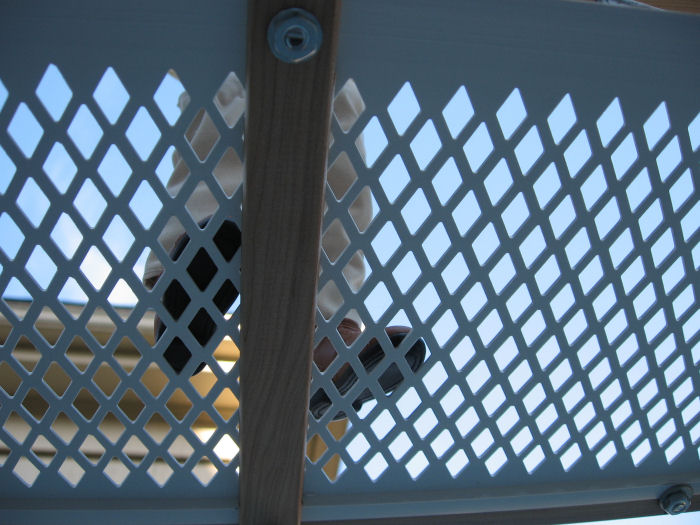
Here's a detail from underneath. As you can see, I can shoot photos from below as well as above or the side. The perforated plastic also casts interesting shadows, making for dramatic lighting. The plastic itself is thin and rather flexible. The wooden railings along both sides, as well as the wooden handrails, provide most of the strength.


Another view from below. Notice the cross-pieces (one at each end, one in the middle), and the fact that one railing sits on TOP of the plastic, while the other fits inside a molded grove on that side. You'll be able to see this better in the end-detail shot.


Here's the end. You can see how the molded-in grove grips one of the lower rails, and how the other is bolted on top of the flat plastic.

The whole thing was done in just a few hours working in front of the television. The tools included the afore-mentioned saw and miter-box, an electric drill, a tape measure, a few spring clamps, some pliers, and a box-end wrench to tighten the nuts. I finished it off with a few spray-coats or reddish-brown primer.

Most anyone should be able to duplicate this project with pretty minimal effort. If you don't need a catwalk, think of it as a balcony, ship railing, boarding gangway, or foot-bridge.

More Minions Extras

Okay, life and Minions have been keeping me busy enough that I haven't posted here in FOREVER. Here's a little Minions DVD extra from the current panel. If you haven't already seen the strip, I suggest you go check it out here before continuing.

This week's setup guest-stars three "Jurassic Park" T-Rexes. Actually, to be technical, two are "Jurassic Park," and the third is a lurid repaint from the "Mutations" line. While these are sub-scale for 12" figures, they're still plenty big enough to photograph well with them and look plenty scary.

My problem was how to get them posed the way I wanted. These are fantastic, very realistic, soft vinyl figures, but they have no articulation at all. They're rubbery statues. So how to get THREE of them standing up and snapping at my poor Minion's heels?

I tried various ways of interlocking their feet to create a kind of tripod. Didn't work. I tried propping them up with boxes, or holding their tails with spring clamps. Didn't work. Finally, I went out the back door of the office into my sun-porch and found a large, unused, flower pot. By folding the flexible tails on two of them and jamming them in, then hanging the third over the edge and propping up one foot with a box, I got more or less the look I wanted.


Otherwise, this is a very simple setup, and the first appearance of my new "catwalk" set-piece. It's supported on a couple of mailing tube covered with a stone-pattern self-adhesive contact paper. The chain came from the hardware store, along with all the goodies to build the catwalk. I think, actually, that the catwalk deserves its own post...