In my photo dioramas I've been making lots of use of pre-printed papers sold in the scrapbooks sections of craft stores. I've successfully used them to represent grass, sand, brick walls, and even water. But after doing last week's park-scene for Minions, it got me thinking about other "stock" props I could build for future use.
One thing it occurred to me would be nice to have would be a bunch of tree trunks for forest scenes. Yes, you can use real wood, but the stuff is heavy, dirty, hard to store, and sometimes just doesn't look right. Maybe there was a better way.
I started to wonder if I could find a "bark" paper to use, but I trip to the craft store turned up nothing. Then I had another thought: why not print my own?
I used Google's handy image-search function (searching on "bark") to come up with a couple of likely source images. Then I picked my favorite and used Paint-shop Pro to "clone" the image three across to make it wider. Finally, I printed it on my inkjet printer using the "stretch to fit page" option. I printed three copies, to give me enough sheets to work with.
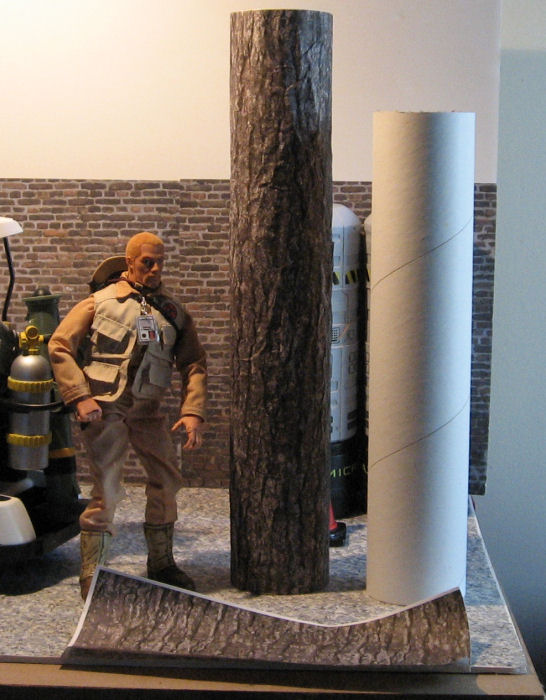
My thought was that I could glue them around cardboard tubes. Yes, they'd be smooth, but my experience is that realistic textures usually don't look flat to the 2-D eye of the camera. I figured if I just wrapped it around a tube or dowel, it would look good enough, especially if it appeared in the background of a scene.
This is the same trick that computer game makers use when they "map" a detailed texture onto a fairly simple 3-D object to achieve a realistic look without bogging down the computer or console rendering the scene. In this case, I was "mapping" the flat bark texture onto my simple tube shape.
Thinking about it, however, I realized that I could go the computer one better, and easily add some real texture to my printed sheets. Here's how I did it...
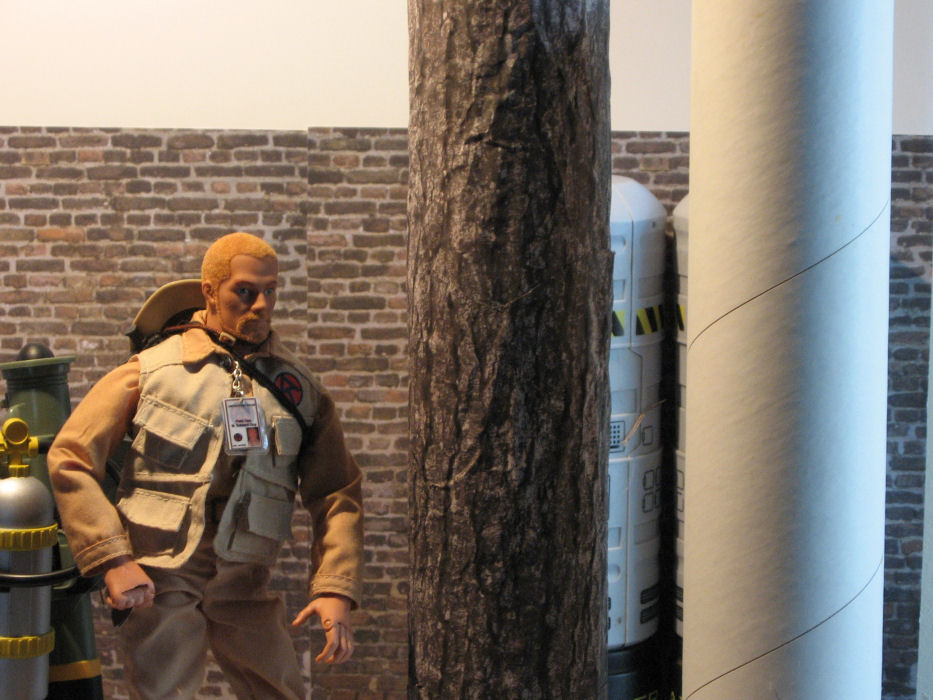
First, I selected my core form, a 3-inch mailing tube that I had laying around my shop. You can see a piece of the "naked" tube on the right side of the pictures. Most any cardboard tube would work, from a couple of paper-towel tubes spliced end-to-end, to a piece of carpet-tubing to create giant redwoods.
I determined that it would take most of three sheets to cover the tube, and that the long direction of my printed sheet would go around the tube with minimal overlap. For ease of construction, I decided to use transparent tape instead of glue. I carefully lined up all the joints so that the tape and seams are all hidden on the back side of the tree. (This is a key trick for pulling this stuff off easily. Don't build or detail things that people aren't going to see. The viewer's mind will fill in the rest of the bits that you leave off.)
I started at the bottom, trimming the white edges off the sheet where they'd show. This is where the real texture comes in. I then took the sheet and rolled it up into a small tube, then crushed it, rolling the resulting mess between my hands to add more folds and creases. Then I carefully flattened the sheet, which now had nifty texture that would pick up highlights and make the profile edges of my tree trunk look more realistic.
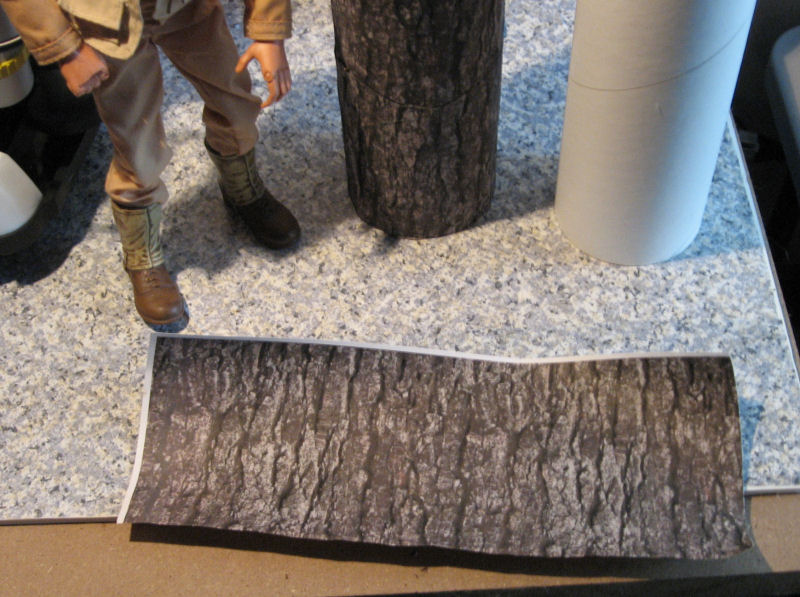
Razor-straight lines are a dead-give-away that something is artificial, and the human eye is very good at spotting straight-lines.
I took this in consideration when rapping the second sheet around the trunk. I planned to overlap the sheets slightly anyway, so I hand-trimmed the bottom of the sheet in a kind of "wave" that would help disguise the seam. After taping the sheet (both the lower sheets were also taped to the tube at the top, where the tape would be hidden by the overlap from the sheet above) I finished off with the final one.
I've got some ideas on how to add roots and limbs to my tree, but I haven't tried them out yet, and for a forest scene, the trunk is the most important part. You can whip up a whole grove of these in an evening while watching TV. Remember to used a variety of tube sizes and bark textures and colors for a more realistic "forest" You could even print out some "knot holes" and other tree features, cut them out, and paste them on for a more realistic look.
One other advantage of using multiple tube sizes is that you can store them compactly nested inside one another. Try that with something you rescued from your wood-pile!
3 comments:
Thanks for the great information about the tree trunks.
Excellent information as usual. What I love about your blog is that you don't mind sharing what you know and that is VERY cool. We can only improve if we share what we know.
Great idea.
Here via your post on the NWSIXTHSCALE Yahoo site.
Post a Comment