Showing posts with label Adventure Team. Show all posts

Wednesday, November 07, 2007

Sea Adventurer Pappy


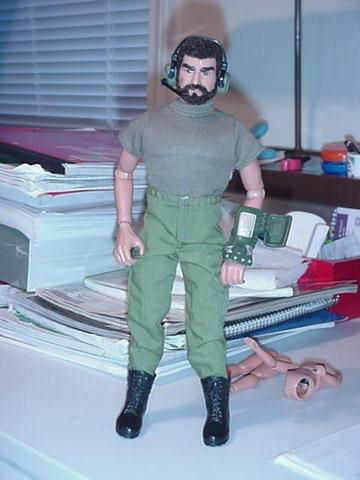
Buddy Finethy has recently been having some parody-fun reimagining various cartoon characters as members of the 1970s GI Joe Adventure Team line. You can see them here.

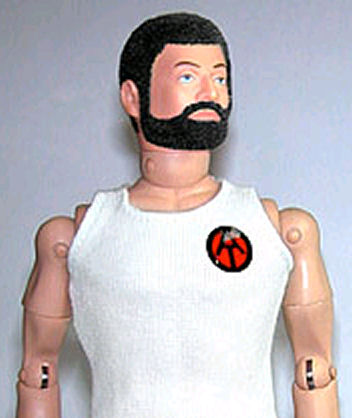
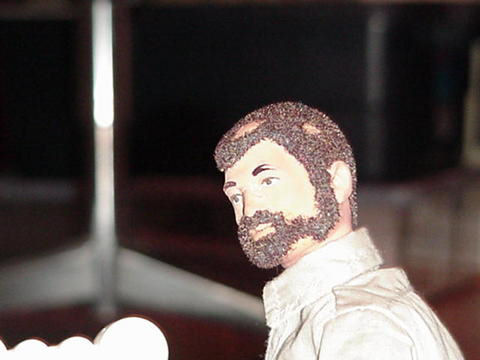
I couldn't resist playing myself. Here's my take on the Sea Adventurer. I used Poop Deck Pappy as a starting point instead of Popeye because, well, Pappy already has the beard. Note I did not call him the "Poop Deck Adventurer," as that is a strict violation of the "don't ask, don't tell" policy.

Friday, October 19, 2007

New Bright 1/6th RC Hummers

Click on pictures for full-sized versions


Because somebody over on my Joe's Garage Yahoo Group requested it, here are some pictures of my latest Goodwill find, a 1/6th (more or less) New Bright RC H3 Hummer, seen side-by-side with the yellow New Bright H2 Hummer I've had for a couple years.

I only paid $9.95 for the H3. It didn't have a charger or remote, but the remotes on most of the large New Bright vehicles are interchangeable as long as you have the right frequency (either 49 MHz, or as in this case 27 MHz, and I've got remotes for both frequencies). Last I checked, you can also order replacement remotes directly from the New Bright website for a very reasonable $10 plus shipping. I can use the same remotes for both Hummers, my two New Beetles, and my F-150 pickup.

The H3 is lighter and has more guts (perhaps just because it's lighter) than the H2, and corrects the H2's too-soft springs (which have it bouncing all over the road). On the other hand, it isn't as pretty or detailed, and lacks the working doors, or even clear windows and an interior. The body is just a shell. I may end up stripping it down to the chassis for an Adventure Team vehicle project of some kind. I haven't decided.

As for the H2, it has its problems, but with a GI Joe Adventure Team passenger and driver inside, a few accessories, and some understated Adventure Team decals, it still looks cool, and nothing will ever take that away.

Saturday, January 20, 2007

A Fossil T-Rex for the Adventure Team


I've been so involved with the Minions lately, that I haven't had much time for my old friends the GI Joe Adventure Team. But today, while picking up a bag of cat food at Petco, I spotted this great T-Rex fossil skull in the aquarium department, and had to have it. I love 1/6th "artifacts" for the Adventure Team to dig up and bring back to the Adventure Team headquarters for display, and this is a doozie.

I always thought that Hasbro missed a bet not making AT "Dinosaur Hunter" figure sets, each of which would include a fossil skull or skeleton accessory for a kid to dig out of the sandbox. This gives you a pretty good idea of what I had in mind, though a toy version would obviously be made of lighter and more durable materials.


The skull is made of hard resin (heavy!) and has an air hose on the back that I'll cut off (even the tag is still attached in this photo). The top of the skull is hinged (so it can open and close as it fills with air). Price was about $10, and money well spent. Actually, big as it is, it STILL isn't full scale for an adult T-Rex skull, but I figure it's close enough.

It looks pretty good in the greenish-gray paint it came with, but I'm at least going to use some acrylic paint to darken the eye sockets, nostrils, and other openings in the skull. I'll post some more photos when I get around to it.

Saturday, June 24, 2006

Speaking of flying Joes


(Posting on the road from Lake Elsinore, California)
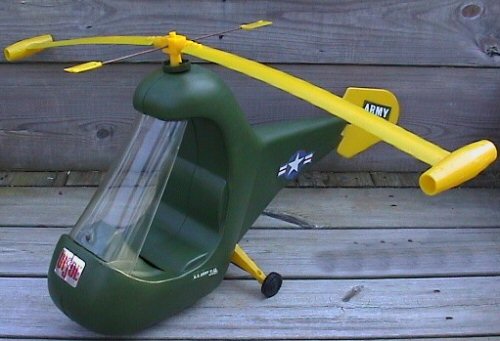
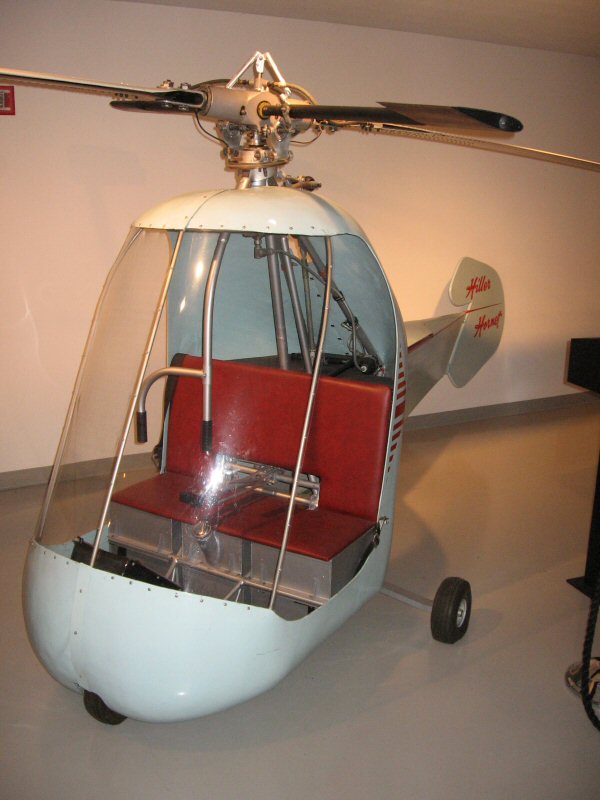
Did you know the GI Joe Irwin Helicopter from the 60s painthead era was based on a real aircraft? The Hiller Hornet was one of a family of simple and light helicopters built by Hiller aircraft in the 50s, with rotors driven not by an engine inside, but by ramjet engines in pods on the rotor tips. So not only is this aircraft the basis of the Irwin helicopter, but also the Adventure Team Turbocopter and, to a lesser extent, the AT Helicopter. Earlier this week, our vacation took us through the bay area where I visited the Hiller Museum, where I took these (and many more) pictures of the Hornet and it's near-kin. Hopefully these will be the basis of some articles I hope to write for the GI Joe Collector's Club newsletter.

Thursday, May 11, 2006

What, me post?

I haven't been posting here a lot lately, in part because I've been busy working on Minions for Hire shoots. Of course, I have some behind-the-scenes shots, but since these shoots are for toons that won't be posted for a while yet (I'm trying to hold myself to posting one a week under normal circumstances, in hopes that I'll build up enough of a backlog so I can pull it off like clockwork) I don't want to spoil the toons by posting the back-stage stuff yet. So look for some Minions DVD-extras here on Monday.

The requirements of Minions are inspiring me to create some stock sets and props that you'll probably see over and over as time goes by. Of course, you've already seen the cell-door I built, but there will be others. A major one I'm working on right now is an industrial-looking cat-walk with an open-grid floor.

The catwalk is something I've been meaning to do for a long time. I'm building it around an extruded and stamped plastic screen designed to keep leaves out of gutters. The stuff comes in three-foot sections, and so I'll build a three foot section of catwalk that can be suspended over a set, or used as a setting itself. The plastic screen will be shored up with strips of flat, rectangular molding attached to the side with screws and nuts, and by the hand-rails uprights, which I plan to make from sections of threaded rod.

I'm hoping the final result will be generic enough to look at home in a super-villain lair, a factory, a refinery, or a rocket gantry. If you've ever watched a James Bond movie, you know there are always Minions in the catwalks, where they have spectacular fist-fights with the heroes, be shot and fall over the railing, or just be blown off by explosions. I think I can get a lot of use out of this little prop. I'll post some construction photos, and hopefully this is something that anyone with access to a hardware store and a few hand-tools will easily be able to replicate.

One important development here is that I've replaced my trusty Canon Powershot A40 with a new Canon Powershot A530. It's smaller lighter, has more shooting modes, better movie function, a 4X optical zoom instead of 3X, and most importantly, 5 megapixels instead of 2. I've been very happy with the Canon Powershot family of digital cameras, and I recommend them highly. They take good pictures, and have a lot of control and versatility for compact cameras. I've been impressed with the quality of the optics, the image sensors, and the all-important software that backs the sensor up. They take good pictures. 'Nuff said.

The old camera still works great, and I'll pass it off to my daughter so she has a decent camera to photograph merchandise for her web-store (she does sewing and costume work). 2 megapixels is more than enough for typical web-ad photos.

Meanwhile, to fill the time until I can post some new stuff, here's a golden oldie in honor of the coming summer, to remind you to always wear your bug-lotion.

Friday, April 21, 2006

Good day for a repaint


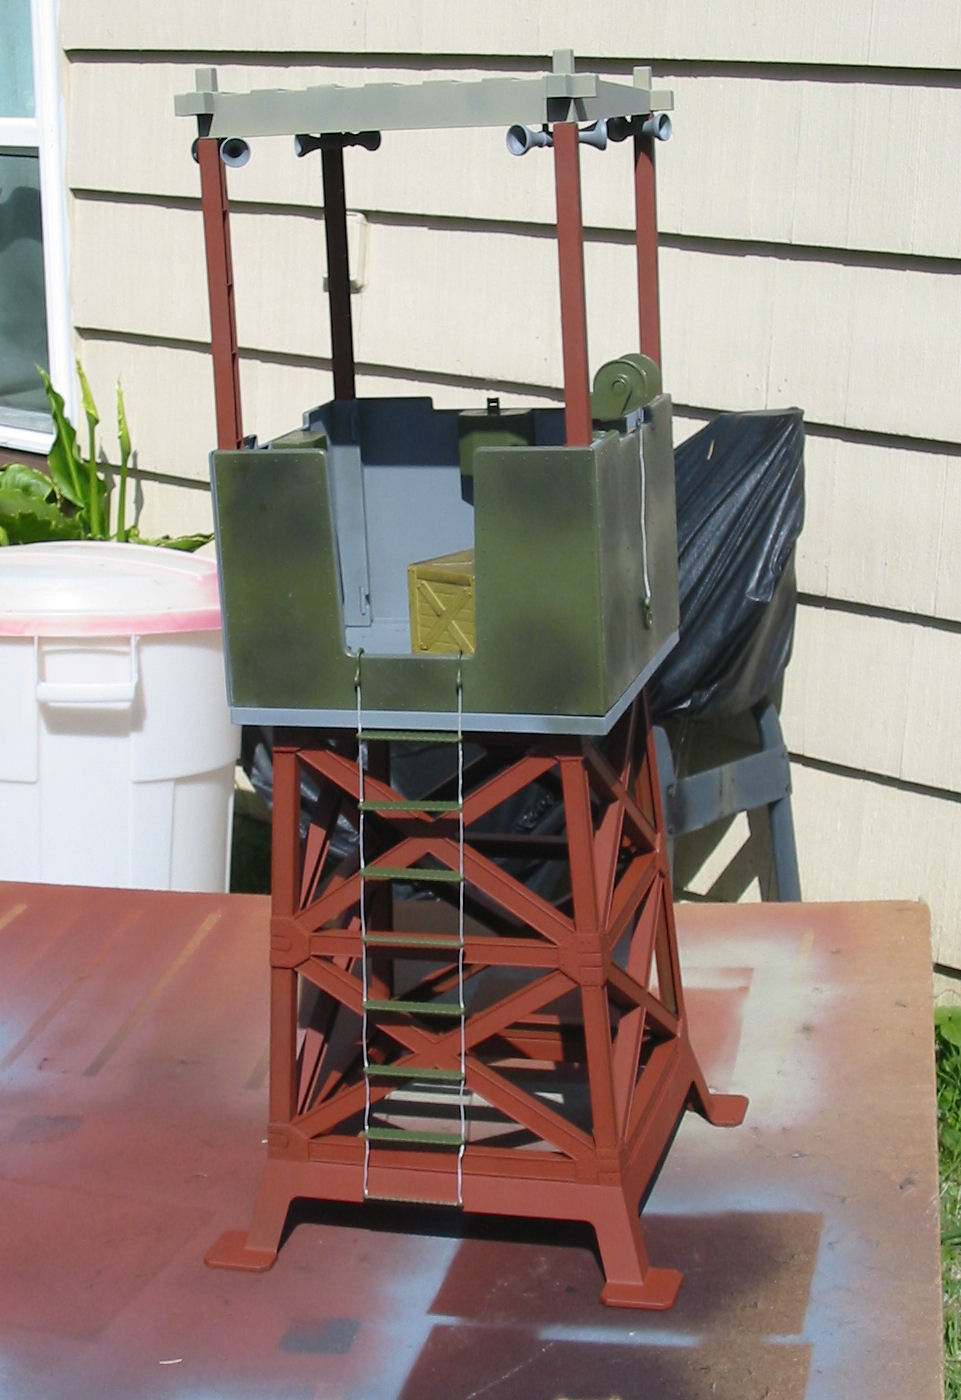
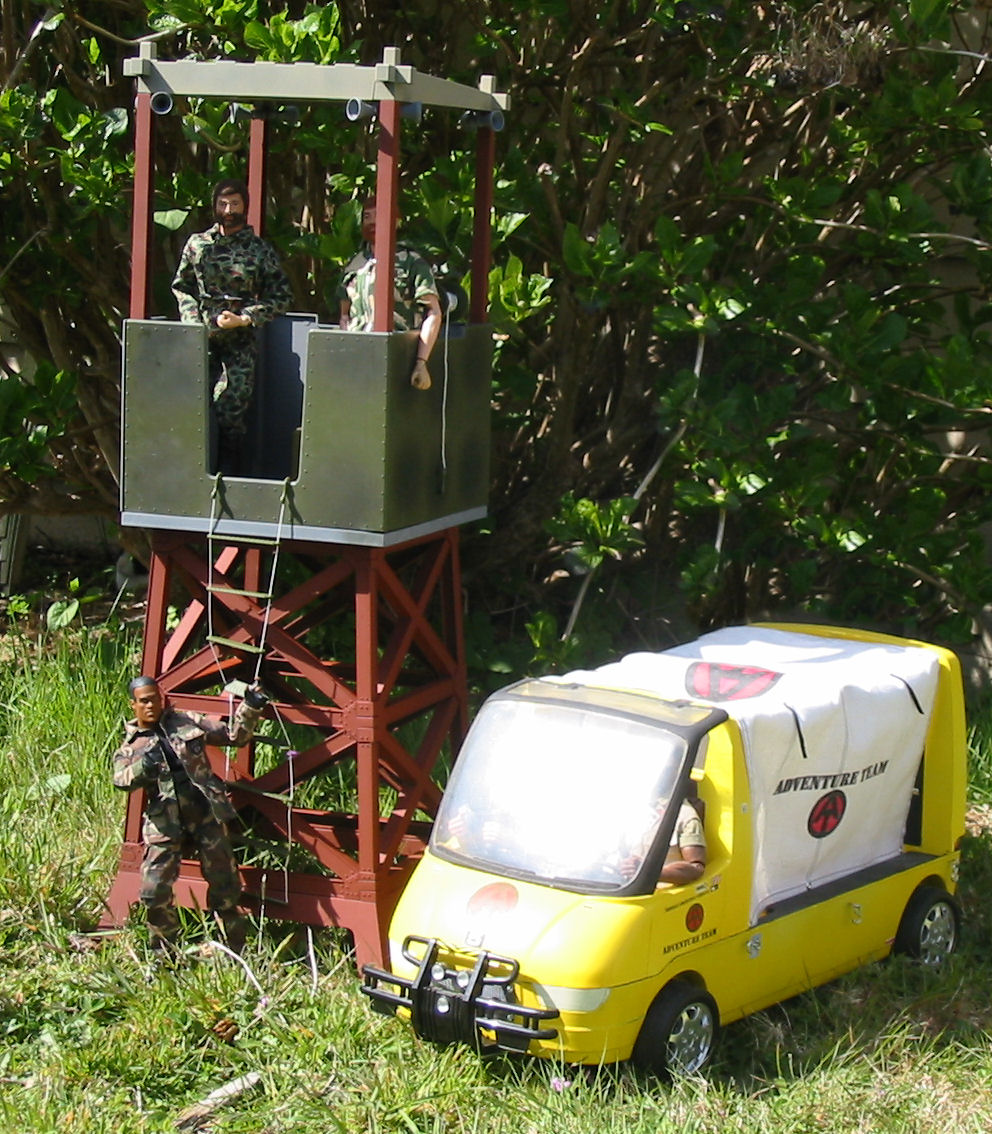
A few weeks ago I was lucky enough to pick up a Power Team guard tower at Goodwill. Much as I liked it, the monochrome dark-green look wasn't working for me. It made it look too plain and toy-like.

Today it was sunny and warm (a rarity around here lately) so I decided to take it out for a quick paint job. Used a combination of red and gray primer along with some dun-colored flat-camo paint. Here's a photo after I put it back together, along with an outdoor shot featuring some AT Joes, old and new.


I'll probably do some more detail painting using a brush, most likely painting the top of the roof-piece weathered silver, to represent corrugated metal.

Friday, March 24, 2006

A V-22 Osprey for Joe?

Today I've decided to talk about the scaling of Joe-sized vehicles. In more contemporary terms, this is a source of great controversy. Many fans of accurate military Joes have complained about vehicles sold as "1/6th scale" which are in fact a good deal smaller. Some of the more notorious are the 21st Century Bradley Fighting Vehicle, the Hasbro M8 armored car, and the 21st Century Little Bird. Most of these vehicles were 1/8th scale or smaller, and that made a lot of people unhappy.

But the fact is, most military (and civilian) vehicles are simply too large to be practical as mass-market items in true 1/6th scale. An F-22 Raptor scales over ten feet long. An M1A1 Abrams tank would be over five feet long and two feet wide. A Chinook cargo helicopter (including rotors) would be sixteen and half feet long! You aren't going to find these on the shelves at Wal-Mart any time soon. So something has to give. Either the vehicles have to be made smaller than scale, or they don't get made at all.

Fact is, shrunken vehicles are part of the great history of our hobby. Yet there's more than one way to shrink a vehicle, as we'll soon see. Other than just anal attention to scale, one of the major complaints about the not-quite 1/6th vehicles I mentioned above is that they didn't work well with figures. Pilots have to be jammed into the front of the Little Bird (which didn't even have room to include the pedals). The M8 really doesn't have room for a driver with legs attached, and troops don't fit well in the Bradley.

Fact is, near as I can tell, these vehicles are more or less scale, just not the scale people wanted. They were reduced, in all dimensions, to fit some arbitrary specification (to fit a box, or to be produced at some price point, or to fit a shelf, or to be shippable).

But that isn't the only way to do things. The other way, the better way I think, is "selective compression." Selective compression reduces dimensions individually with an eye to both the requirements and the intended use. For instance, if the goal is to make a vehicle fit in a box 48" long, the engine compartment might be reduced in size, leaving the cab area unchanged and large enough for a full-scale figure. Of the dimensions of the vehicle might all be reduced, and then the roof-height increased enough so the figure will fit.


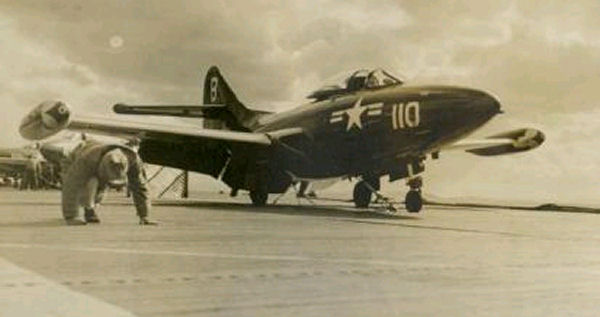
When done well, one can hugely change the dimensions of a vehicle and still capture "look and feel" of the original. One classic example, even if it takes things to extremes, is the vintage Irwin Panther jet airplane seen below, along with the real-life Grumman Panther jet on which is it based.

Mind you, not a single dimension or line of the jet remains unchanged. In fact, a scale Panther jet would have a length and wing-span both over six feet! I don't have the dimensions of the Irwin Jet, but I'd guess it's under a third of that. Yet there is no doubt that one plane is based on the other. Irwin designers boiled the panther down to a form that preserved its essence, but that a child could pick-up and fly around the room. On top of that it would hold (just barely) a 1/6th GI Joe figure.


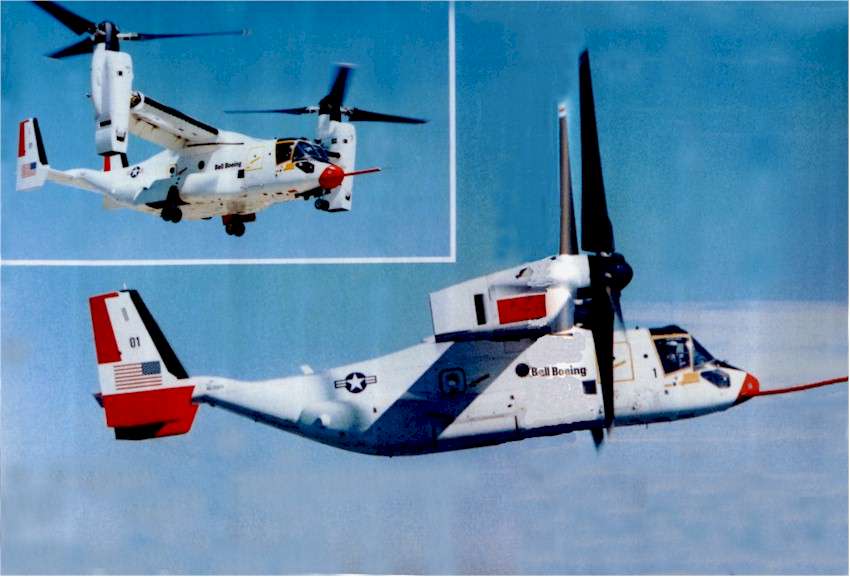
Let's try applying these principles to a modern military vehicle that seems very Joe-worthy, the V-22 Osprey tilt-rotor. The Osprey is a cutting-edge hybrid vehicle combining some of the best features of a helicopter and a fixed-wing cargo airplane. It can fly rapidly and smoothly to a distant target, hover or land vertically to deploy or recover troops, and then fly rapidly back to base. It's an ambitious aircraft that's had it's share of problems, but if the bugs can be worked out its truly revolutionary.

Trouble is, for Joe purposes, it's just way too big. Each rotor alone would be over six-feet in diameter! The fuselage would be nearly six feet long. The span, including rotors, would be almost 14 feet! Young Hercules himself couldn't lift this monster and fly it around the room, even if he had a room big enough.

So, how to make a "kid friendly" version that would fit Joe and still be recognizable ? Well, my first move is to drop the V-22 entirely, and go to its predecessor, the experiment XV-15. Though the two vehicles look a lot alike, the XV-15 is already 20% smaller. Still not nearly small enough, but that 20% is something we don't have to cut.


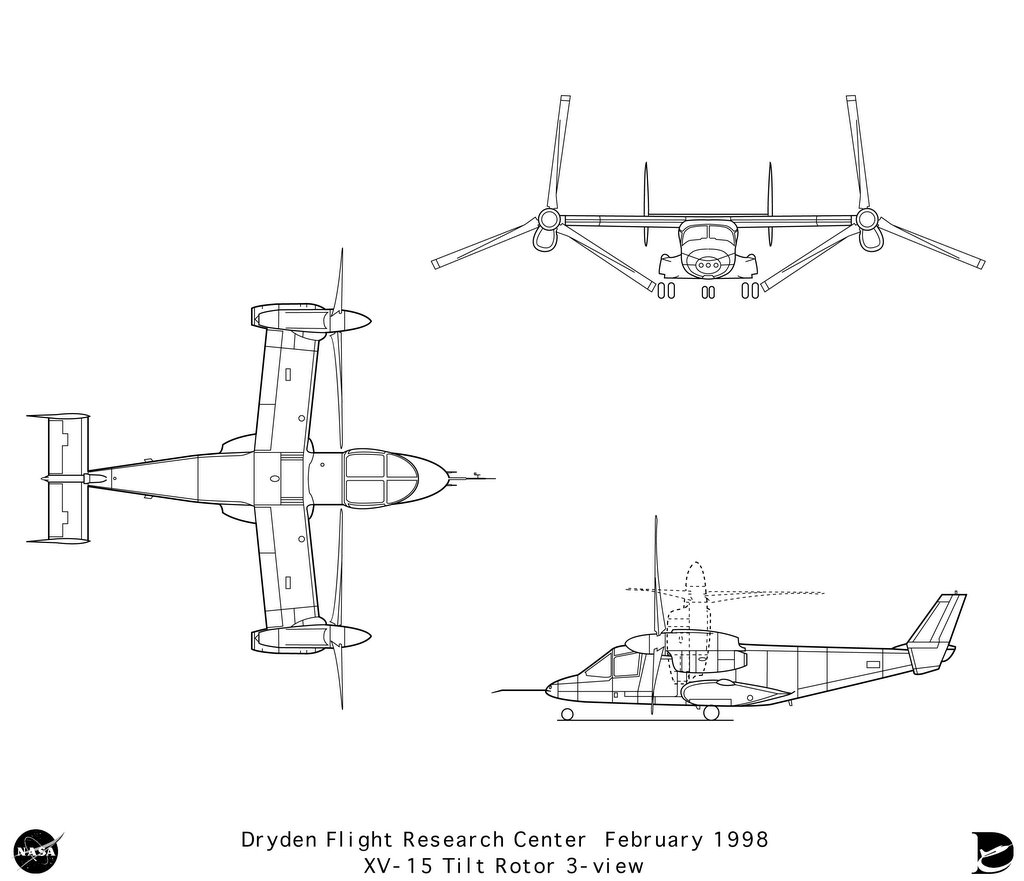
Here's a 3-view drawing of the XV-15, courtesy of NASA. I used this (specifically, the top view) as the basis of my compression. My first move was to load it into my paint program and chop it into individual parts: cockpit, wings, rotors, tail-cone, tail surfaces, rotors.

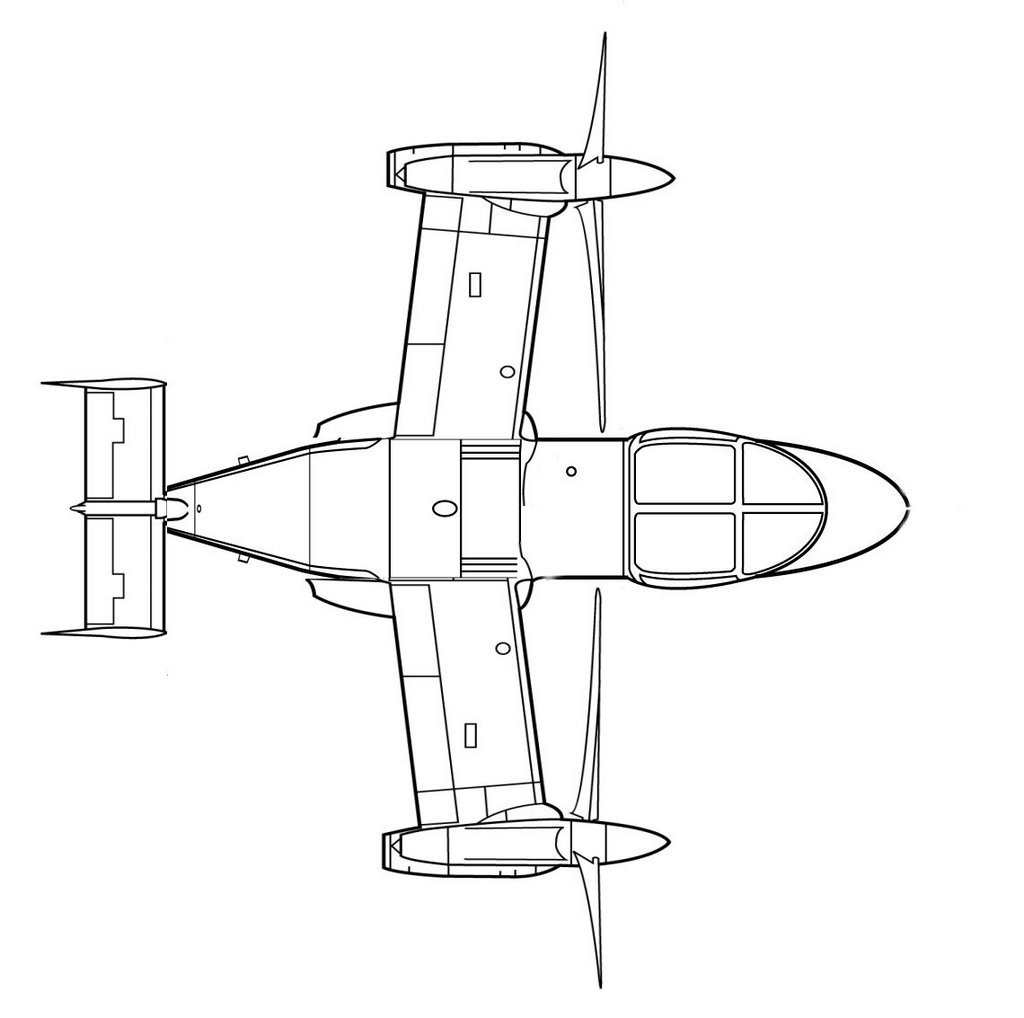
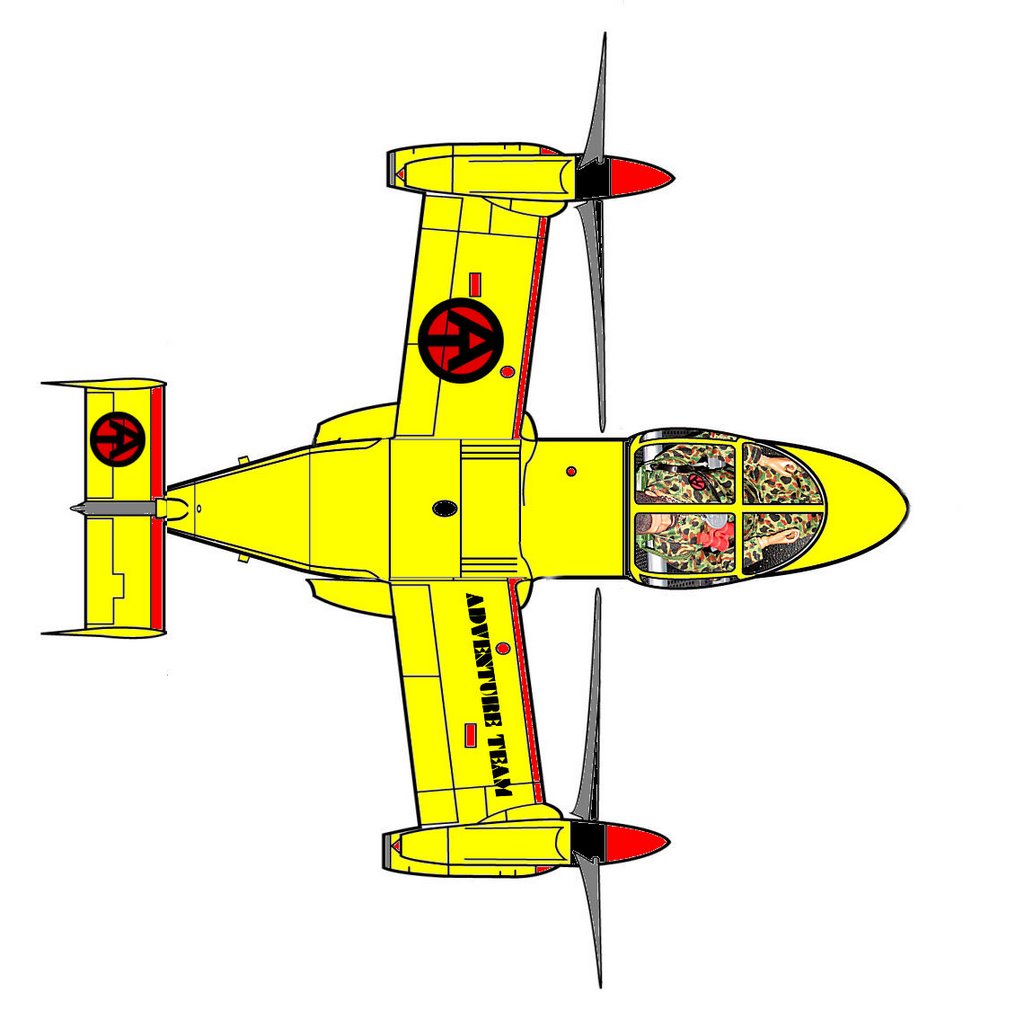
Then I started eliminating anything that wasn't necessary. The straight sections of the fuselage fore and aft of the wing were cut out and discarded. The tail was still too long, so I shortened it a bit, and then shrunk the tail surfaces. The wings were made smaller as well. The engines weren't reduced quite as much, but the rotors were made much smaller. The original V-22 has a large cockpit for two flight crew sitting side by side, but I'm assuming the Joe version will have a single seat in the middle. Suddenly, things overall can be MUCH smaller.


What's left still has the recognizable flavor of the V-22, but it's a fraction of the size, I'm guessing about three-feet long. That's still big by kid-standards, but perhaps not impossibly so. (A Sigma-6 or 3 3/4" version would make a very attractive retail product.) The tail and wings would be removable for storage (or for the retail box).


Of course, by now the question that must be burning in all your brains is, "Steve, what does the Adventure Team version look like? Glad you asked...


What's the point of all this, designing a toy that will never be made for a line that no longer exists? I'm not sure, really, except that it's in the spirit of the toys I loved as a kid. Maybe I can't be ten again, and find this thing under my Christmas tree, but I can at least imagine...

Saturday, March 11, 2006

Real Life AT


From time to time, I plan to post some photos of real-life Adventure Team vehicles.

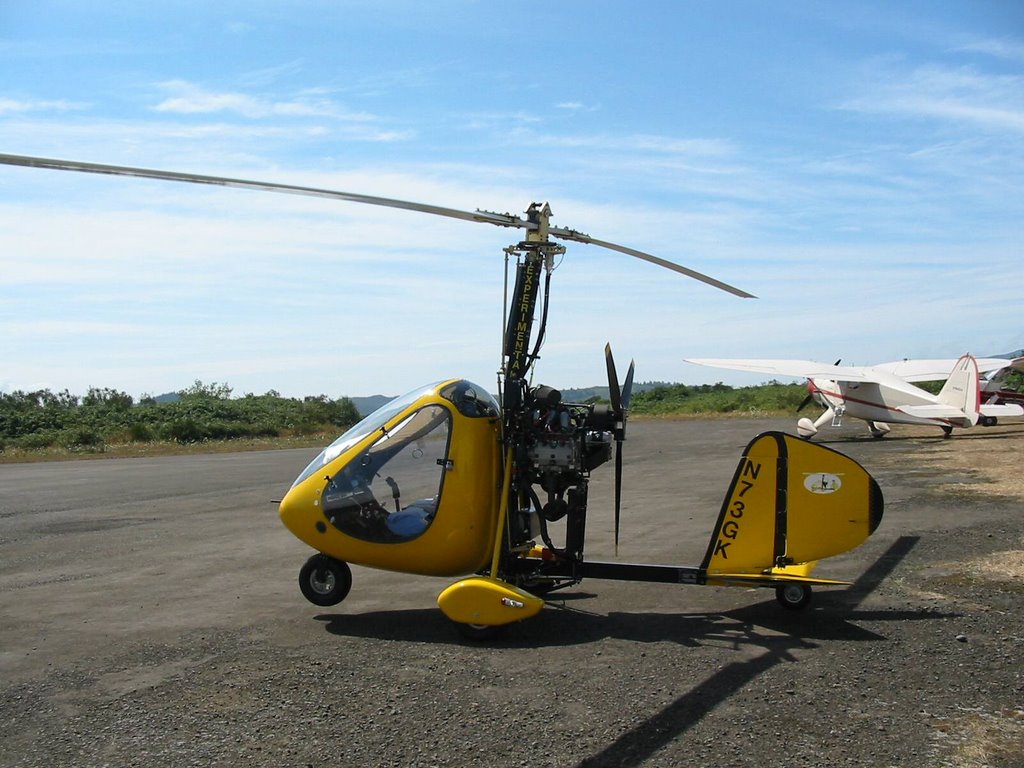
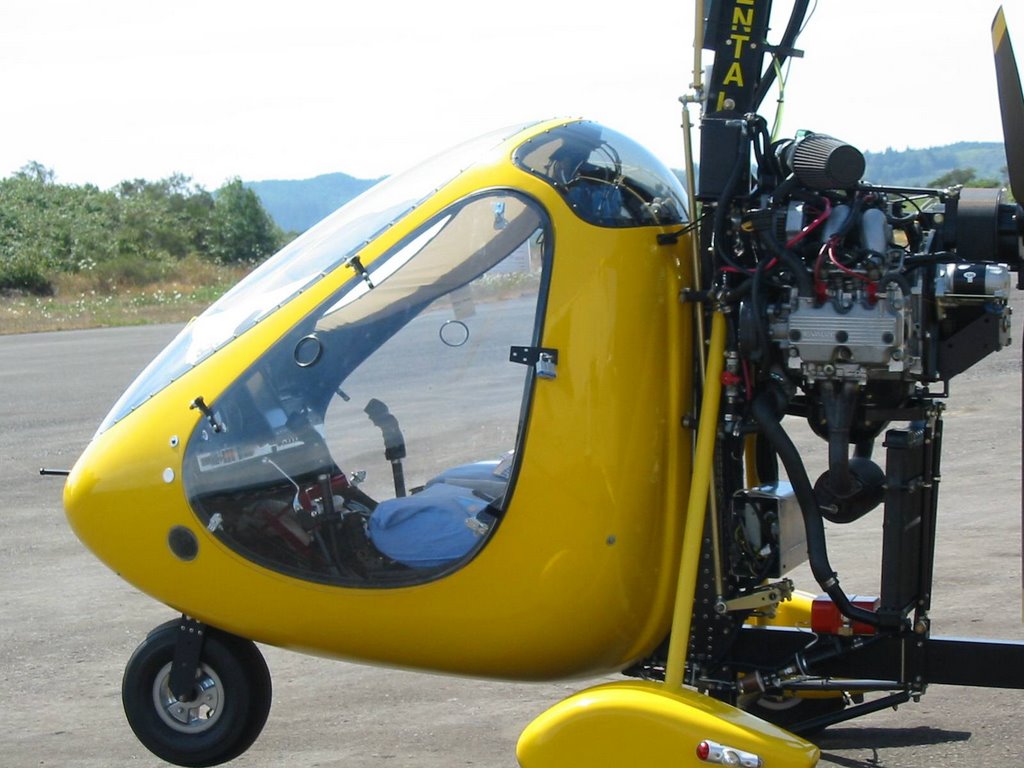
This very nice gyrocopter was photographed by my wife in Tillamook, Oregon a few years back. Not only is it an interesting little aircraft, somebody (consciously or not) has already painted it AT yellow!


For those who don't know, a gyrocopter, or gyroplane as they're sometimes called, is not the same as a helicopter. A helicopter has a powered rotor (or two) that is powered to lift and propel the vehicle. (There are also "compound" helicopters which may add auxiliary propulsion from propellers or jet engines, and sometimes auxiliary lift from small wings, for better high-speed performance, but these are rare, and I don't think any have seen actual service beyond experimental programs.)

A gyrocopter has a normally unpowered rotor. It simply turns in the airflow like a windmill, and in the process generates lift in the same way a conventional wing does as wind flows over it. The propulsion usually comes from a conventional airplane motor with a propeller. To get its rotor turning fast enough for flight, a simple gyrocopter usually will simply turn into the wind and taxi until the rotor is turning fast enough.

Unlike a helicopter, a gyrocopter generally can't take off vertically (though with a good head-wind, some can come close), but they can land with minimal runway, and fly slow. And they can land almost vertically, though it's a rapid decent with no hovering.

That's another rule for gyrocopters that doesn't apply to helicopters. No hovering.

So why would anybody want one? Well, they're very simple and rugged. They cost a tiny fraction of what a helicopter does, are far easier to maintain, and can do some of the same jobs (scouting, observation, aerial photography, access to short, rugged fields) almost as well.

There's one other thing that I've saved until now, just to avoid confusing the issue. Some gyrocopters cheat a bit on the vertical take-off business. They use a power system (either a separate gasoline motor, or a drive shaft connected to the propulsion motor with a clutch) to power the rotor up to flying speed. Then the motor is disengaged, the rotors are quickly turned to "bite" the air, the throttle on the propulsion motor is gunned, and the gyrocopter uses the stored energy in the rotors (which act like a bit flywheel) and "hop" into the air. In some designs, all this stuff is coordinated through the operation of one lever. The pilot waits till the rotors hit proper speed, activates the lever, and then fly for all they're worth.

You may be asking, if there's a system to drive the rotor with a motor, why not keep it connected in the air? The answer is: torque. Real helicopters (single rotor ones, anyway) have a tail rotor that counters torque. Without it, as the helicopter tried to spin its rotor, torque would cause the rotor to try and turn the body of the helicopter, until you're quickly flying a human Cuisinart and crash. As long as the body of the helicopter (or qyrocopter with powered rotor) is sitting firmly on the ground, torque isn't much of an issue, but the instant it leaves the ground torque takes over.

Why not add a tail-rotor to the gyrocopter? Because then it becomes a bad helicopter, and by the time you add all the things it needs to become a good helicopter, it's just as expensive, complex, and hard to maintain as the real thing. In fact, it is the real thing.

One last reason that the Adventure Team should have a gyrocopter is that it has a solid place in the Adventure culture that spawned it. Gyrocopters were all over TV in the 60s. Jacques Cousteau used one on occasion in filming his TV specials, and his son Phillipe was badly injured when one crashed on Easter Island. James Bond use a rocket firing gyrocopter in You Only Live Twice. And of course, there's a late comer in the form of Mad Max's "Gyro-Pilot."

So, Joe never had his gyrocopter, but it seems reasonable that he should have. Why not? Perhaps the AT was so well financed he never had to cut corners. Perhaps AT logistics were so good that maintaining and supporting actual helicopters in isolated jungles and deserts was never a problem. So look on this little craft as a missed opportunity for the AT.

Saturday, March 04, 2006

Moving past Angry Joe Day

Well, Angry Joe Day 2006 was a great success. Thanks to everyone who participated, either by entering the contest, donating prizes, or just in spirit. The plan for now is, if Joe isn't back on retail shelves by March 1, 2007 (and right now, there are no prospects that he will be), then we'll do this again next year.

Remember, this isn't just me, this is all of you. Feel free to take Angry Joe Day and make it your own. Find your own ways to celebrate. Start your own contests, whatever. All I ask is that you keep it in the spirit of fun in which it is intended. We don't want to piss Hasbro off, we just want to remind them that there are people out here who still care, maybe make them smile, and hopefully one day have somebody in charge say, "what the heck, let's give it another try!"

I also wanted to take a moment to talk about "Tanker" Dave and his great 1/6th vehicle contest. If you haven't gone over to his site to check out the winners, you should. Dave asked me to help with the judging, and let me say that it was hard. The quality of all the entries was very good, and the top finishers were just amazing. Congrats to them all, and a big thanks to Dave for sponsoring the contest.

Well, the good thing about the AJD photo contest is that it saved me from a month of posting much of anything of my own. The bad thing is that it's been forever since I posted anything of my own. Time to change that. Several new items have arrived here lately.

Most significantly, I found some thrift-store trains for my friend Eric, who buys, sells, and restores toy and model trains. When I called him, Eric reported that he'd seen some Joes from an estate being unpacked at a place he knew, and that he was going back that day. He was a little vague about what they might be (he really doesn't know GI Joes), only that they were 12," old, and some had fuzz. He set off to the store to see what he could do.


I live 60 miles across a mountain range from Eric, so I couldn't just bop over there to see what he'd found, and in fact, I wasn't able to pick them up for about a week. What I found was a grocery bag with five, nude, fuzzhead Joes in various states of disrepair. Several had pretty good fuzz, one had intact kung-fu grip hands, and among them was a decent looking talking astronaut with a semi-working talk-box. There was also a bag with an assortment of uniform items (some AT, some home-made, some undetermined) a few accessories (the silver astronaut boots, a mystery tape-recorder), and a bag full of incomplete (but mostly dressed) Megos. I don't recall exactly what I ended up getting these all for after we were all done, but I think it was about $25!

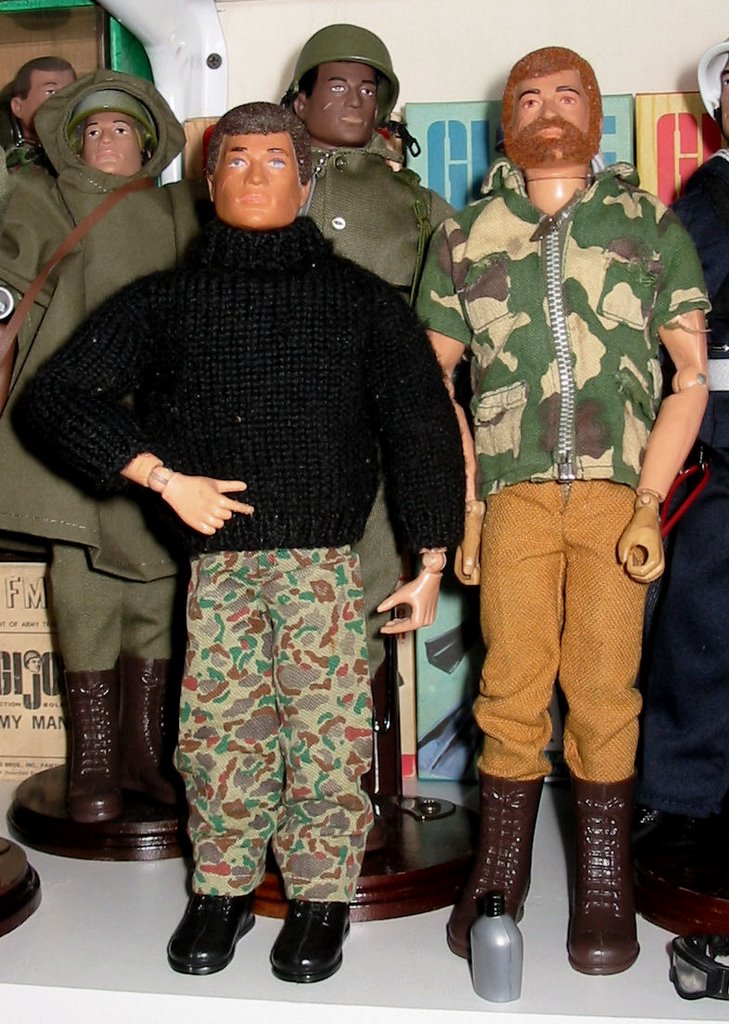
You see two of the guys in the picture. The sweater and shirt are GI Joe from the bag. The pants are from the bag and may be from the same Jungle Survival set as the shirt, but they have a zipper, not a snap. I'm speculating that mom put the zipper in, since some of the other uniform items included were (nicely) home-made. The faded camo pants are childhood vintage from my spares-box. The boots are all modern.


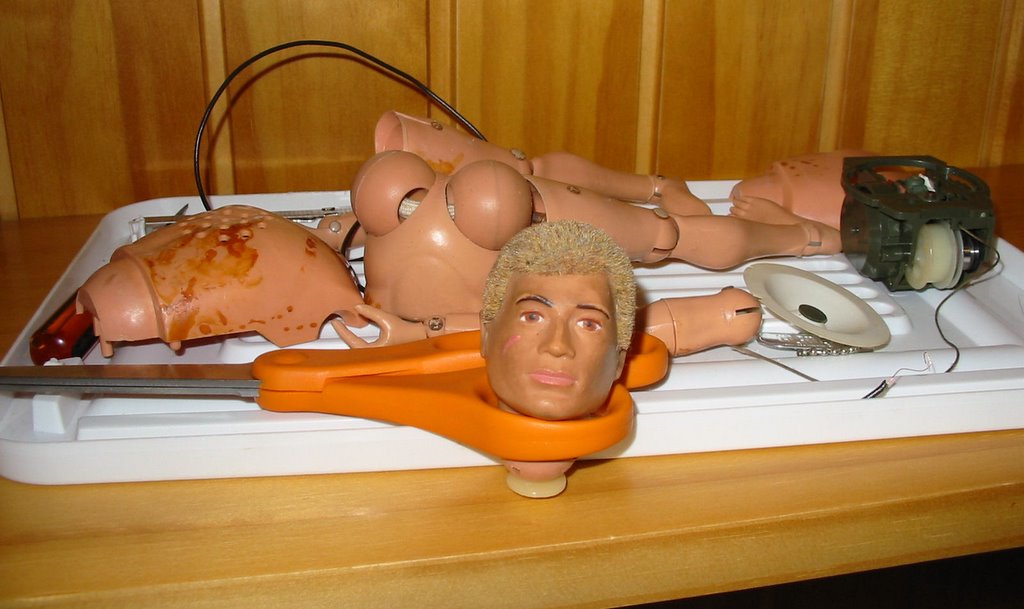
This is may Talking Astronaut, pulled apart for cleaning and repair of the talker. I still haven't figured out how to remove those nasty stains on the body, but they shouldn't show when he's dressed (I need a white jumpsuit though). I seem to be making progress on repairing the talking mechanism using instructions I found here. I'm really looking forward to getting him fixed and back-together.

I am a total novice, by the way, at the business of cleaning and repairing old Joes, so any tips and advice would be appreciated.


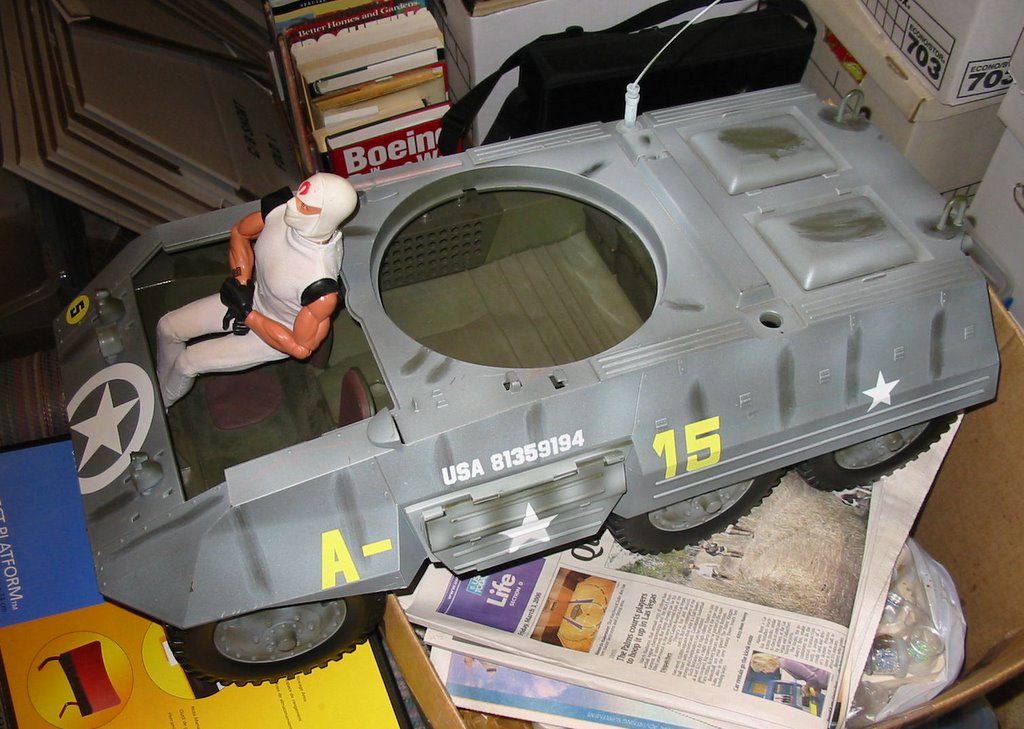
Finally, while I was in "the big city" to pick up my new-old Joes, I hit a few Goodwill stores in search of 1/6th stuff. The first store (one where I almost find something) came up empty. The second turned up only a Storm-Shadow from the two-pack minus missing everything except his uniform. I was standing in line at the checkout when I happened to look up near the front of the store, where some baby strollers and similar items were displayed, and was amazed to see a Hasbro M8 Scout-car!

I jumped out of line and trotted over. It was missing the turret and cover for the crew compartment, but that was okay. It saved me from any temptation to keep it stock, and not convert it into an AT vehicle. Question was, how much? My wife was waiting in the car (working on her ALIAS novel on her laptop like a good writer with a deadline) and I'd already spent Joe money that day, so I didn't want to press my luck.

I rolled it around, looking for a price tag. Finally found it under the nose. $3.99! Score! Well, she might justifiably use the "where will you put it?" complaint, but price would not be an issue.


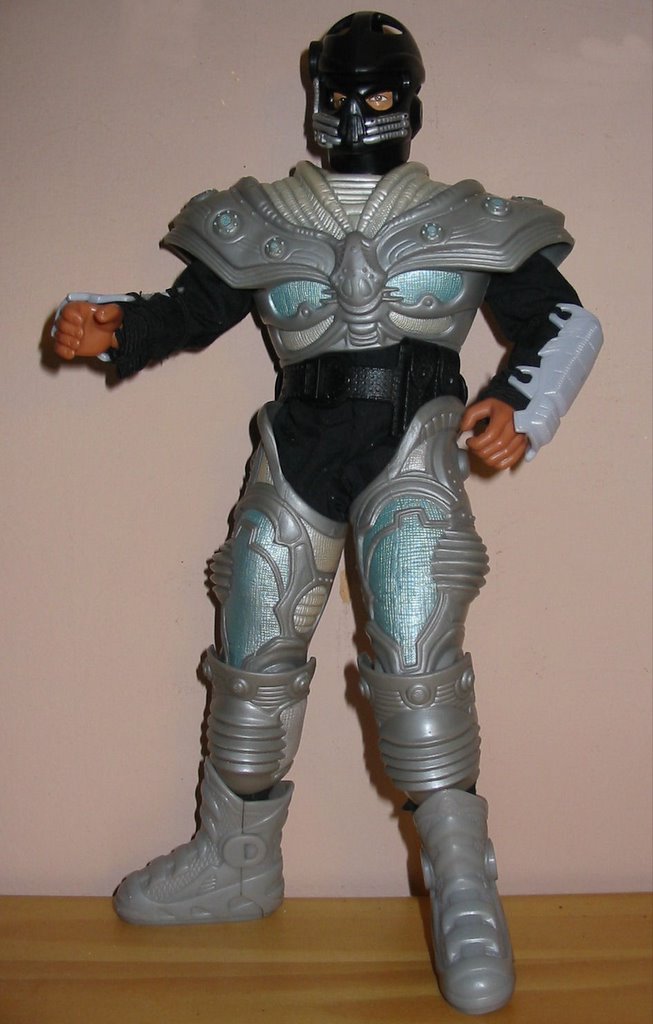
Oh, and let me leave you with one last bit of kitbashing. I was doing some reorganization today, and spotted this guy in a box looking 85% as you see him here. I barely remember throwing him together a few months back. He was just a bunch of stuff thrown together with no real plan. The major armor pieces are from a Hasbro 12" "Batman Forever, Mr Freeze" figure, the same one who provided the head for my infamouse "Der Governator" figure. The base figure is a Max Steel Ultra Action body with a HOF Storm Shadow (I think) head in a black jumpsuit of unknown origin. Tonight, I swapped the black combat boots he'd original been wearing for some sci-fi looking Max Steel boots, added the arm armor, and fiddled with his headgear (he's actually wearing an Action Man helmet over a Spy Troops hard mask over Storm Shadow's molded mask.

No, I can't tell you who or what he's supposed to be, but he looks kind of cool.

Monday, February 27, 2006

Angry Joe Day Entry - C. Martin


Here's the back story on this one, from C. himself:

Steve,

Here's my Angry Joe Day entry. Well, when I say my, that's debatable.

See, I looked over my collection and had all these great ideas, but I was sick last night and didn't have the time or inclination to do any of them; Joe as a doorstop, Joe as a pencil holder, Joe as a toilet brush (flocked of course), Joe as a fill in for Buster with my custom Mythbusters figures...

So anyway, I was checking out Huxter's Adventure team page and saw the Aging Adventurer photo... and this idea just hit me. So, the Joe photo is not really mine, nor is the background, but I did photoshop it and come up with all the clever bits.

Enjoy!


C.


Given that the central image had been borrowed from Sean's site, I ran this past him before posting. He graciously gave it the thumbs-up, so here it is!

Wednesday, February 22, 2006

Happy Joe Day!


I'm way behind here. We spent the long weekend in Pasco, Washington for the Radcon gaming/science-fiction convention. This was our first time attending this convention, and we had a great time. I've little doubt we'll be returning next year. I hauled along some cold-weather Joes and a Yeti, hoping for a photo op, but although the temperatures hovered in the mid-20s, it was dry and clear. Can't say that I'm complaining about that. That's a long way to be driving in the snow.

When I got back though, I had a case of con-crud. I'm not used to the dry desert air, or the pollen over there (I have bad hay-fever), and hotel air is just never good for you. So I've had a bit of a cough and runny nose since we got back.

All of which has led me to neglect the blog a bit. I've got several Angry Joe Day entries stacked up here to post. I'll try to get to that tonight.

But getting to the "Happy Joe Day" title for this post, the best news since the cancellation of the 12" Joe line just hit. Take a look at this year's membership figure for the GI Joe Collector's club, the "Foreign Adventurer" and the wonderful accessory set that you can purchase to go with him. Here's the link.

So this means that if you join (or renew) by the deadline, you're going to get a flocked vintage-type figure with a unique headsculpt (previously used for the "Battle of Kursk" convention set), an AT tank-tee, and shorts. But for a mere $25 there will be a nifty accessory kit to turn this into a fully-outfitted figure. It consists of brown boots, a black AT Jumpsuit (not a two-piece black uniform like the Black Spider set, though they look superficially similar), shoulder-holster and pistol, AT dog-tag, brown boots, and (most exciting to me) a black AT bomber jacket with AT logos on the front breast-pocket position and on the back!

I just can't say how great this is. The only way it could have been better would have been the addition of KFG hands. Apparently there was some production problem that made this impossible, but we've been assured that KFG hands will be available on Club offerings sometime in the future, so that's something to look forward to.

Not only does this look like a great set on it's own, but it's loaded with kitbash potential. You could get THREE AT figures out of this, by putting the tee, jumpsuit, and jacket on three different figures.

Anyway, it's just great that we have something positive to celebrate Angry Joe Day with. This is what you guys get for keeping the spirit of Joe alive. A big Angry Joe Day victory growl goes out to the GI Joe Collector's Club.

Friday, February 10, 2006

Angry Joe Day entries, Omar S

Five entries from Omar. His descriptions:

Pic 1- G.I.Joe, Land Adventurer

Pic 2- Joe's office, empty since he's been cancelled.
:(

Pic 3- joe's newest recruits

Pic 4- 12" RAH Breaker, the way he should've been done

Pic 5- My take on how G.I.Joe should come back.


Tuesday, February 07, 2006

Angry Joe Day Entry - David Eden


The first of several entries from David Eden. Here's what he has to say about this one:

"Me Intruder and me very angry that Has-been cancelled Joes. Who me gonna wump now? Squidgy little Joes not worth it!"

Monday, February 06, 2006

Angry Joe Day Entry: Daniel Edwards

Here's the first entry in our "Angry Joe Day" photo contest. Says Daniel about the picture:

"I call it "Feedin' Time!" The AT Joes are disposing of the Sigma Six figure while at the same time checking out all of the cool equipment."

Thanks, Daniel, for getting our contest off to a great start.

Thursday, January 26, 2006

Countdown to Adventure


After considerable delay while I mixed in other things, here is the final (probably) segment on the Adventure Team Near Space Vehicle, a model rocket designed to launch a 3 3/4" GI Joe (or compatible) Astronaut in Adventure Team style. Today's installment covers launch-pad, flight, and recovery pictures.

First, one more shot of "Captain Lanard" as we prepare the night before the launch. What a go getter! Already suited up and ready to go! Note the tiny Adventure Team astronaut patches on his chest and shoulder.

The launch was held on a grass farm outside Sheridan, Oregon, about 35 miles from where I live on the coast. The launch is focused on high-power rockets, which the NSV is decidedly not, so the size of the launch area is vast, and the distances between the safety ropes and the launch pads is considerably longer than is absolutely necessary for such a rocket. Keep that in mind when you see my launch photos. My zoom only goes so far, and I was a long way from this little foot-tall rocket. Good thing it's bright yellow!

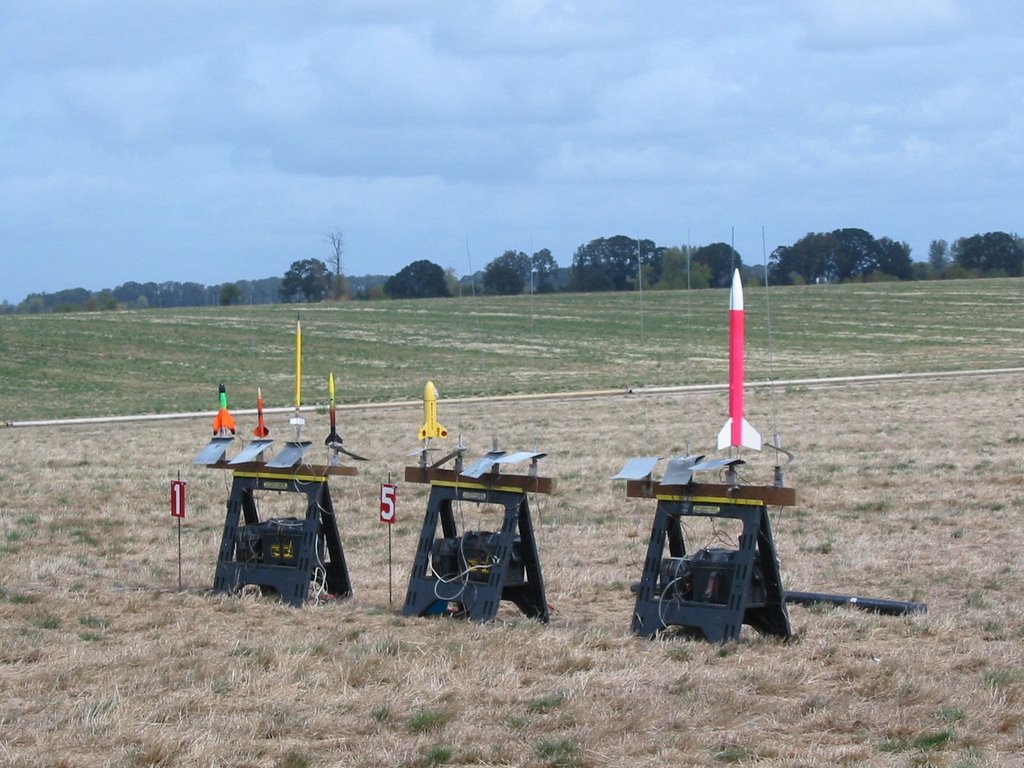
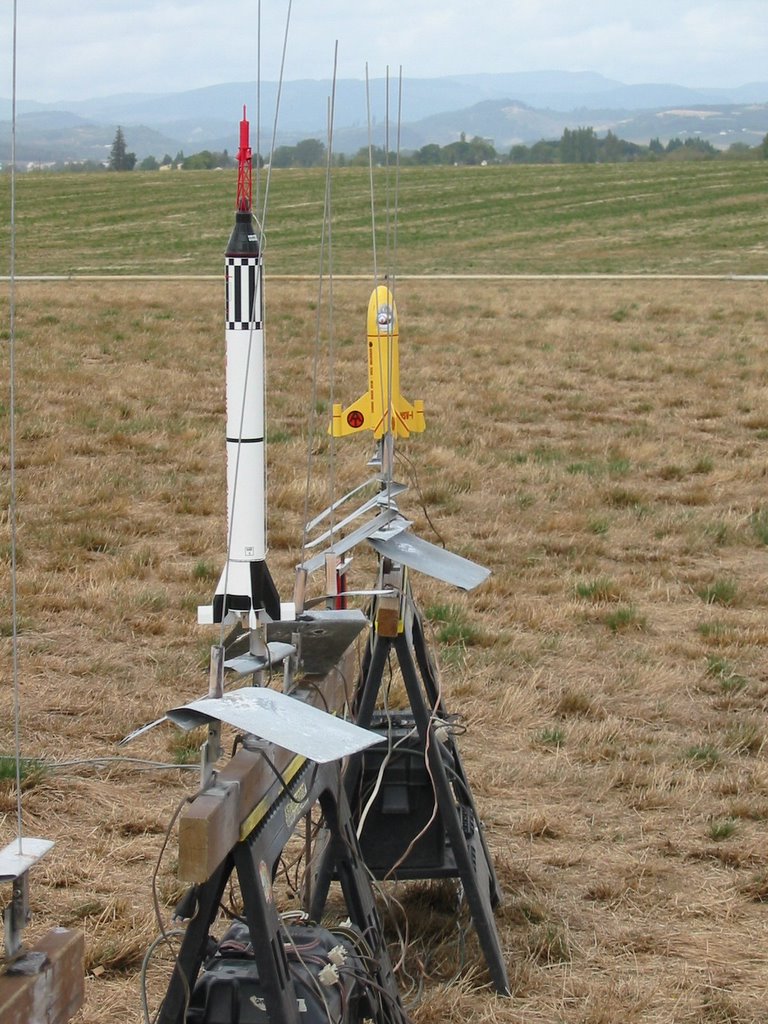
This first shot is taken at the launch pad, as the rockets are being placed and hooked up for ignition. For those not familiar with model rockets, the metal rods guide the rocket until it is going fast enough for its fins to keep it going straight. Rockets are remotely fired using an electric igniter placed in the engine nozzle. The boxes underneath the launch pads are automotive batteries, which power the whole thing. The metal plates under each pads are blast deflectors, used to direct hot rocket exhaust away from the launcher itself, and to direct it away from the ground. (Given that it's a grass farm and often dry, grass fires are a real concern).

No, that's not me in the picture. The man and his daughter are hooking up an Estes kit rocket on the pad next to mine.
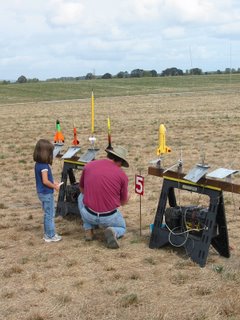

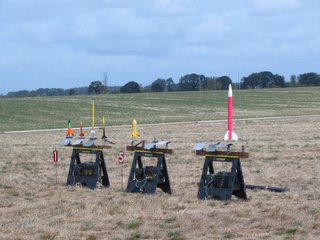
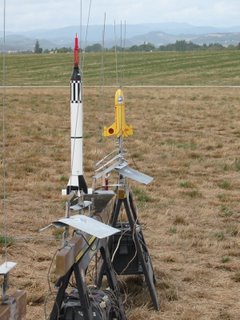
Here we see the fully loaded rack, waiting to fly. As you can see, the NSV isn't very big as model rockets go. In fact, the large white and pink (nothing Freudian here!) rocket is still what is considered "mid-power." "High power" rockets fly from a separate series of pads much further from the crowd line. They're out of sight to the right of the frame.

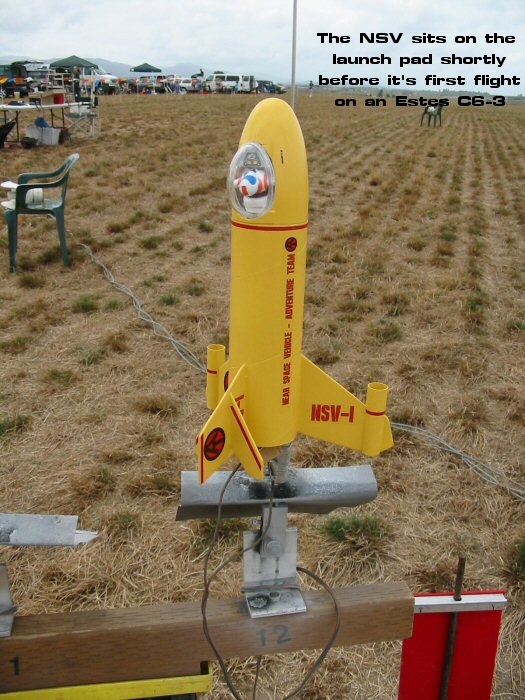
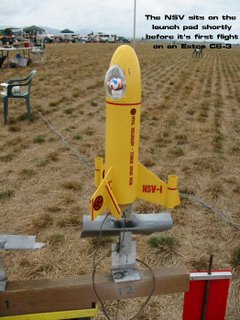
The first flight of the NSV was made using an Estes "C6-3" rocket motor. For a little motor, that's pretty big, a maximum of 3 pounds of thrust, and a burn time of 1.7 seconds. The "3" is the number of seconds in the coasting delay, which allows the rocket to reach maximum altitude before the parachute is deployed.

The C6-3 has an 18mm case diameter. The motor mount on the NSV was modified to use 24mm diameter motors, and therefore I had to use an adapter to use the smaller diameter engine.

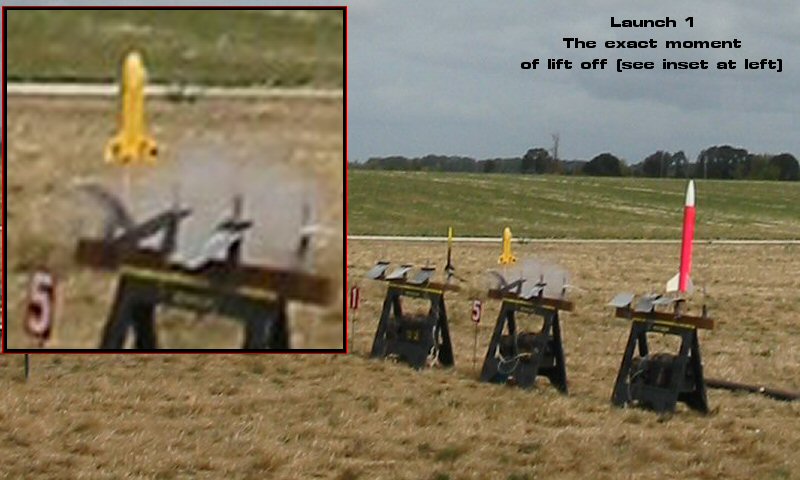
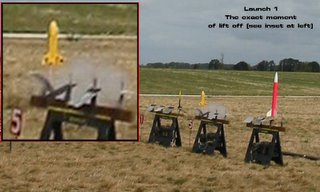
Here's the actual lift-off. As I said, I was a long way away from the pad, and I've pulled out a detail and magnified it so you can see what is happening.

The small, light-colored line pointing straight down from the rocket is actually flame from the motor exhaust. It doesn't look like much, but concentrated on one point, it's very intense. I've seen rockets hang up on the launch rod, and burn a hole in the sheet-steel blast deflector.

Model rocketry has an amazing safety record (you're probably in far more danger going to a Little League game, much less actually playing in one), but the potential for injury and property damage is always there. Organized launches like this follow strict safety rules.

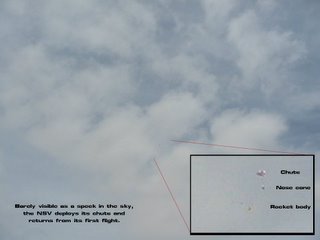
From this point, the rocket was moving too fast and high to follow with the camera. The flight was straight and near perfect. It actually got a lot more altitude out of the C6-3 than I had expected.

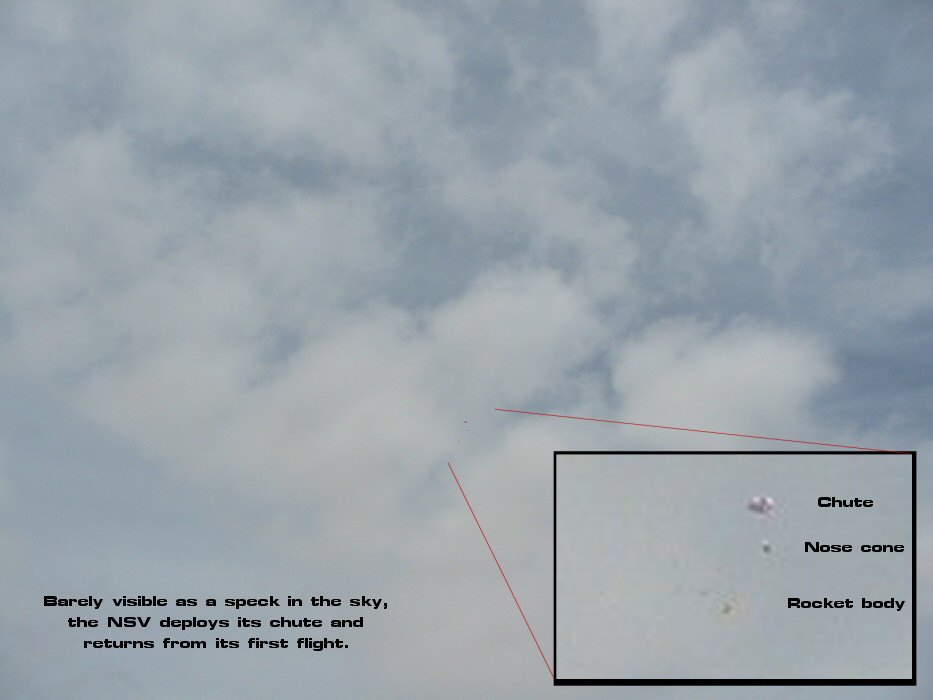
I did manage to pick it up with the camera after the recovery system had been deployed, though it wasn't much more than a speck in the sky. Again, there's an inset so you can actually see the rocket.

The nose cone separates from the rocket, and remains connected through a long, elastic, shock cord. A plastic parachute is connected to the nose cone, and (hopefully) slows the rocket for a soft landing.

To be honest, at this point, I had half expected that the cockpit had been ripped open and that Captain Lanard would be lost in the grass somewhere, never to be seen again. Fortunately, I'd built the cockpit well. The canopy remained in place, and Captain Lanard lives to fly another day.
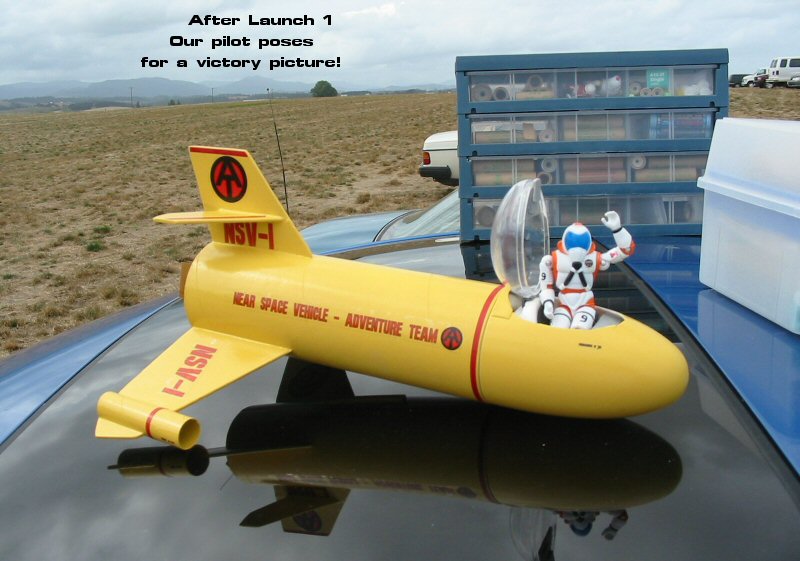
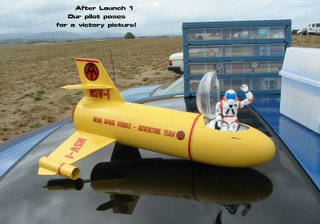
Here we see a posed, post-flight, victory wave. The parachute has already been packed back inside, and we've opened the cockpit so that Captain Lanard can take his bow.

Really, for me, this was an important part of the process. This wasn't some fake pilot head glued into a fake cockpit, as you sometimes see on model airplanes. This was a true action figure, able to be removed from his cockpit, played with and posed.

Encouraged by the success, I decided to pull out the 18mm motor adapter and fly on a more powerful 24mm motor. I chose an Estes D12-5. At a maximum of 6.4 pounds of thrust, this was a big step up from the "C" motor, and that changes a lot of things.

As I tried to explain to people over in the Sandbox recently, as they discussed the idea of building a working rocket pack for a 12" GI Joe, getting any rocket powered object to fly straight is -- well -- rocket science. Actually, for things that actually look like rockets, the rocket science doesn't have to be that hard. The general rules of thumb:

1. The longer (and to some extent, thinner) a rocket is, the more stable it is.
2. Weight in the front of the rocket (moving the center-of-gravity forward) makes a rocket more stable. Weight in the back of the rocket (moving the center-of-gravity backwards) makes a rocket less stable.
3. Fins behind the center-of-gravity make a rocket more stable. Fins in front of the center-of-gravity make it less stable. (Military guided missiles often have fins in the front because they use active, rather than passive stability systems like model rockets, and because instability makes it easy to turn on a dime when you need to, not a desirable characteristic for a model rocket).

The NSV has rule 1 working against it. It isn't long and thin, it's short and thick. Rule 2 is fairly good though, as the astronaut ads some weight to the front. Unfortunately, nose weight works better on long rockets, where it's way out in front and has lots of leverage. Not possible with the NSV. Rule 3 can be a problem too. It's easy to let the center of gravity slip so far back that part of the rear fins is actually on the wrong side of the CG.

So, why are we talking about this when the NSV flew perfectly on it's first flight? Well, as I said, that big motor changes things. For one thing, it's much heavier. It shifts the center of gravity backwards, and on a short rocket, a little shift can make a big difference.

Now on a simple rocket like the others you see in most of these shots, a rocket is pretty much either stable, or it isn't. But the NSV isn't a simple rocket. It's asymmetrical, what with the cockpit bubble, the fin-tip pods, the horizontal tail, the aerodynamics are suddenly dozens, maybe thousands of times more complicated. It's possible to have a rocket that's stable along one axis of rotation, and not along another. It's possible for stability to change under under other circumstances too, such as depending on the "angle-of-attack" at which it hits the oncoming air. Now we're getting into serious rocket science.

Mind you, the NSV did get tested before flight. I slung it around on a string. Seriously, that's an accepted test. You put a loop of string around the rocket, sling it in a circle around your head, and if it flies nose forward, it's theoretically stable. Along that one axis of rotation anyway. On a rocket like this, you rotate the rocket to multiple positions and retest each time. The test seemed to show was stable, even with the D motor. So off to the launch pad it went...

Now, here's some irony for you. The NSV project was inspired by the "Mercury Joe" program, an ongoing effort to launch high-power rockets with 12" GI Joe space capsules and astronauts on top. The launch vehicles are made to look like Redstone boosters, and the capsules are equipped with escape towers and multiple on-board video cameras. Wonderful stuff. If you haven't already, go visit the Vidroc site and watch their Mercury Joe videos. The Gumby rocket videos are also entertaining.

So anyway, it was interesting that I ended up on the pad next to a very nice scale model of a Mercury Redstone rocket.
Here's a closer short of the NSV on the pad. You can see the astronaut and cockpit in launch position. One of my concerns in designing the rocket was that the acceleration is actually pushing the astronaut back into the canopy, and that this might pop it off from inside. I actually considered giving the astronaut his own, small, emergency chute in case he accidently "ejected," but I didn't have time. Fortunately, it was never an issue.

But here we have yet more stability issues. Joe's off-center position throws the CG of the rocket off to one side, and as the rocket moves, he has enough room to shift around the cockpit, shifting the center of gravity on the fly. Now we need one of NASA's super-computers to know quite what is going on. Some things, you just have to try.

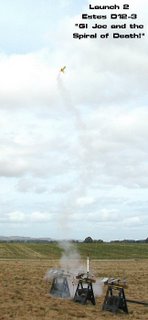
So here's what happened. Fortunately, the NSV wasn't completely unstable. If it had have been it could have looped and become a "cruise missile" headed for spectators, launch officials, or other rockets. Dangerous and embarrassing.

But it wasn't entirely stable either. Like I said, I think it had one "lobe" of insufficient stability. This cause the rocket to cork-screw its way into the air, wasting most of the increased thrust. In fact, I'd guess this D motor flight only went about 2/3s as high as the C motor flight, despite the increased thrust.

Fortunately, all ended well. As the motor burned, it became lighter. The rocket straightened out, and flew high enough to safely deploy its parachute and come to a safe landing (well, I think maybe we broke a fin, but it was an easy fix).

So, that was the end of that series of flights. The NSV returned the next year, repaired and improved, with a new Adventure Team astronaut (see previous posts) at the controls. Unfortunately, I was too busy flying to take many pictures that time, but the AT astronaut racked up several successful flights (though minor fin damage on landing continued to be a problem).

The NSV is in sad shape at the moment. It suffered some accidental damage here in my office, and needs major fin repairs. I'll do that eventually, but I'm thinking about retiring the rocket to static display. It's the fate of all rockets, it seems, that if you fly them long enough, either you lose them, or something eventually goes wrong. I'd like the NSV to survive long enough to serve as a reminder of its own glory days.

Now, that doesn't mean that we won't eventually build another Joe rocket...

Sunday, January 15, 2006

Rocket pilots

Before we move on to the launch and flight photos of the Adventure Team Near Space Vehicle (NSV-1), let's get a closer look at the pilots.
As I said in my previous post, I gave the hazardous assignment of test pilot, not to a Joe, but to a Lanard Star Corps figure. "Captain Lanard" was actually an experienced astronaut by the time he climbed into the cockpit of the NSV. He'd already taken several high-altitude flights on my "D-Ranger," a modified (stretched with a payload bay, pointed nose-cone, and 24mm engine mount) Estes Ranger.

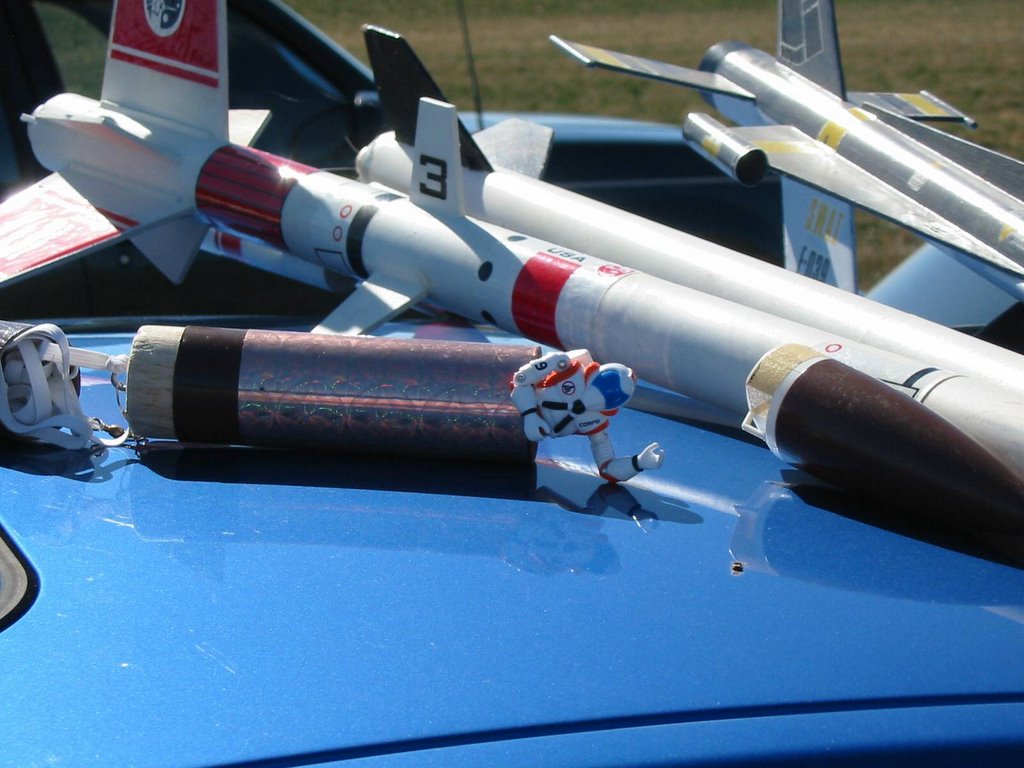
The rockets in the background, for those who are curious, are an Estes Super-Vega, an Estes D-Region Tomahawk (modified from a single 24mm motor mount, to 3 18mm motors), and an Estes S.W.A.T. As you can see, I have a strong preference for "futuristic" models.


This photo was taken at the launch site outside Sheridan, Oregon just after one of the flights. Captain Lanard can be seen climbing from the payload section of the D-Ranger, giving his "all okay" wave.


After these flights, I felt that Captain Lanard deserved to become an honorary member of the Adventure team, and I made him a small version of this AT astronaut patch. It is inspired by the vintage astronaut patch, and incorporates the astronaut flight wings. The symbol was printed on paper, carefully cut out, and affixed to the figure with a drop of super-glue.

But despite Captain Lanard's excellent service, I really wanted to fly with a "real" Joe, and my chance came with the release of the Comic 3-figure pack that included an astronaut (Flash), as well as Short Fuze and Rock N Roll. I initially planned to fly Flash stock, but he seemed a little plain and boring to me, so I had to modify him.


Since he was supposed to be an Adventure Team Astronaut, I figured a beard would be appropriate, and since Rock N Roll had a beard, out came the screwdriver for a quick head-transplant. The Rock N Roll hair is a little long, even for the AT, but I think he looks pretty good. I also used a Sharpie pen to darken in the "padding" around his helmet opening, and added an AT symbol to his chest. The result is my 3 3/4 AT Air-Adventurer Astronaut.


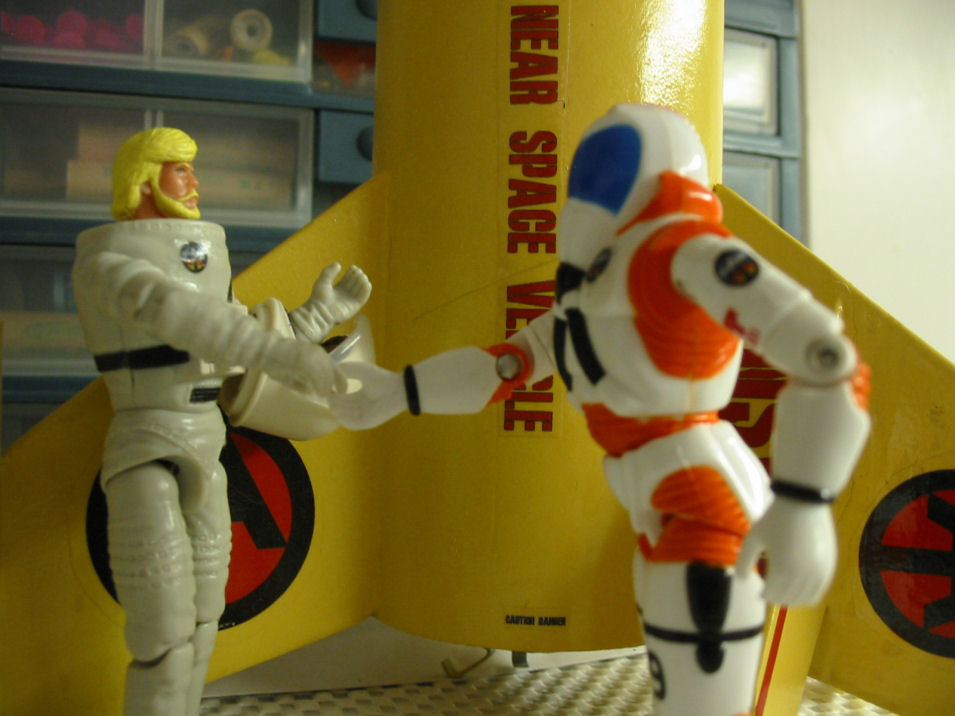
Finally, we see the hand-off as test pilot makes the official delivery and hand-off of the NSV-1 for regular Adventure Team operations. Who says Adventure Team and 3 3/4" Joes don't mix?

Friday, January 06, 2006

A real Adventure Team Vehicle


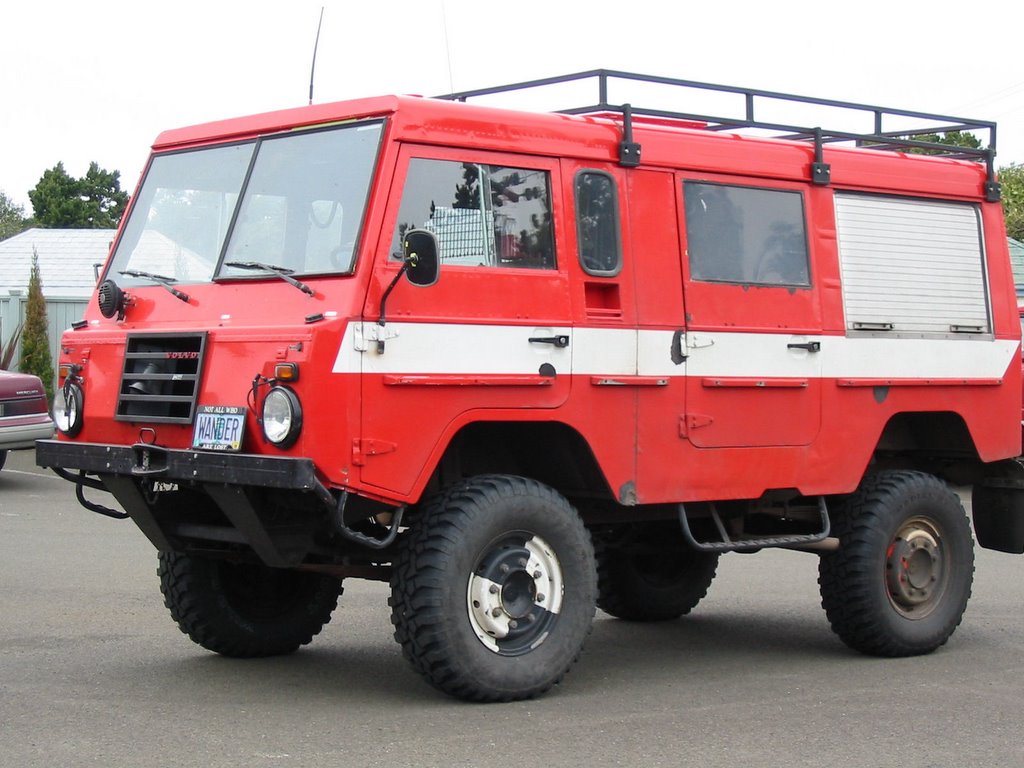
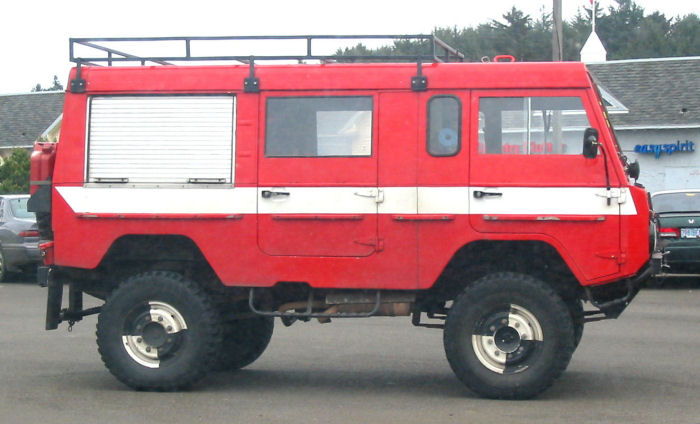
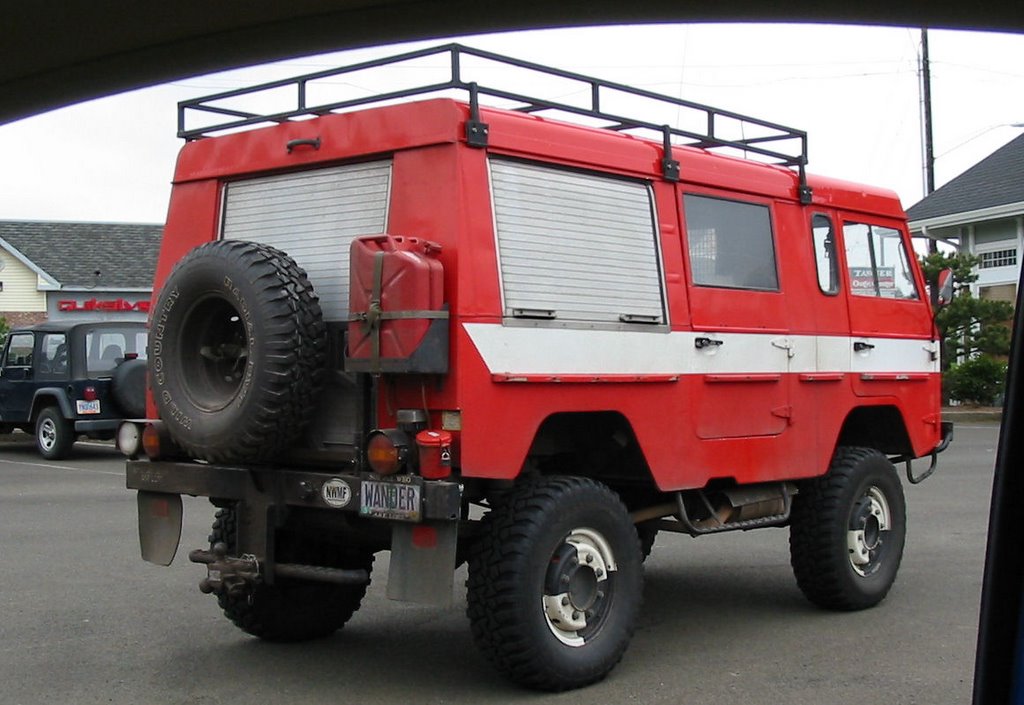
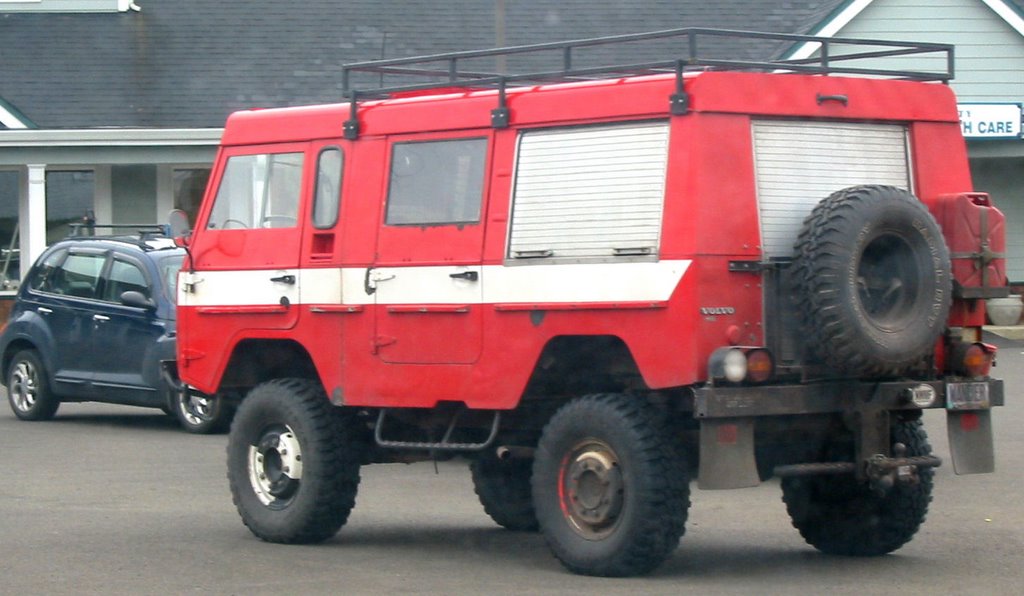
Since I'm a little behind on picture posting, I'm going to break with format a little and give you something different to look at. I fell in love with this unique vehicle the first time I saw it driving along a street a few blocks from where I live on the Oregon coast.

By the time I got my jaw back up off the floor of my car, it was gone. I had no idea what it was, and figured (this being a tourist town, where many usual vehicles come to visit, but usually just for a day or so). But to my amazement, I saw it on the street again a few days later, and this time I noticed the "Volvo" on the grill, my one clue to the identity of my mystery vehicle.

I googled on "Volvo Four-Wheel Drive," and with a bit of poking around, discovered that this was a Volvo Laplander, a military vehicle used primarily in Europe back in the 70s, primarily by the Swiss. You can find more information on the Laplander here.

The Laplander is an all-terrain utility vehicle used in a number of different body styles and configurations. Like the more famous Humvee, it's four-wheel-drive and has offset axles for maximum suspension travel and ground clearance (a full 16"). Though they weren't used by the US military, a number have been imported for private use, including this one.

Shortly thereafter, I noticed that the Laplander was often parked at a medical clinic a few blocks from my house, and I mentioned it to my wife. Then she was good enough to slip on some ice in her employer's parking lot. It was just a bump, but they sent her to the clinic to get checked out, and she asked the doctor examining her, "do you know who owns the Laplander out there?" Simply by knowing what the Laplander was, she became his instant best friend, and provided much of the information I'm sharing with you here today.

As it turns out, I'm not the only one who saw his Laplander and liked it. Another local liked it so much, that the doctor helped hook him up and he bought his own. So our little town now has two of these unusual vehicles running around! Even more interesting, the new one is a former airport crash truck, and six-wheel-drive vehicle! I think I've spotted a regular parking place for this one (probably the owners place of employment) so I'll try and get some pictures to post here when I get the chance.

Meanwhile, wouldn't this little baby look great in 1/6th scale and Adventure Team markings? (It would look even better in 1/1 scale and Adventure Team markings. Drool. ) Given the relatively flat sides, the body wouldn't be that hard to scratch build. All I'd need is a suitably large 4x4 radio control chassis to mount it on...