While I'm quite proud of these and really had fun doing them, I wonder sometimes if they put people off, simply because they're too involved and it just isn't obvious how I got from that pink monster to the nifty yellow vehicle at the end.
Look, a cool vehicle project doesn't have to be that elaborate. It's a lot of run to take a basic vehicle and, with a little paint, some odds-and-ends, some super-glue, and some imagination, improve it far beyond the basic product, making it your very own. Well, tonight I finished (for now) a long-in-the-works project, and upgrade of the obscure Lanard Ultra-Corps "Sand Rat" vehicle. (Remember, you can click on any of the small pictures to see a large version so you can examine the details.
Most of the materials here are easily found at your local craft or hardware store, or maybe you already have most of what you need in your house.
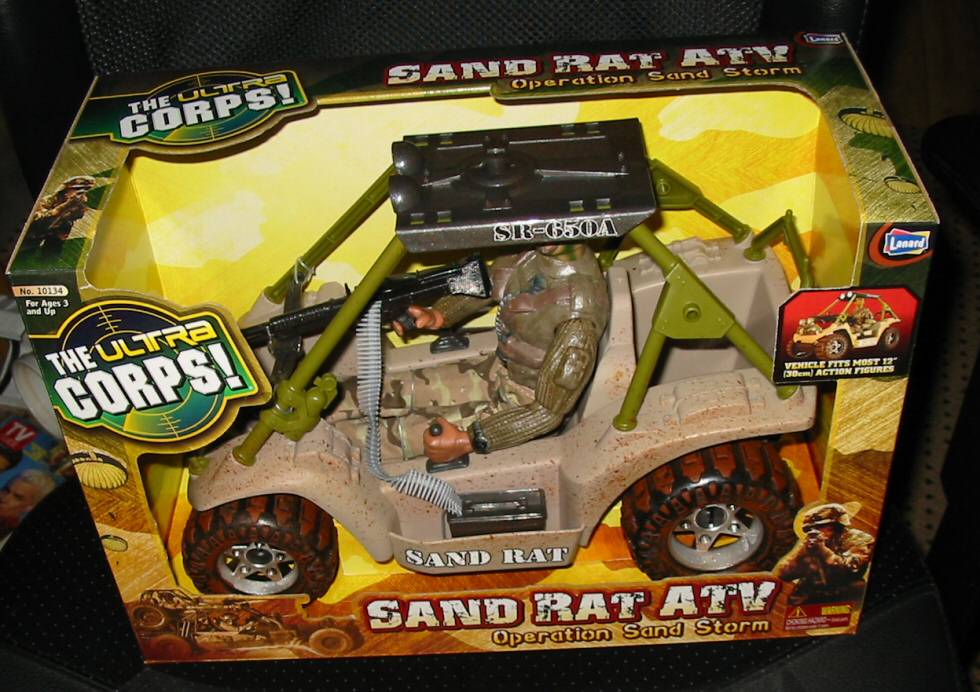
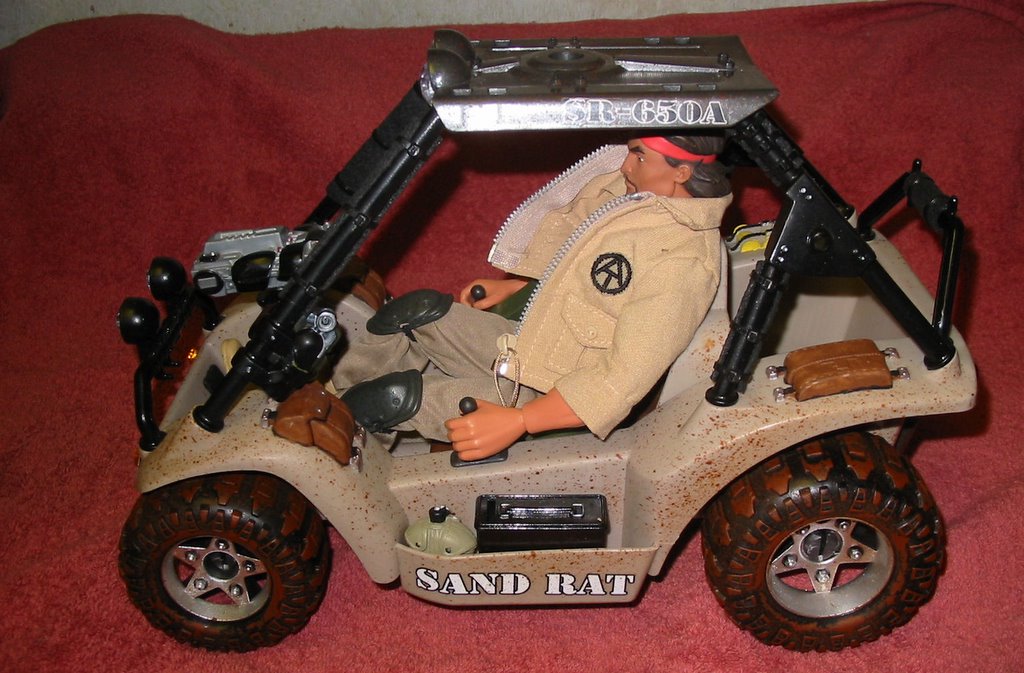
Here's the Sand Rat as I found it in the box last Christmas. I realize that this is a pretty obscure vehicle, and it's unlikely you'll be able to lay your hands on one. But think of it as an example, an "every-vehicle." You can take the lessons here and apply them to a trashed vintage AT vehicle, a 1/6 RC Snowmobile, a Bratz car, or any other not-quite-right vehicle you might lay your hands on.
The Sand Rat is both the best and the worst case in many ways. The best, in that I think it has great lines. It's clearly a knock-off of the Action Man dune-buggy, which was re-released in the US under the Joe vs. Cobra banner a couple years ago (and should be much easier to find). But while it lacks that vehicle's action features, I think it's better from my standpoint. I think it's more attractive, it's a bit larger, a bit more grounded, and it even has room for two figures (a second one can ride in the back, and the roof was clearly designed to mount a weapon of some sort, which wasn't included).

There is, of course, a machine gun in the front, and ammo cans in the cargo side-wells (another nifty feature that the Hasbro version is lacking). But there are many unused mounting points on the vehicle, the hole for the roof-weapon, the holes in the side of the roll bar, and the mysterious pins on the rear "sissy-bar," that make me think this vehicle was designed to have a lot more goodies on it, probably more paint-applications to some of the molded-on-accessories, and to sell at a higher price point than the $10 or so (including figure) that I paid.
My thinking is that when the 12" market imploded, Lanard cut this item to the bare bones, packed it with the ugly molded-shirt (and boots) figure shown, and blew it out cheap. So, while the lines are nice, it really has a unrealistic toy-like appearance right out of the box.
Rather than paint-apps, we got some rather heavy-handed weathering, as through the vehicle had just been driven through mud, rather than sand. I considered trying to remove the weathering, but elected to live with it. I may add some more realistic dry-brush weathering of my own at some point, and I may swap out the stock stickers for Adventure Team markings, but I haven't done that yet, and I'm not sure I'm going to.
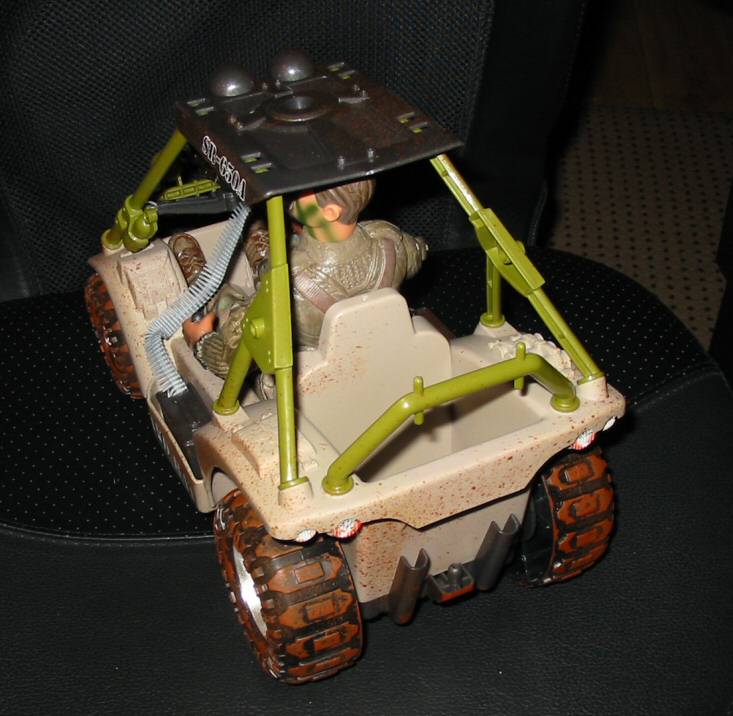
From this rear angle, you can see how it really suffers from lack of paint-apps. Those molded on the seat, pedals, packs and grenades really look fake, as does the half-of-a-fire-extinguisher molded to the left side of the roll cage. Speaking of the cage, you can also see how the "tubing" is actually open on the back. The translucent green plastic really shows this flaw up, and hurts the realism.
From this angle you can also see a couple of other drawbacks. There are not lenses on the headlights and tail-lights. They're just stickers over flat plastic. You can also see the rather unconvincing "exhaust pipes" on the back.

So, what's the plan to upgrade the Sand Rat? Well, here's a shopping list for any vehicle:
1. Decide what your application for the vehicle will be. Change colors, markings, and accessories to match the new mission.
2. Target ugly colors and translucent fake-looking plastic for repainting.
3. Identify unrealistic details. Remove, repaint, or improve.
4. Add small details to increase realism. These don't have to be huge or fancy. Keep in mind that anything that increases the visible number of textures, colors, and surface types will add realism and apparent detail. Think in terms of paint details, things that can be inserted or added in (floor mats, fire-extinguishers, headlight lenses, etc.), or attached (trailer-hitches, gear-shifts, cargo racks, etc.)
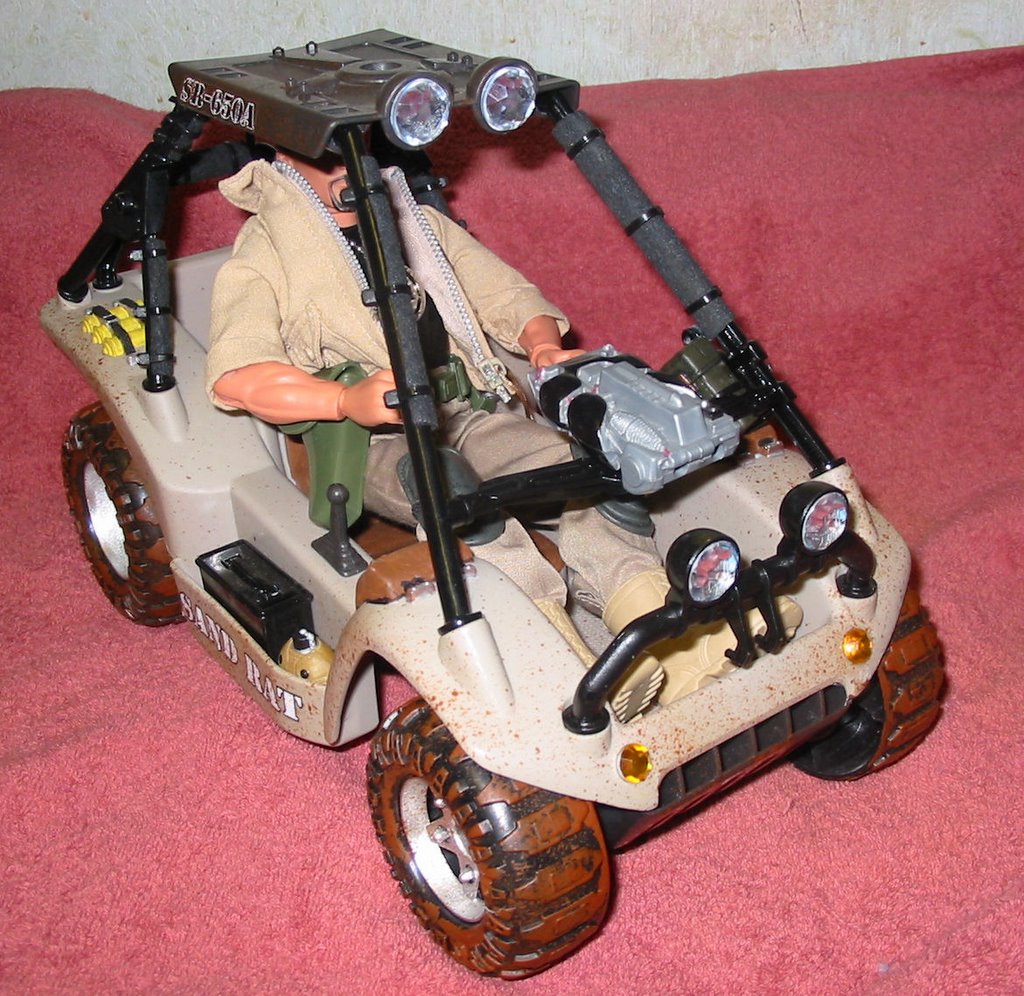
So, here's our improved Sand Rat. The overall appearance hasn't changed that much, but there's a huge increase in realism and visual appeal. Notice that there are lots of small areas of color. There are new and functional-looking details, clearly using different and contrasting materials and colors. Obviously we tossed the ugly figure for a kitbashed AT member (never underestimate the value of a nice-looking driver figure in any vehicle). Given that this is an AT vehicle, the heavy machine gun is gone, replaced by a "sensor cluster" (actually, a weapon pod from some smaller-scale sci-fi toy).
The headlights now have real lenses. These are made from plastic rhinestones picked up at a craft store and stuck on with super-glue. These are clear with a silver backing. On the lower lights, that backing has been sanded off, and the lenses glued directly over the existing headlight stickers. On the upper lights, the sticker was removed and the stone, complete with silvered backing, simply glued in place. A pair of smaller amber stones have been glued on as "parking lights."
The biggest single improvement in appearance and realism came from one, relatively-easy, change. I removed the roll-bars and bumpers, and painted them gloss black using Krylon Fusion paint for plastics. The Fusion sticks just fine to the flexible plastic the bars are made from. It hides the translucent plastic, making it more realistic, and the dark color makes the open back-side of the roll-bars less obvious. (We also disguised this to some extent by adding "padding." More on that in a bit.) Black was also more appropriate to the AT than the semi-military looking green. While I was painting all the bars, I also repainted the ammo-boxes black as well.
Note too that the molded in packs, and grenades have been hand painted using acrylic craft paints. Don't forget to paint the buckles in metallic or contrasting colors to add to the realism. You can't see it, but the seat back and molded in pedals have also been painted dark-brown. This doesn't require a lot of artistic ability, just a fine-brush and a steady hand. Pretty much I followed the molded in lines. It's a coloring-book in three dimensions.

From this front angle, you can see one shortcoming of the Sand Rat that I didn't address, those wheels. They're simply hollow shells, open on the back. Getting some realistic wheels, perhaps salvaged from a smaller scale toy truck or construction vehicle would make a huge difference in appearance. But I haven't done this yet, and I'm not sure I will. I'm going for increased realism here, but not hyper-realism. For instance, where's the engine? There's literally almost no space here for an engine or fuel. A stickler would have fabricated an engine cover to go over that rear compartment, but I wanted to keep it available for cargo, or as a place for a second figure to stand.
In this and the previous picture, you can also see how I addressed the half-a-fire-extinguisher on the left (driver's left) of the roll cage. I simply found an ammo-belt-pack in the junk box that was about the size of the extinguisher, and attached it to the open back side using a small, black, wire-tie (sold in electronics and hardware stores).
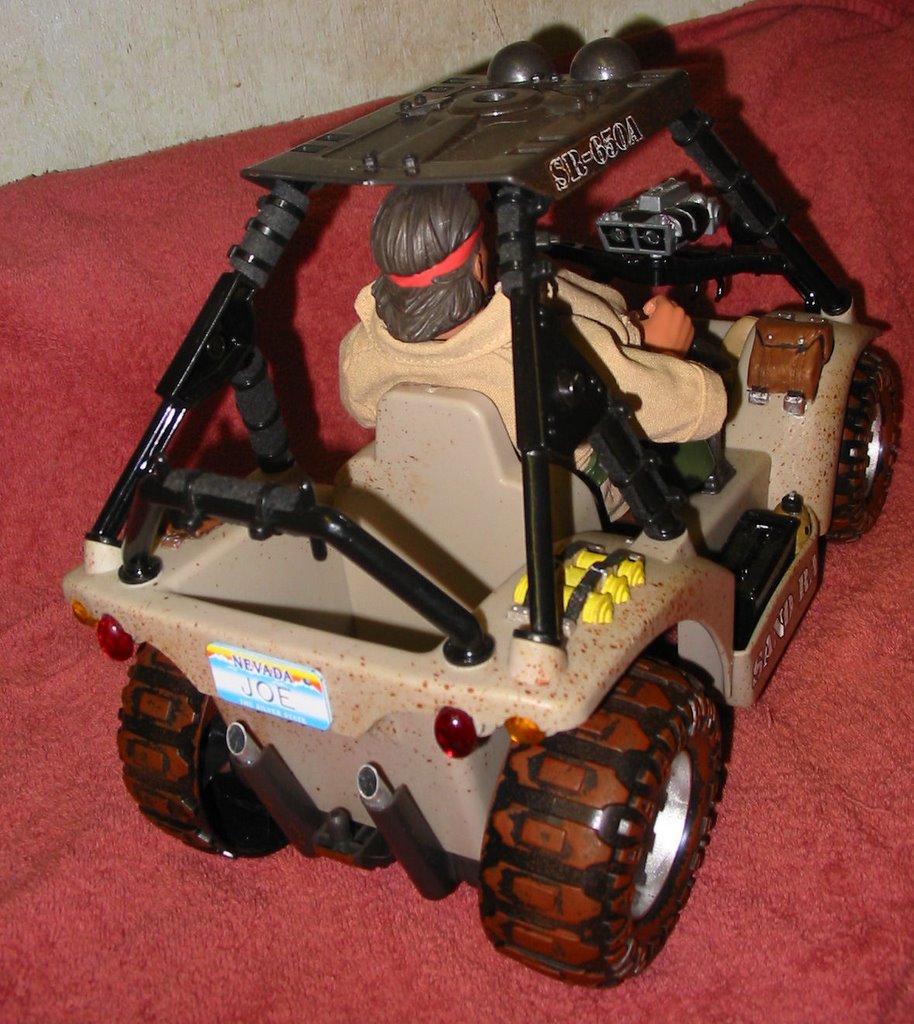
From the back, you can see some other details I added. The tail-lights are replaced with glued-on colored stones, again from the craft store. The license plate is a plastic souvenir zipper-pull. These are sold in tourist spots across the country with hundreds of common names printed on them. I look for them when I travel, and always pick up a pare of "JOE" tags whenever I spot them. They look great glued on 1/6th vehicles. They really add some color and interest, with hardly any effort at all.
I also upgraded the exhaust pipes, by adding some bits of Aluminum tube purchased at a hardware store. I find that any place that you have a chance to use real, exposed, metal, it can really enhance a vehicle's realism. Bright, shiny surfaces are also nice interest-points. Look around a hardware store, looking at all the screws, nuts, brackets, screw-eyes, drawer pulls and other items, and you'll find lots of stuff that will work on your vehicles, as bumpers, trailer hitches, light-brackets, etc.
Finally, look around and see what interesting gear you can add to enhance the vehicle's mission. Considering this is a desert vehicle, it seemed natural to put a few canteens in the cargo trays on the side. I carefully chose a pair that had tan covers rather than the more common OD green, and that had the added advantage of some silver and black detail paint. More realism points, effectively for free, that wouldn't be gained by dumping molded mono-color canteens in there.
It's worth noting a few other improvements I've added as well. Though you can't see it in the pictures, the cargo well now has a black "floor mat" made simply out of thin craft foam. Craft form is sold in a variety of colors in any craft store, or in the craft section at Wal-Mart. It's cheap, versatile, and easy to work with (just cut it with scissors or a hobby knife). Often it will just stay where you put it (as in my floor-matt application), or you can glue it, or even buy a self-adhesive version with a peel-off backing. You can use this stuff as seat padding, floor mat's, linings for tool boxes, all kinds of things. I recommend keeping a variety of colors on hand, but especially black.
I had originally intended to do the roll-bar padding using craft-foam as well, but went with an alternate plan at the last minute. The padding is "mini-soaker hose," cheap stuff sold in garden departments for use in drip irrigation systems. I cut it to length with scissors, then cut a slit up one side of the hose. Then I spread it open at the slit, and snapped it over the open side of the roll-bar tubes. Finally, I fixed it in place using small, black, plastic wire-ties (see above). What's really nice about this is that it shows that black is not just black. The black of the painted roll bars, the black of the plastic wire-ties, and the black of the padding are completely different. This kind of contrast among things of similar color really adds to realism for some reason.
So, that's our conversion. Just for comparison, lets look at the finished result side-by-side with the mint-original. Looks better, doesn't it?
Of course, there's plenty more that could be done. Mount some science gear or a cargo rack on the roof. Paint the roof and body. Add some AT markings. Upgrade the wheels. Put in a rifle rack, or mount some kind of small seat to the rear bar for a standing passenger to lean on. Maybe even add working lights. That's the beauty of these projects. Anything you do will likely be an improvement, but there's really not limit to what you can do. All it takes is a little patience and imagination.
No comments:
Post a Comment