The other day, I got this note from Minions reader Phil M.:
I love your comics. I was wondering, where did you find all the scaled down items? most of them look like the correct scale for the "minion" you have. I have never seen trash cans, golf carts, etc.
Just wondering...
Fair, question, but one I figured only a fraction of Minions readers would be interested in. So rather than cluttering up their space with what would have to be a lengthy post, I decided to answer over here, at my seldom-used hobby blog, where it was more likely to be seen by interested parties (and where interested Minions readers would be able to find it).
So, just for starters, let's take a look at the latest cartoon (you can, by the way, click on any of these to view a larger version):

Okay, the pat answer to Phil's question is, "everywhere." I've spent several years obsessively building up huge collection of figures, set-pieces, props, and accessories. Some are made. Some are found as action figure or doll accessories. Some come from the most unlikely places.
So what I'm going to do is use some cartoons as examples, talk about where the various items in them came from, and use that to offer more general advice about where you might find things of your own.
Let's just kind of go left to right and discuss things as we find them.
Number Two is talking on a pretty nice phone. The phone is a modified kitchen magnet I found at a kitchen store. I had to do some cutting and modification to make the hand-set removable.
Since the set is non-magnetic, I stuck it to the wall temporarily using a putty-like reusable adhesive clay sold for mounting posters and the like. You can find it in most any office supply stuff, and it's good for a million and one things when making dioramas. It doesn't dry out, so I keep blobs of it stuck to the side of a cabinet adjacent to my "Minions" workbench/studio, ready for immediate use. Like I said, it's reusable, so when I pull down the blob holding the phone to the wall, it will go back up there for reuse.
In the foreground there are some sandbags. Those are accessories that come with "Power Team" military action figure play-sets. Since most of my Minions use Power Team bodies, I've bought a lot of those over the years. The bags are actually hollow plastic, and open on the back, and so only look good from the front. I almost threw them away at some point, but I'm glad I didn't.
Not only are they handy for giving a set that pseudo-military "lair" look, but the hollow backside is great for hiding battery-powered LED "puck" lights, which I often use to as blue fill-lights in my photo set-ups. Actually, there's a light hidden there, but I forgot to turn it on before shooting. Whoops.
The rats fighting on top of the bags are toy-store items, sold as part of line of clear plastic tubes carrying various plastic animals. Some tubes are sold with nothing but various colored rubber rats, and I've bought a bunch of these. Again, handy around the lair, and I use mostly the black ones, which most of the rats in the tubes are white or tan. Save those for the lab-scenes.
The broken table and green storage drum are also Power Team items. The table isn't broken. It just snapped together in the first place, so I just snapped it back apart to make it appear smashed. It will be good as new next time I need it.
You can't see it well here, but the cell door is scratch-built. It's made from foam core, cardstock, toothpicks (for bars in the window), craft store hinges, and a padlock-charm found in a bead store.
1/6th scale doors are hard to come by, and I should make some more in various styles.
The wooden crates were found in thrift stores. Crates like these are used as containers for gift-soaps, bath products, little jars of jelly and jam, and other such things. I think the fad for these may be over, but there are still zillions of them cluttering up grandma closets everywhere.
The trash cans also came from thrift stores. They're at once surprisingly common, and hard to find. They're made as promotional items and sold to garbage and recycling companies, usually imprinted with their logos. The idea is you use them for pencil cups, paper clips, and the company's number is on your desk next time you need trash service. I've managed to pick up maybe half-a-dozen different ones in various colors. I don't know ANY place to pick these up at retail, but if you really want one, calling up the various trash companies in your area might turn one up. Good luck explaining WHY you want it.
Okay, let's move onto another prop-intensive cartoon.

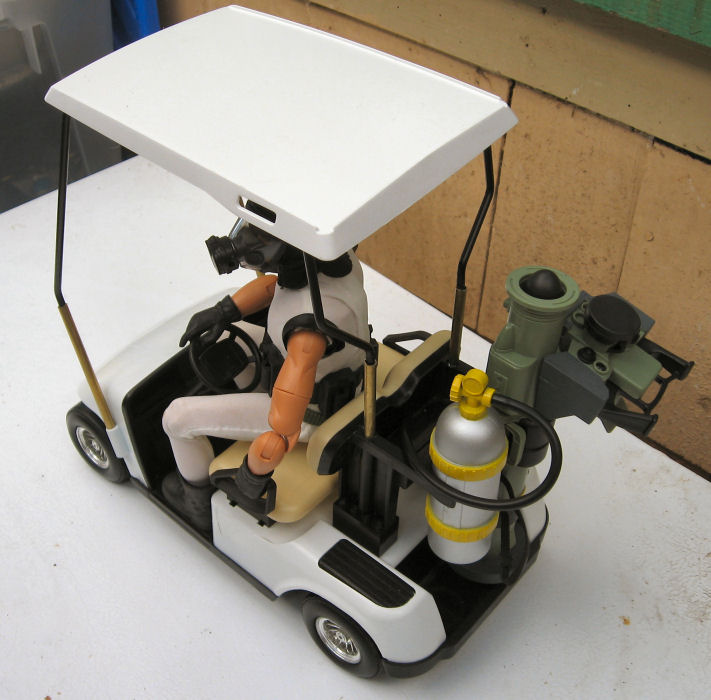
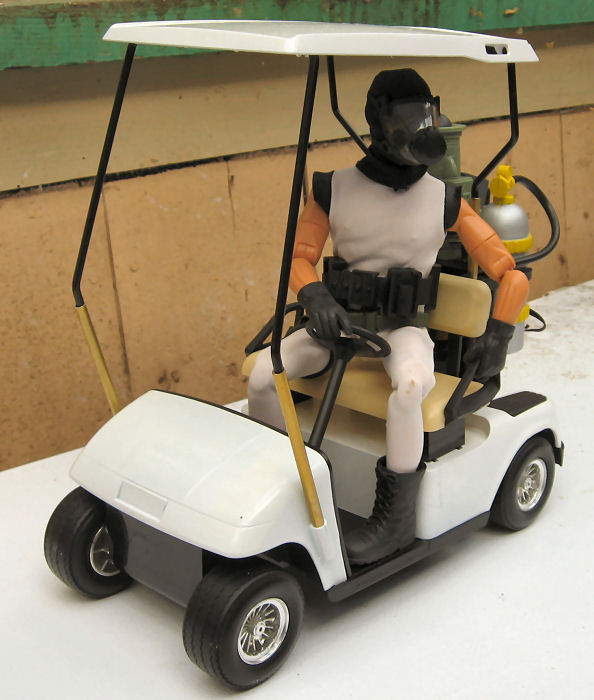
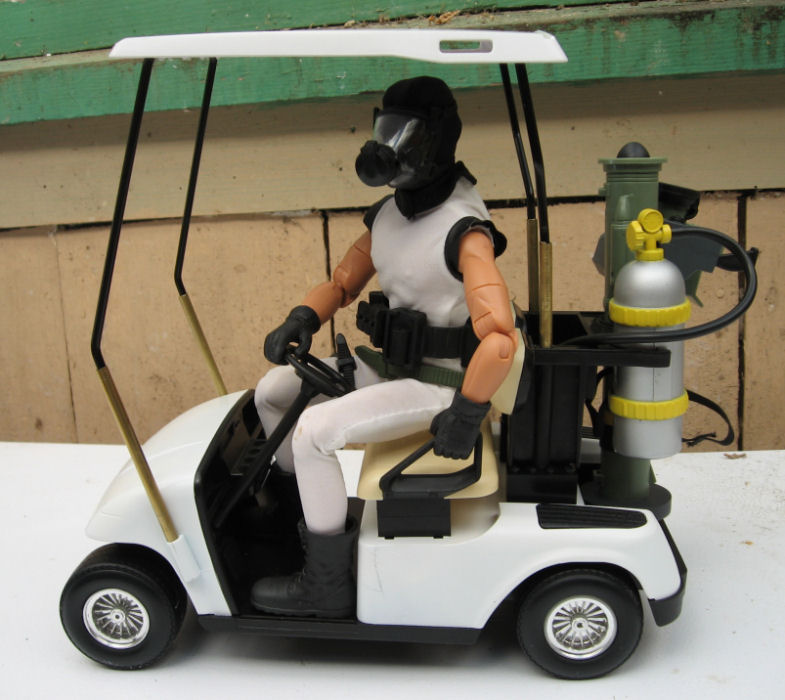
Phil mentioned the Minionmobile, so I had to include it. The Minionmobile is obviously a golf cart. It was sold as part of some die-cast vehicle line a few years back, and it's actually more like 1/8th scale, not 1/6th. The roof was way too low for a 1/6th figure, so I had to extend the metal rods that support the roof and raise the seat to allow for more leg-room. You can see details on how I did it here. It doesn't look bad, and actually, I think the "clown car" aspect adds a subtle bit of humor everywhere it appears.
The clips in the back are designed to hold golf bags, which were missing on my example of the golf cart (I saw it in stores, but mine came from a thrift store again). So, instead, we have a GI Joe anti-tank missile launcher back there, and a scuba tank from an 18" knock-off action figure sold at Wal-Mart a few years back. (I bought some on clearance with idea of making giants or monsters out of them.)
While this golf-cart may be hard to find (check eBay), there are alternatives. Wal-Mart sold an RC Yamaha Rhino 4-wheel ATV last year, and there's a golf cart in the current "High School Musical" fashion-doll line that has possibilities.
The traffic cones are Power Team items again, and I wish I had more of them. They're great little props.
The high-tech curbs are rails from an Imaginex building set I think. More thrift store finds. The nukes are actually launchers from a Quest Aerospace Micromax model rocket starter set. I bought a bunch of these on clearance a few years back, mainly for the rockets and motors. The launchers I didn't have much use for, until I noticed how much they did look like some kind of nuclear storage canister or warhead. Now they show up regularly in Minions at Work sets.
Now onto something that shows a whole variety of prop-sources:

Going left to right again:
The wonderful console is part of a "Muppets in Space" action figure playset from a few years back. I got a bunch of these very cheap on clearance, and they're just full of great parts and set pieces. The console was plenty big enough, but it was too low, so it's removed from its original base and mounted on an inverted plastic cup sold as a desk organizer.
You can see the edge of an arched doorway in the back. This is actually one of those "sold on TV" gizmos called a "Can-A-Round." They're white plastic tracks designed to allow you to slide cans of soda and beer around to the back of your fridge. Or something. Seems like a stupid idea to me, but when painted gray, they look like high-tech girders and bulkheads. I have two or three sets, and I use them all the time.
The back wall is foam-core board (office supply or craft store) painted silver. It's decorated with PVC plastic pipe from the hardware store, held on with metal clips, screws, and nuts, also purchased there. The louvered vents are sold as under-eave vents for home roofs. Lots of goodies can be found in the hardware store, if you browse everywhere, and thing of things in terms of form, not intended function.
The equipment rack in the background is another one of those wooden gift crates I mentioned earlier. I painted it black, and stuffed it with a variety of military field radios (Hasbro GI Joe, Power Team, 21st Century toys), again, repainted and detailed using hardware spray paints and craft acrylic paint.
The chairs are all fashion doll items. Fashion doll lines are good sources for furniture and household items, though they often need repainting (lots of pink). Barbie, Bratz and My Scene lines are all good sources of stuff.
The table is thrown together. The top is just a piece of scrap wood put in as packing material in an "assemble it yourself" bookcase I bought a while back. The pedestal bases are a couple of curtain hardware things I spotted at the thrift store (form, not function, again). The top is held on with more of that poster putty stuff.
The top of the podium is a doll-house item. Standard doll-houses are 1/12th scale, half the size of 1/6th, but a lot of usable items can be found at doll-house suppliers. This was a desk-top lectern though, so I had to build the base myself, using wood scraps, and decorative molding strip (hardware store). Craft paint tied it all together.
The map and stand are from a Power Team set again, as is the green crate.
The briefcase actually was sold as a novelty gift item. It has a manicure set inside! But the latches, handle, and all the hardware work fine, and it's in pretty good scale. I've also seen these sold as business card holders. Business and desk-top novelty items and premiums often yield interesting items. In addition to the trash cans and briefcases, I've also picked up some cool office chairs, beach chairs, desktop computers, and other goodies sold as novelty or promotional goods.
The red table is another wooden crate. The yellow thing on top is part of some toddler playset. I found it at a thrift store, liked the shape, and made a few modifications to the "screen" on the side, replacing animal stickers with green cardstock (so I can easily Photoshop in computer displays or whatever).
The phone is our magnet again from the first cartoon. I've got a lot of novelty magnets that are useful props: computers, desk phones, pay phones, blenders, coffee-makers, dustbusters, clothes irons, toasters, lunchboxes, crates of fruit, pots and pans, toaster ovens, microwave ovens, aquariums, lunchboxes, gumball machines, wine bottles, all sorts of stuff. It pays to spin through the kitchen store every once in a while.
Okay, one more, in part to see how the same props get used again and again in different ways. This is Cap'n Rehab's submarine.

The porthole in the background is some kind of fiberboard ring I found in the floral section of a craft store. I have no idea what it's used for. I spay painted it gray, put in some scrapbook paper for the "reef scene" outside, and stuck it to the wall with more putty.
The ship's wheel was a wall hanging I bought at a tourist-trap gift store (I live in a beach town). The metal base for it (which you can't see) was made from a brass candle holder and some copper-pipe fittings from the hardware store.
In the foreground, there's the Muppet's in Space console again. Behind Number 9, you can see one of those rocket-launcher "nukes" again. The red barrel is a repainted Power Team item. The lamp thingies on top is actually an old, novelty salt-and-pepper set. I think I got it for $2 at a junk shop.
The arched doorway is made from our friend the Can-A-Round again. The door in the middle is cardboard and some textured scrapbooking paper I got at a craft store.
The high-tech crates came with figures in the GI Joe "Sigma Six" line.
The rubber duck around Cap'n Rehab's neck was part of a set of novelty earrings I spotted while following my wife into an accessory store at the mall. (Really guys, if your wife or girlfriend is at all crafty, it pays to follow her into bead, craft, and fabric stores now and then. You can go in by yourself, but the strange women who work in these places seem to have a talent for asking embarrassing questions.)
The little Nautilus desk model in the foreground was an accessory for a smaller scale Captain Nemo action figure I bought on deep clearance a while back. (I had no interest in the figure, but he came with a ton of cool accessories. I've also seen cool, usable for 1/6th accessories in other small-scale figures. Wrestling figures, the entire Muppets line being examples. (I got a cool mop and janitor's rolling bucket, a footlocker, some books, and food items with Muppets figures.) But for things like desk models, look for smaller die-cast toys. Nothing spruces up a military office like a model fighter plane, missile, or tank on the desk, and they're all over the die-cast section of the toy store. I've also found similar things in gumball machines and museum gift-shops.
I could keep doing this, but this post has gotten pretty long already. General hints:
Develop a "one-sixth eye." Develop the habit of looking at things in scale. Potential props are everywhere. For instance, I noticed one day while taking the protective cap off a "sports bottle" style bottle of drinking water I got at the theater, that it looked like a miniature Tupperware style bowl. I collected a few and added them to my box of kitchen and food items.
For specific ready-made 1/6th items, check fashion doll toy lines, but also look for novelty items elsewhere, sold as novelty clocks, souvenirs, key-chains, lighters, pencil sharpeners, magnets, desk accessories, business give-aways, jewelry, charms, etc. In addition to toy and hobby stores, you should also be browsing craft stores, bead stores (lots of interesting charms, bits of metal hardware, clasps, etc.), kitchen stores (especially for magnets and other novelty items), gift stores, souvenir stores (in my experience, the junkier the better), museum gift shops, zoo gift shops, and office supply stores.
Finally, you'll notice that a lot of my stuff comes from thrift stores. Thrift stores, garage sales, junk-stores, swap meets, rummage sales, are full of useful prop items. Just use the 1/6th eye. A wooden jewelry box is a desk. A pencil cup is a waste basket. A novelty metal cocktail skewer or letter-opener is a sword.
This stuff is literally everywhere, and often the coolest items are cheap or free. It's all a matter of having the eye, and the creativity, to find them.