Showing posts with label space. Show all posts

Tuesday, February 06, 2007

Houston, we have winner.


We're going to stray from our 1/6th mantra today.

Besides GI Joe and other 12" action figures like the Marx Mike Hazard and Captain Action, one of my favorite toys as a kid was Major Matt Mason. For those who aren't familiar with Matt's short but glorious run, he was a 6" bendy astronaut with removable helmet. The figure was fine, but what made the line so great were Matt's huge range of accessories, from nifty bubble-carded playsets to huge battery operated Moon vehicles, a working space glider, and the grandaddy of the line, a three level "space station" that stood several feet tall. He also had a number of astronaut friends (including an early black action figure, though GI Joe apparently had the first), and several aliens.

I've got a more-or-less complete space station in my collection, a space crawler, a few replica figures and a few smaller accessories, but this stuff is spendier and harder to come by than GI Joe stuff, so I've never tried to amass a full collection. But I do follow several discussion lists for MMM collectors, and there's always discussion about Mattel reviving the Matt Mason line in some form, either as a replica of the original toy, as a new toy line, or both.

Of course, with old-time collectors the sentiment is on a new bendy toy. And while that's possible for a nostalgia replica, I doubt it would happen with a new toy line. (Given modern safety laws, it might even be impossible for it to happen.) On the other hand, people seem opposed to the idea of a hard-plastic figure. Maybe one feeling is that it won't be realistic enough, or more probably, that it will lack articulation.

Well, in that department, I think the original Matt is somewhat overrated. His waist, wrists, and ankles didn't bend (though the ability to twist the leg somewhat compensated for the last), and his "bellows" knee, elbow, shoulder and hip joints couldn't hold a tight bend very well. He couldn't sit well, or bend well, or do much of anything well but stand there with limited bending of his arms.

The original had other problems as well. Those wires always broke eventually, and they could break sooner if the figure was dropped or flexed too hard. The rubber had a tendency to "melt" in the hard plastic of his accessories (try finding a space station seat without melt marks), and his paint peeled off.

Fortunately, modern toy designers have other options, and I think nothing illustrates this better than the above pictured figure. Surprisingly, it's from the second series of Fantastic Four movie figures. It's the "Astronaut Ben Grimm" figure. (You can click on all these pictures for a closer look).


Like Major Matt Mason, this is a roughly 6" astronaut figure. Like Matt, the design is closely based on real space suit designs (this closely resembles hard suits planned for future Mars and Moon missions) and seems to include the rear-entry hatch design used in current Russian suits). But there, the comparison ends.

This is a hard plastic figure, and unlike MMM, this faithfully represents the bulky look of actual EVA space suits from Apollo forward. As such, you'd think the articulation on this figure would be very limited. You'd be wrong.


This guy is very limber. He has ball and socket joints at hips and shoulders with a large range of movement. The knees are double jointed so the legs can bend almost double. The elbows only bend about 90 degrees, but that's probably as good as Matt could do, and he also has a hinged wrist (no rotation, unfortunately, though there's no reason a similar figure couldn't have this designed in), and hinged fingers for grasping. His waist swivels, and his feet not only bend back and forth, but have hinged toes for kneeling, and swivel from side to side to allow him to stand flat-footed in a variety of poses or on irregular terrain.


In addition, there are also rotary cut joints at the upper arms and legs, giving him even more flexibility. He can be posed walking. He can kneel. He can jump. He can dance. He can float He can sit, though not bolt upright with his knees close together. His poses are very natural and life-like, not stiff and robotic.

He can touch the top of his helmet, and hold things in front of his faceplate.

Heck, he can even scratch his butt (those space diapers they have to wear are itchy!).

With all this, he still has an "action feature" built in. Press the button on his backpack, and his head spins around in his helmet, changing from a human face ("look, it's that guy from 'The Shield!'") to a rocky "Thing" face. Of course the action feature means his helmet and backpack aren't removable, nor can the head turn in the conventional way. But these features could certainly be built into a purpose-built modern astronaut figure.

With all this, Astronaut Grimm seems to be a solid, sturdy, playable toy that I wouldn't hesitate to give to a younger child.

If you like space toys, this little baby belongs in your collection, even if it is (no pun intended) a stand-alone piece. These came out a long while back, but I've seen them in KB Liquidator stores not to long ago, and given the wide distribution of the FF toys, you never know what drug store of Big Lots might have one of these warming the pegs.

But the bigger point is, it is possible to do a good astronaut figure using modern hard-plastic construction, one that would be a worthy heir to our beloved bendy Matt.

Thursday, January 26, 2006

Countdown to Adventure


After considerable delay while I mixed in other things, here is the final (probably) segment on the Adventure Team Near Space Vehicle, a model rocket designed to launch a 3 3/4" GI Joe (or compatible) Astronaut in Adventure Team style. Today's installment covers launch-pad, flight, and recovery pictures.

First, one more shot of "Captain Lanard" as we prepare the night before the launch. What a go getter! Already suited up and ready to go! Note the tiny Adventure Team astronaut patches on his chest and shoulder.

The launch was held on a grass farm outside Sheridan, Oregon, about 35 miles from where I live on the coast. The launch is focused on high-power rockets, which the NSV is decidedly not, so the size of the launch area is vast, and the distances between the safety ropes and the launch pads is considerably longer than is absolutely necessary for such a rocket. Keep that in mind when you see my launch photos. My zoom only goes so far, and I was a long way from this little foot-tall rocket. Good thing it's bright yellow!

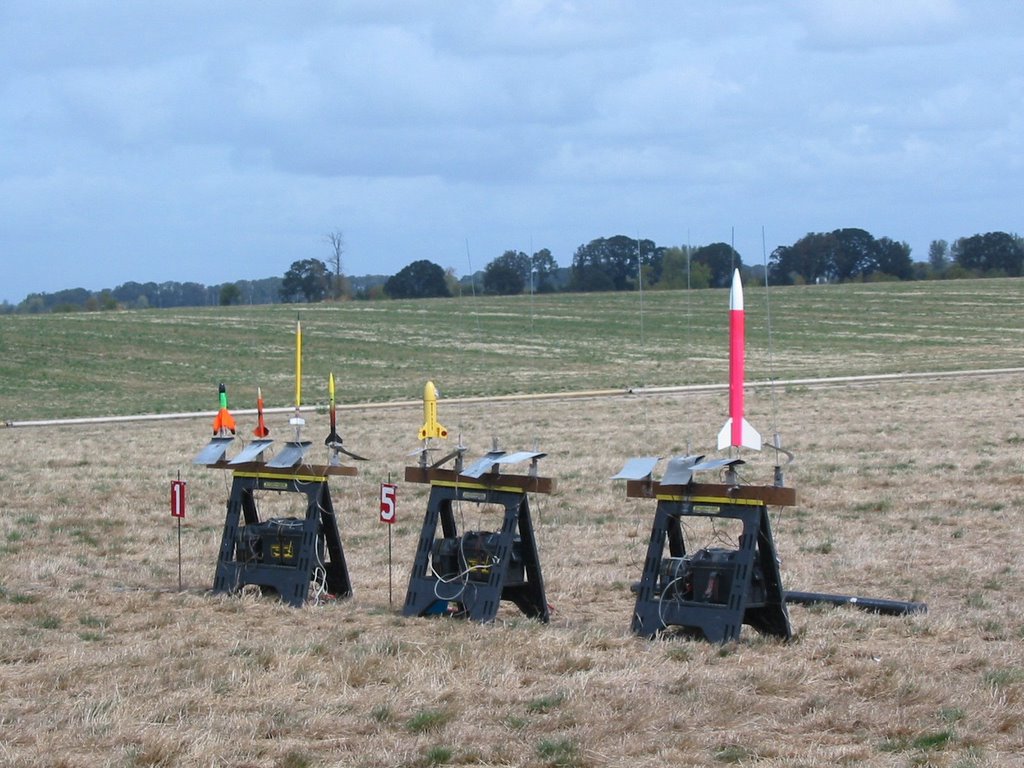
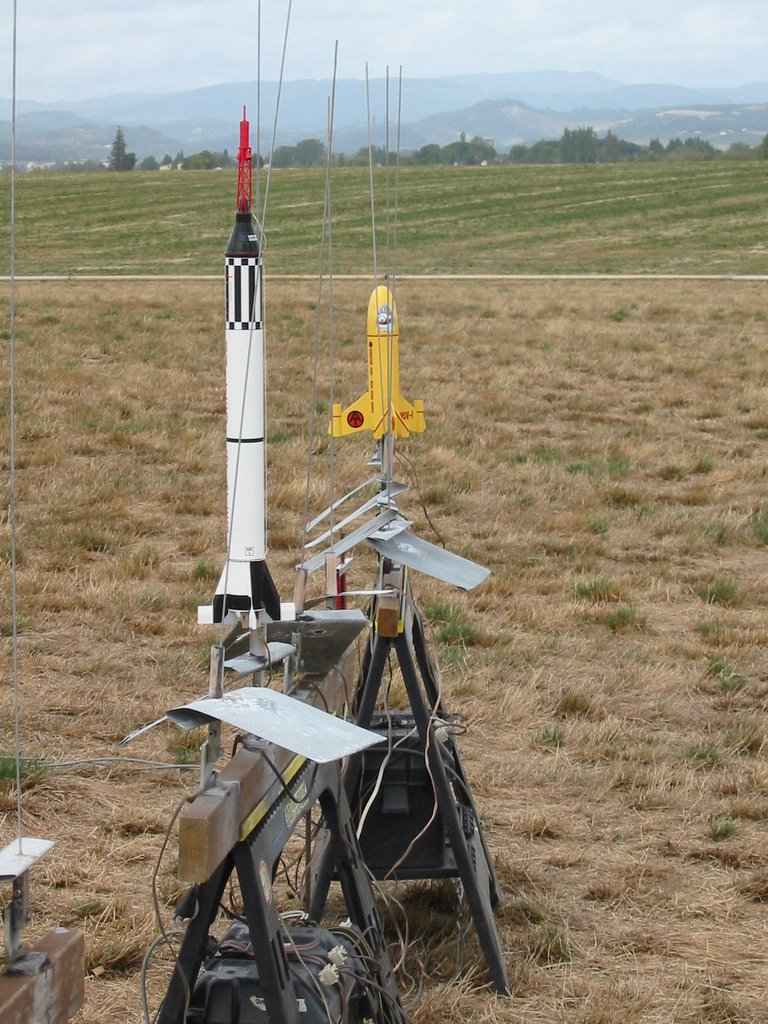
This first shot is taken at the launch pad, as the rockets are being placed and hooked up for ignition. For those not familiar with model rockets, the metal rods guide the rocket until it is going fast enough for its fins to keep it going straight. Rockets are remotely fired using an electric igniter placed in the engine nozzle. The boxes underneath the launch pads are automotive batteries, which power the whole thing. The metal plates under each pads are blast deflectors, used to direct hot rocket exhaust away from the launcher itself, and to direct it away from the ground. (Given that it's a grass farm and often dry, grass fires are a real concern).

No, that's not me in the picture. The man and his daughter are hooking up an Estes kit rocket on the pad next to mine.
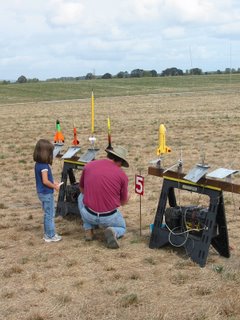

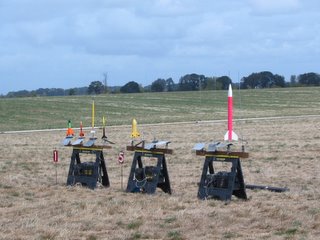
Here we see the fully loaded rack, waiting to fly. As you can see, the NSV isn't very big as model rockets go. In fact, the large white and pink (nothing Freudian here!) rocket is still what is considered "mid-power." "High power" rockets fly from a separate series of pads much further from the crowd line. They're out of sight to the right of the frame.

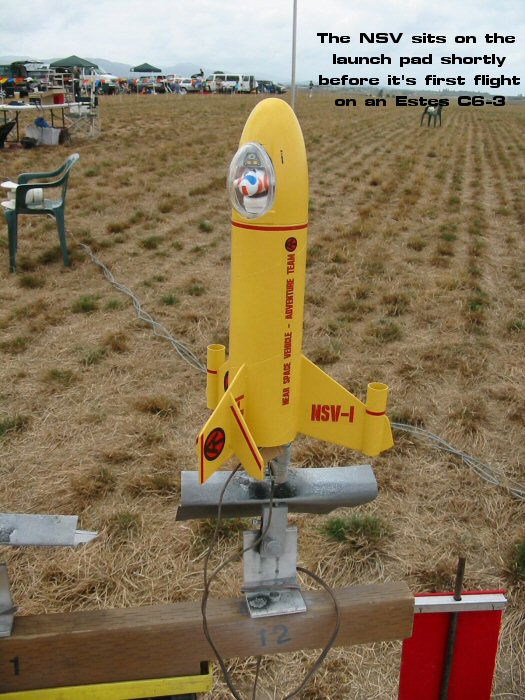
The first flight of the NSV was made using an Estes "C6-3" rocket motor. For a little motor, that's pretty big, a maximum of 3 pounds of thrust, and a burn time of 1.7 seconds. The "3" is the number of seconds in the coasting delay, which allows the rocket to reach maximum altitude before the parachute is deployed.

The C6-3 has an 18mm case diameter. The motor mount on the NSV was modified to use 24mm diameter motors, and therefore I had to use an adapter to use the smaller diameter engine.

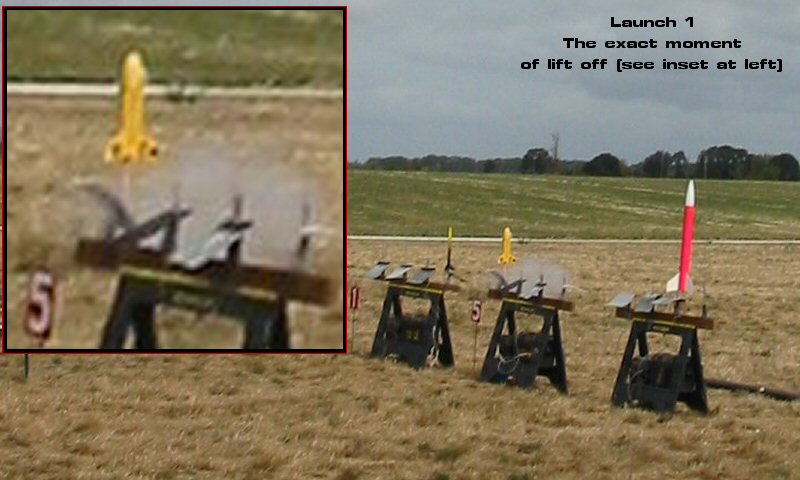
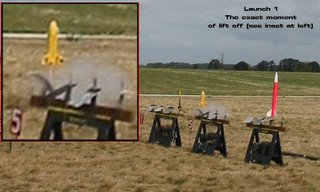
Here's the actual lift-off. As I said, I was a long way away from the pad, and I've pulled out a detail and magnified it so you can see what is happening.

The small, light-colored line pointing straight down from the rocket is actually flame from the motor exhaust. It doesn't look like much, but concentrated on one point, it's very intense. I've seen rockets hang up on the launch rod, and burn a hole in the sheet-steel blast deflector.

Model rocketry has an amazing safety record (you're probably in far more danger going to a Little League game, much less actually playing in one), but the potential for injury and property damage is always there. Organized launches like this follow strict safety rules.

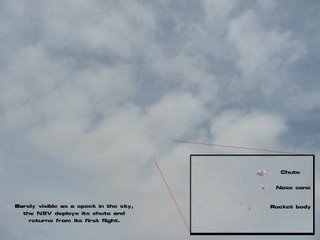
From this point, the rocket was moving too fast and high to follow with the camera. The flight was straight and near perfect. It actually got a lot more altitude out of the C6-3 than I had expected.

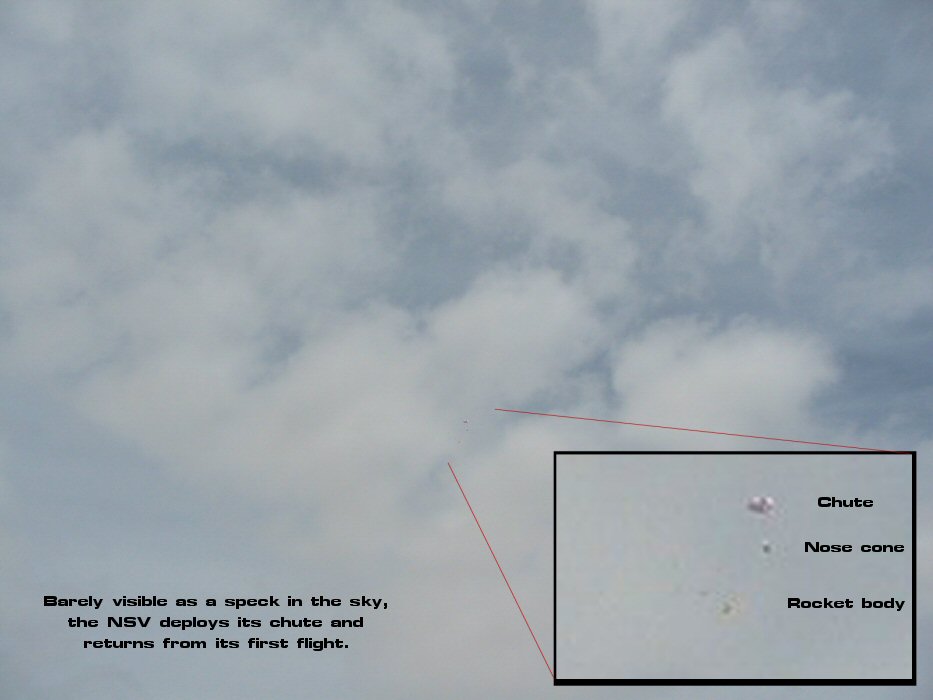
I did manage to pick it up with the camera after the recovery system had been deployed, though it wasn't much more than a speck in the sky. Again, there's an inset so you can actually see the rocket.

The nose cone separates from the rocket, and remains connected through a long, elastic, shock cord. A plastic parachute is connected to the nose cone, and (hopefully) slows the rocket for a soft landing.

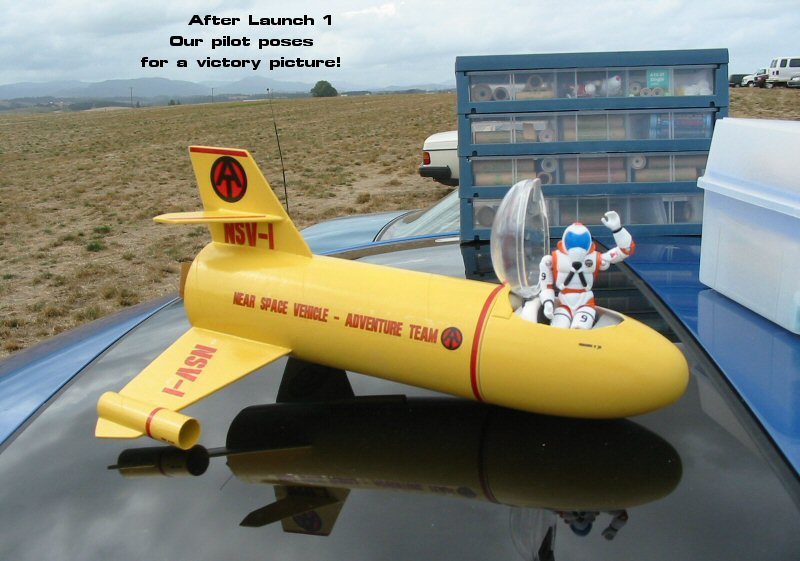
To be honest, at this point, I had half expected that the cockpit had been ripped open and that Captain Lanard would be lost in the grass somewhere, never to be seen again. Fortunately, I'd built the cockpit well. The canopy remained in place, and Captain Lanard lives to fly another day.
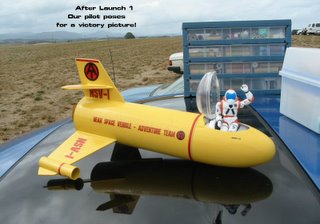
Here we see a posed, post-flight, victory wave. The parachute has already been packed back inside, and we've opened the cockpit so that Captain Lanard can take his bow.

Really, for me, this was an important part of the process. This wasn't some fake pilot head glued into a fake cockpit, as you sometimes see on model airplanes. This was a true action figure, able to be removed from his cockpit, played with and posed.

Encouraged by the success, I decided to pull out the 18mm motor adapter and fly on a more powerful 24mm motor. I chose an Estes D12-5. At a maximum of 6.4 pounds of thrust, this was a big step up from the "C" motor, and that changes a lot of things.

As I tried to explain to people over in the Sandbox recently, as they discussed the idea of building a working rocket pack for a 12" GI Joe, getting any rocket powered object to fly straight is -- well -- rocket science. Actually, for things that actually look like rockets, the rocket science doesn't have to be that hard. The general rules of thumb:

1. The longer (and to some extent, thinner) a rocket is, the more stable it is.
2. Weight in the front of the rocket (moving the center-of-gravity forward) makes a rocket more stable. Weight in the back of the rocket (moving the center-of-gravity backwards) makes a rocket less stable.
3. Fins behind the center-of-gravity make a rocket more stable. Fins in front of the center-of-gravity make it less stable. (Military guided missiles often have fins in the front because they use active, rather than passive stability systems like model rockets, and because instability makes it easy to turn on a dime when you need to, not a desirable characteristic for a model rocket).

The NSV has rule 1 working against it. It isn't long and thin, it's short and thick. Rule 2 is fairly good though, as the astronaut ads some weight to the front. Unfortunately, nose weight works better on long rockets, where it's way out in front and has lots of leverage. Not possible with the NSV. Rule 3 can be a problem too. It's easy to let the center of gravity slip so far back that part of the rear fins is actually on the wrong side of the CG.

So, why are we talking about this when the NSV flew perfectly on it's first flight? Well, as I said, that big motor changes things. For one thing, it's much heavier. It shifts the center of gravity backwards, and on a short rocket, a little shift can make a big difference.

Now on a simple rocket like the others you see in most of these shots, a rocket is pretty much either stable, or it isn't. But the NSV isn't a simple rocket. It's asymmetrical, what with the cockpit bubble, the fin-tip pods, the horizontal tail, the aerodynamics are suddenly dozens, maybe thousands of times more complicated. It's possible to have a rocket that's stable along one axis of rotation, and not along another. It's possible for stability to change under under other circumstances too, such as depending on the "angle-of-attack" at which it hits the oncoming air. Now we're getting into serious rocket science.

Mind you, the NSV did get tested before flight. I slung it around on a string. Seriously, that's an accepted test. You put a loop of string around the rocket, sling it in a circle around your head, and if it flies nose forward, it's theoretically stable. Along that one axis of rotation anyway. On a rocket like this, you rotate the rocket to multiple positions and retest each time. The test seemed to show was stable, even with the D motor. So off to the launch pad it went...

Now, here's some irony for you. The NSV project was inspired by the "Mercury Joe" program, an ongoing effort to launch high-power rockets with 12" GI Joe space capsules and astronauts on top. The launch vehicles are made to look like Redstone boosters, and the capsules are equipped with escape towers and multiple on-board video cameras. Wonderful stuff. If you haven't already, go visit the Vidroc site and watch their Mercury Joe videos. The Gumby rocket videos are also entertaining.

So anyway, it was interesting that I ended up on the pad next to a very nice scale model of a Mercury Redstone rocket.
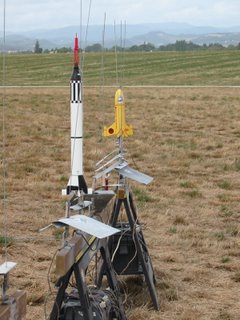
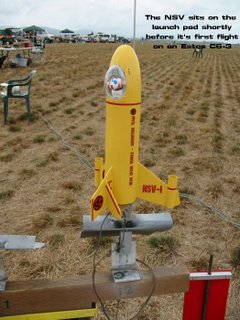
Here's a closer short of the NSV on the pad. You can see the astronaut and cockpit in launch position. One of my concerns in designing the rocket was that the acceleration is actually pushing the astronaut back into the canopy, and that this might pop it off from inside. I actually considered giving the astronaut his own, small, emergency chute in case he accidently "ejected," but I didn't have time. Fortunately, it was never an issue.

But here we have yet more stability issues. Joe's off-center position throws the CG of the rocket off to one side, and as the rocket moves, he has enough room to shift around the cockpit, shifting the center of gravity on the fly. Now we need one of NASA's super-computers to know quite what is going on. Some things, you just have to try.

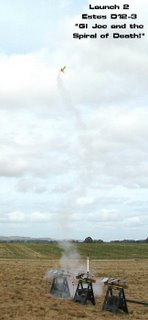
So here's what happened. Fortunately, the NSV wasn't completely unstable. If it had have been it could have looped and become a "cruise missile" headed for spectators, launch officials, or other rockets. Dangerous and embarrassing.

But it wasn't entirely stable either. Like I said, I think it had one "lobe" of insufficient stability. This cause the rocket to cork-screw its way into the air, wasting most of the increased thrust. In fact, I'd guess this D motor flight only went about 2/3s as high as the C motor flight, despite the increased thrust.

Fortunately, all ended well. As the motor burned, it became lighter. The rocket straightened out, and flew high enough to safely deploy its parachute and come to a safe landing (well, I think maybe we broke a fin, but it was an easy fix).

So, that was the end of that series of flights. The NSV returned the next year, repaired and improved, with a new Adventure Team astronaut (see previous posts) at the controls. Unfortunately, I was too busy flying to take many pictures that time, but the AT astronaut racked up several successful flights (though minor fin damage on landing continued to be a problem).

The NSV is in sad shape at the moment. It suffered some accidental damage here in my office, and needs major fin repairs. I'll do that eventually, but I'm thinking about retiring the rocket to static display. It's the fate of all rockets, it seems, that if you fly them long enough, either you lose them, or something eventually goes wrong. I'd like the NSV to survive long enough to serve as a reminder of its own glory days.

Now, that doesn't mean that we won't eventually build another Joe rocket...

Sunday, January 15, 2006

Rocket pilots

Before we move on to the launch and flight photos of the Adventure Team Near Space Vehicle (NSV-1), let's get a closer look at the pilots.

As I said in my previous post, I gave the hazardous assignment of test pilot, not to a Joe, but to a Lanard Star Corps figure. "Captain Lanard" was actually an experienced astronaut by the time he climbed into the cockpit of the NSV. He'd already taken several high-altitude flights on my "D-Ranger," a modified (stretched with a payload bay, pointed nose-cone, and 24mm engine mount) Estes Ranger.

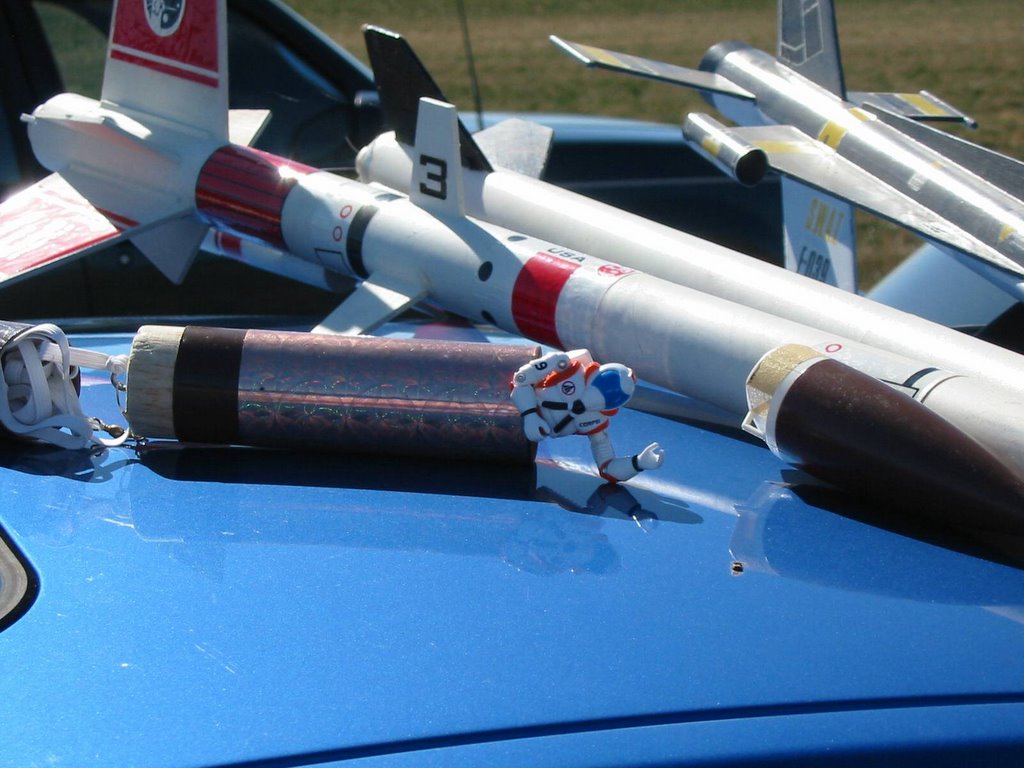
The rockets in the background, for those who are curious, are an Estes Super-Vega, an Estes D-Region Tomahawk (modified from a single 24mm motor mount, to 3 18mm motors), and an Estes S.W.A.T. As you can see, I have a strong preference for "futuristic" models.


This photo was taken at the launch site outside Sheridan, Oregon just after one of the flights. Captain Lanard can be seen climbing from the payload section of the D-Ranger, giving his "all okay" wave.


After these flights, I felt that Captain Lanard deserved to become an honorary member of the Adventure team, and I made him a small version of this AT astronaut patch. It is inspired by the vintage astronaut patch, and incorporates the astronaut flight wings. The symbol was printed on paper, carefully cut out, and affixed to the figure with a drop of super-glue.

But despite Captain Lanard's excellent service, I really wanted to fly with a "real" Joe, and my chance came with the release of the Comic 3-figure pack that included an astronaut (Flash), as well as Short Fuze and Rock N Roll. I initially planned to fly Flash stock, but he seemed a little plain and boring to me, so I had to modify him.


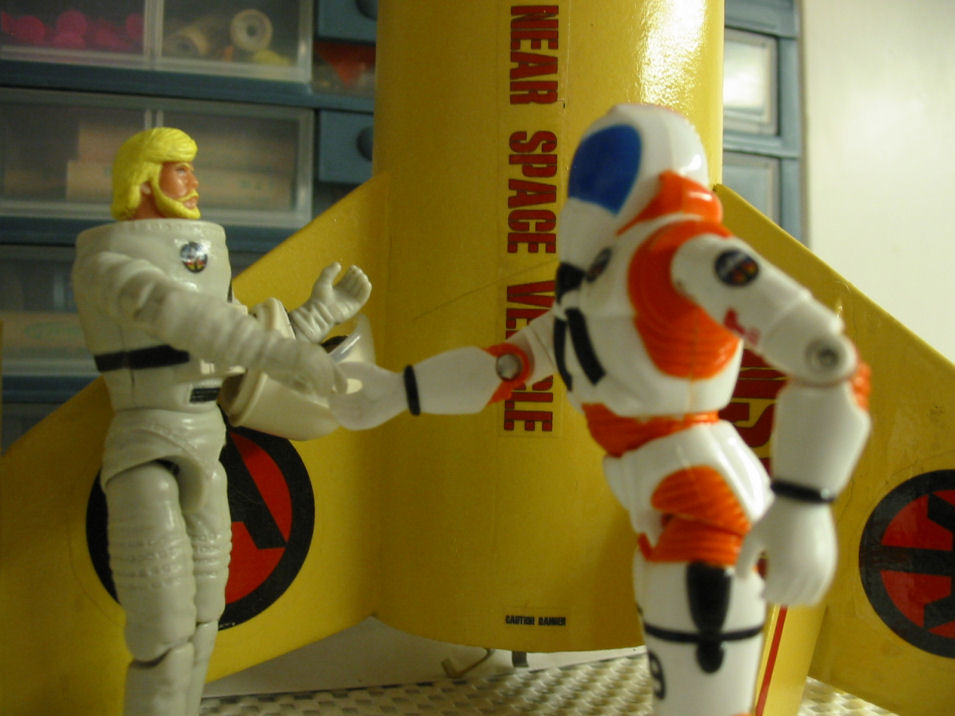
Since he was supposed to be an Adventure Team Astronaut, I figured a beard would be appropriate, and since Rock N Roll had a beard, out came the screwdriver for a quick head-transplant. The Rock N Roll hair is a little long, even for the AT, but I think he looks pretty good. I also used a Sharpie pen to darken in the "padding" around his helmet opening, and added an AT symbol to his chest. The result is my 3 3/4 AT Air-Adventurer Astronaut.


Finally, we see the hand-off as test pilot makes the official delivery and hand-off of the NSV-1 for regular Adventure Team operations. Who says Adventure Team and 3 3/4" Joes don't mix?

Thursday, January 12, 2006

Rocket Joe

First of all, some housekeeping. Thanks to those who have asked about our sick Cat, Banzai. He's still in a bad way, not obviously worse, but not obviously better either. We had an emergency run to the vets yesterday afternoon. I was afraid he had a bladder blockage (which can be quickly fatal in cats) but it turned out to be a false alarm. He got some more IV fluids and is back home again. Still struggling to get food into him, and hoping his other problems will correct themselves. We shall see.

Moving on to more pleasant matters, there's been some discussion over on the Sandbox about the idea of building a Joe launcher to loft parachute Joes to high altitudes. All sorts of systems have been proposed, but a lot of bandwidth has gone to the idea of strapping rockets to a Joe in some fashion.

I've tried to caution folks that this isn't nearly as easy as it might seem to the casual observer. First, Joe is a heavy (as model rockets go) and draggy object. You've got to come up with some way to make him fly straight, and come up with some way to deploy the parachute and you've got to do it while keeping it all light enough to fly (and to avoid the legal complications that going over 16 ounces of total weight will cause, Google "FAR 101" and "rocket" for details).

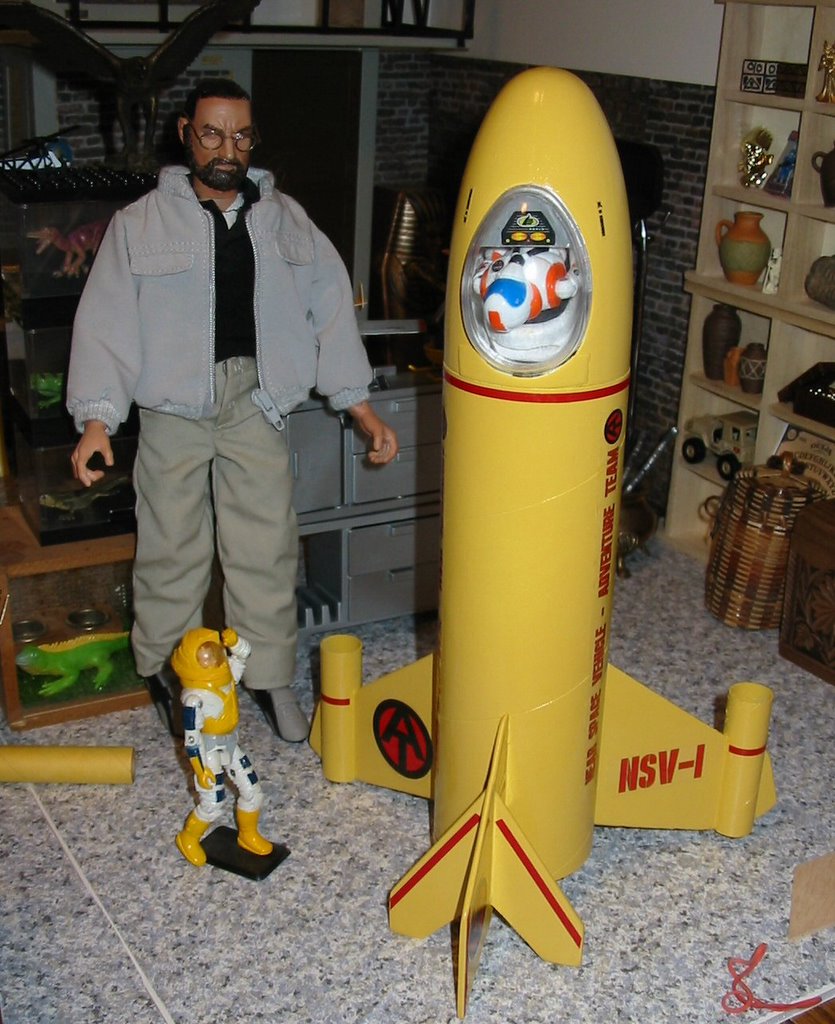
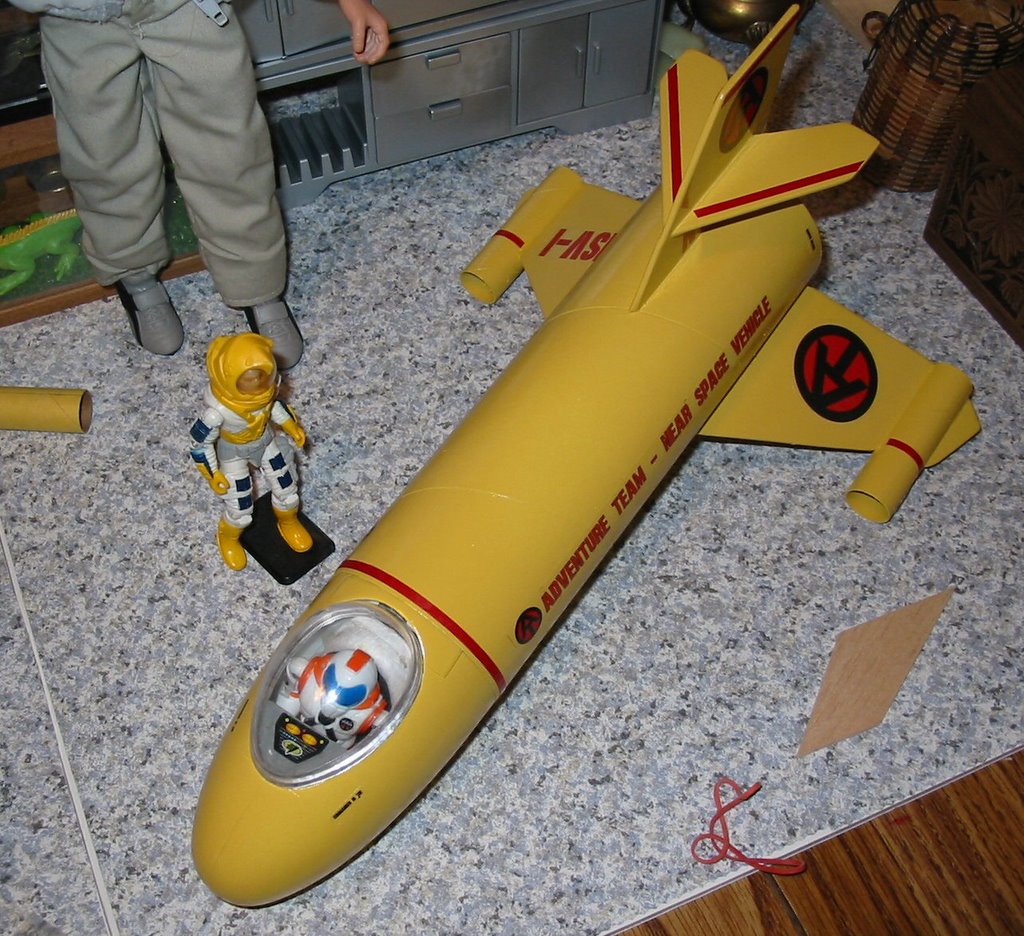
But this is a very attractive idea. I long ago decided that flying a 12" Joe was beyond both my current technical abilities and budget, so a couple years ago I decided to try my hand at launching something in the 3 3/4" Joe format. This is the result, the Adventure Team Near Space Vehicle (NSV-1).


This is modification of the Estes "Fat Boy" rocket kit. I chose it because it had sufficient diameter to put a small Joe inside in a seated position, and frankly, because you could get them cheaply at Wal-Mart at the time.

The original rocket had three identical fins. To these I added the tip extensions, pods (empty tubes) and horizontal stabilizers to increase the fin area (at it turned out, I didn't increase it quite enough, but more on that in a later post) and make it look more "X-Plane" like.


The cockpit was created by cutting a hole in the existing nose cone (blow-molded plastic) and attaching half of a plastic Easter-egg as a canopy. The seat is made from scrap foam, and the control panel from sheet plastic. Making the canopy latch securely (I had to hold the astronaut inside during boost, parachute deployment, and landing) while still being easily removable was actually a lot harder than it sounded. I ended up with a long tab in the back, and a short one in the front. Squeezing the nose side-to-side elongates the hold JUST enough to carefully snap the forward tab out and remove the canopy.

The other major modification was to the engine mount. The stock Fat Boy is designed for 18mm (A-C designation) motors. I changed the mount at accept the more powerful 24mm (D) motors. This was my main reason for the larger fins. The larger, heavier, motor would shift the center-of-gravity to the rear, making the rocket less stable. The astronaut in the front would counter-balance that somewhat, but I was still concerned (justifiably, as it happens). The 18mm motors could still be used with an adapter, and I always intended to use a smaller motor for the initial test flights.

The figure in the cockpit isn't actually a Joe, it's a Lanard "Star Corps" figure, a Joe knock-off. These figures were sold by the gazillions at Wal-Mart a while back, are easy to find in thrift stores, and not worth much to collectors. But I like the looks of them, and that made one an idea "cannon fodder" test pilot. I even super-glued tiny Adventure Team symbols to his space-suit.


The guy in the yellow space-suit was initially supposed to be my pilot. I found him in a thrift store too, but he's "Payload," the version packed only with the monster "Defiant Space Shuttle" GI Joe playset, and worth, as I discovered, a fair-chunk of change. I decided not to risk him on early flights (and at is turns out, that big helmet is too large to fit in my cockpit anyway!).

Yes, it did fly, and I have photos to prove it. I also later replaced my Star Corps pilot with a "real" Joe astronaut, as I'll show in a future post. Stay tuned.

Wednesday, December 14, 2005

Breaking out the luggage


A few more space photos from the archive. This is a cart/trailer that I made inspired by the "Modular Equipment Transporter," a two-wheeled equipment cart used on Apollo 14. It's made from some toy vehicle wheels, some drawer organizers, the handle from a craft-store shovel, and some assorted hardware.

It's appropriate to feature this "space luggage," as I'm leaving tomorrow on a trip to Southern California to visit my son. I'll be gone about a week, and it remains to be seen what (if anything) I'll post while I'm gone.

If I don't post, I'll be home before Christmas, with plenty of time to post a retrospective of some of my favorite 1/6th holiday shots.

See you then.

- Steve

Sunday, December 11, 2005

Lost in space -- again


Of all the posts I've done to date, the ones I've gotten the most reponse to are my 1/6th astronauts and the mention of incomplete space-station project. That darned space station has to be the most famous project never completed. I still get regular emails from people asking about it.

Sadly it got stalled when I went back to work on finishing my home office, and after beind stored in my sun-porch for a while, ended up disassembled. In truth, I'd run into a series of engineering problems that were frustating me, and when (and hopefully if) it gets completed, it may be rebuilt almost from scratch to get around those problems.

Still, it was the grandest thing I've ever tried, and it's worth revisiting some of those photos.

Note the shot with the original Major Matt Mason Space Station shown inside the structure of my larger version. In the later shots, you can see the roof beacon, and the roof-crane (a riff off the way that the MMM Space Crawler could be attached sideways to the Space Station roof to act as a crane). In some shots, I drew in lines on the computer to show where the transparent outer panels would be attached, but I never worked out the details of how those would work.

You can also some of the engineering problems that discouraged me. It was nearly impossible to keep the platforms, made of dozens of connectors and short pieces of pipe, flat and level. Even tiny errors in assembly got magified by the many joints and the circular nature of the structure, so that closing each circle, be it the outer rim of the platform, or the inner rim of the roof section, was an excercise in frustration. I never worked out the details of the transparent panels, and there were many other hurdles to be resolved.

Still, every time I look at these, I want to take another run at it. Where I'd store or display such a big piece, and where I'd take it even for photos (the coastal Northwest is just generally too green to look like the Moon or Mars) are nagging questions though.

Thursday, December 01, 2005

Days of Future Past

There were a few other notable action figures of the 60s that I consider worthy to be compared to GI Joe. One of these was Mattel's Major Matt Mason. Matt Mason was a 6" rubber astronaut figure with "bendy" joints in his otherwise hard-rubber limbs.

The figures themselves were attractive, but unremarkable. The wire inside those bendy joints was infamous for breaking, the visor on Matt's removable helmet was fragile, and for all his wonderful gear, Matt didn't even come with a life-support pack, and therefore had to hold his breath during his several-year stay on the Moon. What made Matt excel as an action figure, in some respects eclipsing GI Joe, was his amazing assortment of gear and vehicles.

The largest of is accessories was the Space Station, a huge, three-story, tree-house in space. The top was enclosed by translucent blue panels, and featured a command chair, storage shelf light-up center console, sink, and two-burner stove. (no microwave oven for 60s-centric Matt!)

Beyond that, Matt had an amazing variety of gear: several battery-operated vehicles, with treads, wheels, and legs, space-probe launchers, weapons, and two varieties of powered exoskeletal armor. This brings me to one of my favorite accessories in the line, the Supernaut Power Limbs.

You can see the original toy in the center inset of the picture at right. Matt (or one of his friends) was strapped into a large backpack that formed the center frame of the device. His feet snapped into foot rests on the inside of the jointed, telescoping, legs (shown retracted in the picture). The two arms were clearly designed for construction. The one on Matt's right, had a serrated claw, and the one on the left had a scooping bucket. The arms were designed so that a child could hold onto the levers at the top of the arm, remotely move the arms, and open and close the "hands" using push-button levers next to the handle. As a bonus, the backpack had a small crane arm and hoist with lifting hook.

Now, this was an idea just ahead of its time. In the 60s, General Electric tried to build a working exoskeleton called "Hardiman," seen at left. Unfortunately, Hardiman was never completed, other than a single arm (that could lift 600 pounds, but thanks to feedback circuits, would allow an operator to pick up an egg without crushing it). Walking, unfortunately, was more of a problem, and then there was the question of how to power it without a long extension cord.

But in the late 60s, the hope was alive, and the Supernaut Power Limbs were a pretty good model for what a real exoskeleton might be like. Now, if you think that the SPL suit looks a lot like the Power Loaders in the movie Aliens, I find it difficult to imagine this is an accident. I'll just bet if you could go back in time, you'd find young James Cameron (or one of his production designers) had a pile of Major Matt Mason toys.

Of course, if you've studied the first picture closely, you have some idea how this relates to 1/6th scale.

Back when I was first getting into the hobby, my first major custom project was to create 12" analogs of the old Major Matt Mason figures, and a few of their toys. Perhaps a few of you remember pictures of the mammoth 12"-scale version of the Space Station I was building from PVC pipe. Like GE's Hardiman,was ever a case of my reach exceeding my grasp. The station ran into more and more problems the closer if came to completion, and work on completing my 1:1 scale office took precedent. I eventually disassembled the station, packed it away, and there it remains. If I get back to the project (and I might) I anticipate I'll start most of it over from scratch.

I did create some decent 12" versions of Matt Mason, kitbashed around Lanard Ultracorps space suits. Late in the project, I found a good-sized stash of Robotix construction toys at a thrift-store. This line is ideally suited to creating sci-fi props for use with 1/6th figures, from things as mundane as shelves and tables, to -- well -- Supernaut Power Limbs.

This was actually a fairly easy project, done in an hour or two, but I think it looks pretty good. It stood about two and a half feet tall, I believe. The legs and arms in this version are fixed (If I did it again, at least the arms would move). The claws, however, were electrically operated from switches on the backpack, which also contained the batteries. One nice improvement over the original, is that the astronaut had some head and face protection in the form of a transparent shield that lowers down from above. Another nice addition is that there were two functional spotlights on either side of the astronaut's head (it's a little difficult to see them in this somewhat fuzzy flash picture).

Like the Space Station, this has since been disassembled and packed away, but with this picture, I could recreate it in just a few minutes, and I now have more Robotix parts, to do an even better job. It might even be possible to add electrical operation to the arms as well.
Impractical or not, some ideas are just too cool to let die.