Thursday, May 11, 2006

What, me post?

I haven't been posting here a lot lately, in part because I've been busy working on Minions for Hire shoots. Of course, I have some behind-the-scenes shots, but since these shoots are for toons that won't be posted for a while yet (I'm trying to hold myself to posting one a week under normal circumstances, in hopes that I'll build up enough of a backlog so I can pull it off like clockwork) I don't want to spoil the toons by posting the back-stage stuff yet. So look for some Minions DVD-extras here on Monday.

The requirements of Minions are inspiring me to create some stock sets and props that you'll probably see over and over as time goes by. Of course, you've already seen the cell-door I built, but there will be others. A major one I'm working on right now is an industrial-looking cat-walk with an open-grid floor.

The catwalk is something I've been meaning to do for a long time. I'm building it around an extruded and stamped plastic screen designed to keep leaves out of gutters. The stuff comes in three-foot sections, and so I'll build a three foot section of catwalk that can be suspended over a set, or used as a setting itself. The plastic screen will be shored up with strips of flat, rectangular molding attached to the side with screws and nuts, and by the hand-rails uprights, which I plan to make from sections of threaded rod.

I'm hoping the final result will be generic enough to look at home in a super-villain lair, a factory, a refinery, or a rocket gantry. If you've ever watched a James Bond movie, you know there are always Minions in the catwalks, where they have spectacular fist-fights with the heroes, be shot and fall over the railing, or just be blown off by explosions. I think I can get a lot of use out of this little prop. I'll post some construction photos, and hopefully this is something that anyone with access to a hardware store and a few hand-tools will easily be able to replicate.

One important development here is that I've replaced my trusty Canon Powershot A40 with a new Canon Powershot A530. It's smaller lighter, has more shooting modes, better movie function, a 4X optical zoom instead of 3X, and most importantly, 5 megapixels instead of 2. I've been very happy with the Canon Powershot family of digital cameras, and I recommend them highly. They take good pictures, and have a lot of control and versatility for compact cameras. I've been impressed with the quality of the optics, the image sensors, and the all-important software that backs the sensor up. They take good pictures. 'Nuff said.

The old camera still works great, and I'll pass it off to my daughter so she has a decent camera to photograph merchandise for her web-store (she does sewing and costume work). 2 megapixels is more than enough for typical web-ad photos.

Meanwhile, to fill the time until I can post some new stuff, here's a golden oldie in honor of the coming summer, to remind you to always wear your bug-lotion.

Monday, May 01, 2006

Minions Extra Feature


As promised, some behind-the-scenes stuff from the latest "Minions" toon posted over at Minions for Hire. This is my employment office set. I thought this came out pretty well, considering how quickly I threw it together. Some notes on the props and set-pieces.

I've used my "universal wall/floor" for the backdrop. This is just a sheet of foamcore board with some shelf-paper stuck to it. I'm getting pretty tired of it, and so are you by now, so I need to make up some new ones for variety. The wood flooring is just a couple of cheap floor tiles I picked up at a dollar store (three for a buck). The "glass" walls are actually a couple of Plexiglas sign holders, a couple of pieces of Plexiglas held in a self-standing wooden base. You can buy these in any office supply, but I got mine for cheap at a thrift store.

The desk is actually a couple of pieces of scrap wood that were used as packing material on some unassembled bookcases I bought last year. They were pre-finished, so all I had to do was find something of the right height to support them. One goes on top, and the other leans against the front. Instant desk. Mind you, I didn't want to take the time to cut down the front one and used it as-found, which is why the desk is so darned tall.

The window is actually a small picture frame, sprayed black, with a photo-copy skyline taped to the back. It hangs on the background using a thumbtack.

The briefcase actually came with a novelty manicure kit (I removed the contents, naturally). I got mine from American Science and Surplus. Item 32646, $3.95 each. (Mind you, you'll need to spend $20-30 on an order for the shipping charges not to eat you alive, but they have lots of cool stuff, so that shouldn't be hard. Or just buy a whole pile of briefcases!)

The phone is a fridge magnet. The in-basket is the lid from a novelty box I got on clearance at a craft store a while back. The wastebasket is a desk-accessory cup I got at Staples office supply. The filing cabinet is a novelty business-car file. These are sold mainly as premium items (there's a business name printed on top) so they're hard to find at retail, but they show up at gift and office supply stores sometimes.

Several items here were just made on my printer. The cut-and-assemble storage boxes with removable lids can be downloaded from Jim's Print-minis. You'll find all sorts of printable props and goodies there. I simply made the sign and desk sign in Microsoft Word and printed them on card-stock. The papers on the desk and in the briefcase were printed in Word as well (three point type), on regular paper, then cut down to size with scissors.

Thursday, April 27, 2006

The Minions get their own blog!

(Update: Since posting this the URL for the Minions has changed. Find them a www.MinionsAtWork.com .

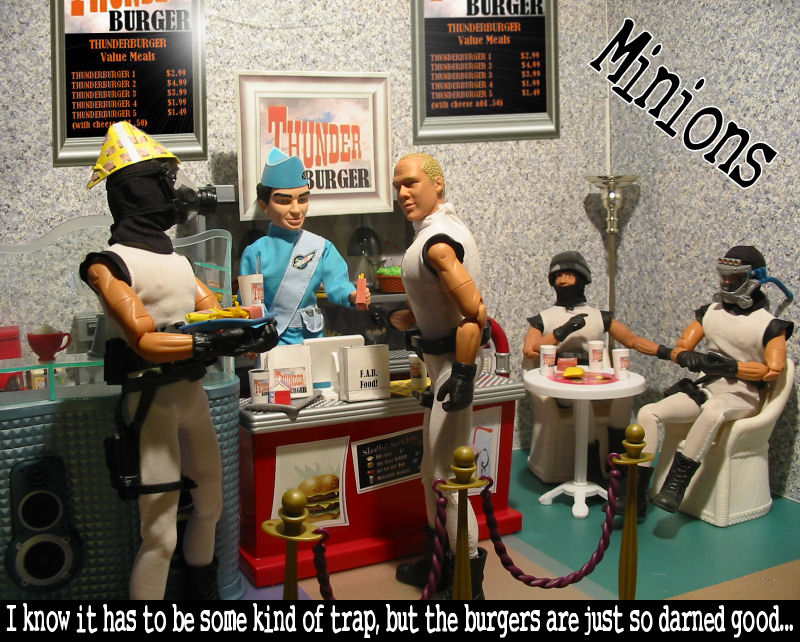
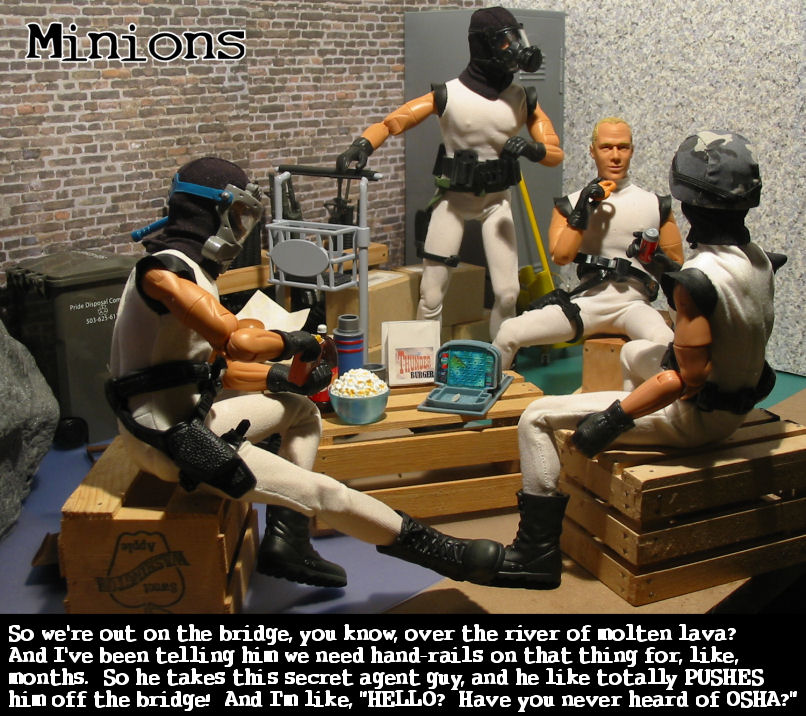
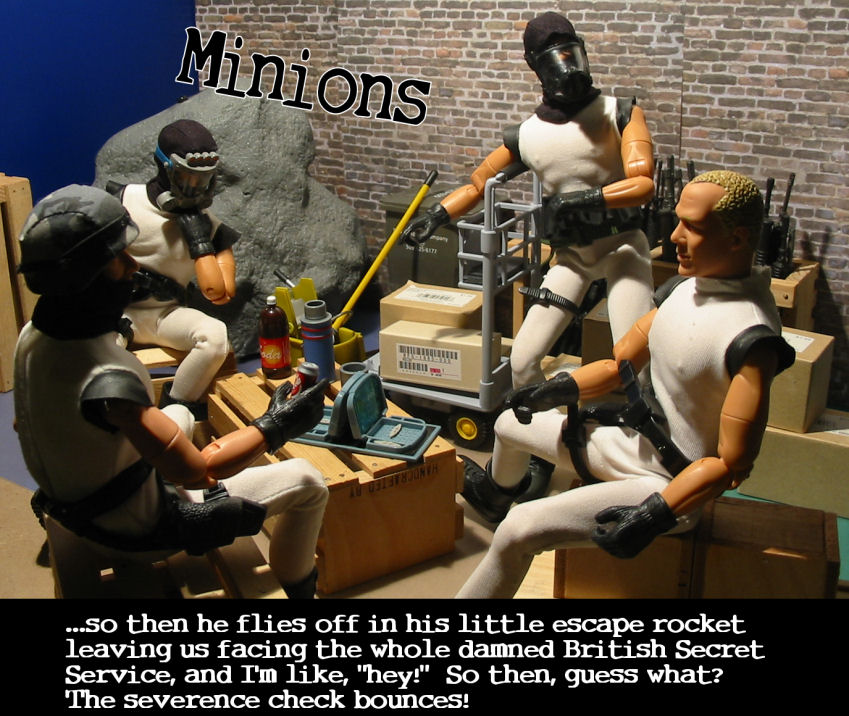
Since I know plenty of people who would doubtless enjoy the Minions toons I've been posting, and since many of them wouldn't necessarily be interested in the rest of what goes on around here, I've decided to give the Minions their own blog. Visit Minions for Hire to see the latest one, just posted.


You'll continue to see some behind-the-scenes Minions material here, such as this. I've decided that there are certain props and set-pieces that would be useful over-and-over in Minions toons, and thus it would be worth putting a bit of effort into making them. I finished the first one tonight, a cell-door for the Minions to (unsuccessfully) guard.

The door is constructed simply enough from a piece of foam-core board. It's trimmed out with wooden coffee stirrers that I snagged for free at the Safeway deli, some of those plastic twist-tie packers from toy packaging, a handle and hasp bent from small aluminum tubing, wooden dowels for bars, some small hex-head screws, and a "padlock" metal charm picked up at a craft store. The whole thing is painted and weathered with acrylic craft paint in various colors to give it a "rusty" look. The flash photo here is just to give you a clear look at it. You can see it with more realistic lighting over on Minions-for-Hire.

In-joke: You may be wondering why the hasp and lock are so shiny when the rest of the door is so rusty looking. Well, I figure people escape from this cell on a regular basis, so they get replaced -- a lot!

Friday, April 21, 2006

Good day for a repaint


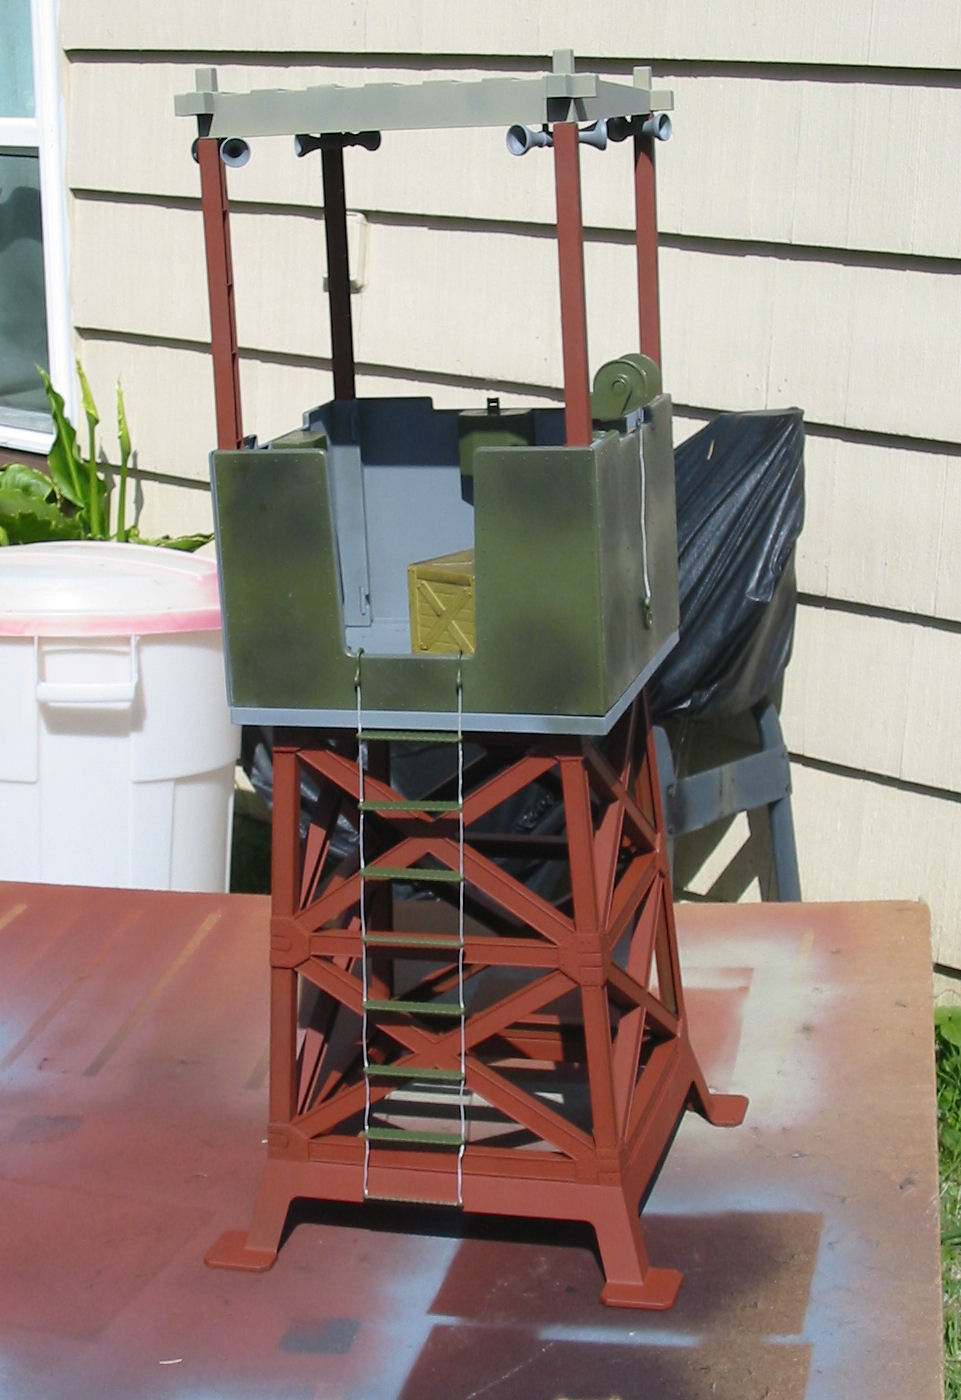
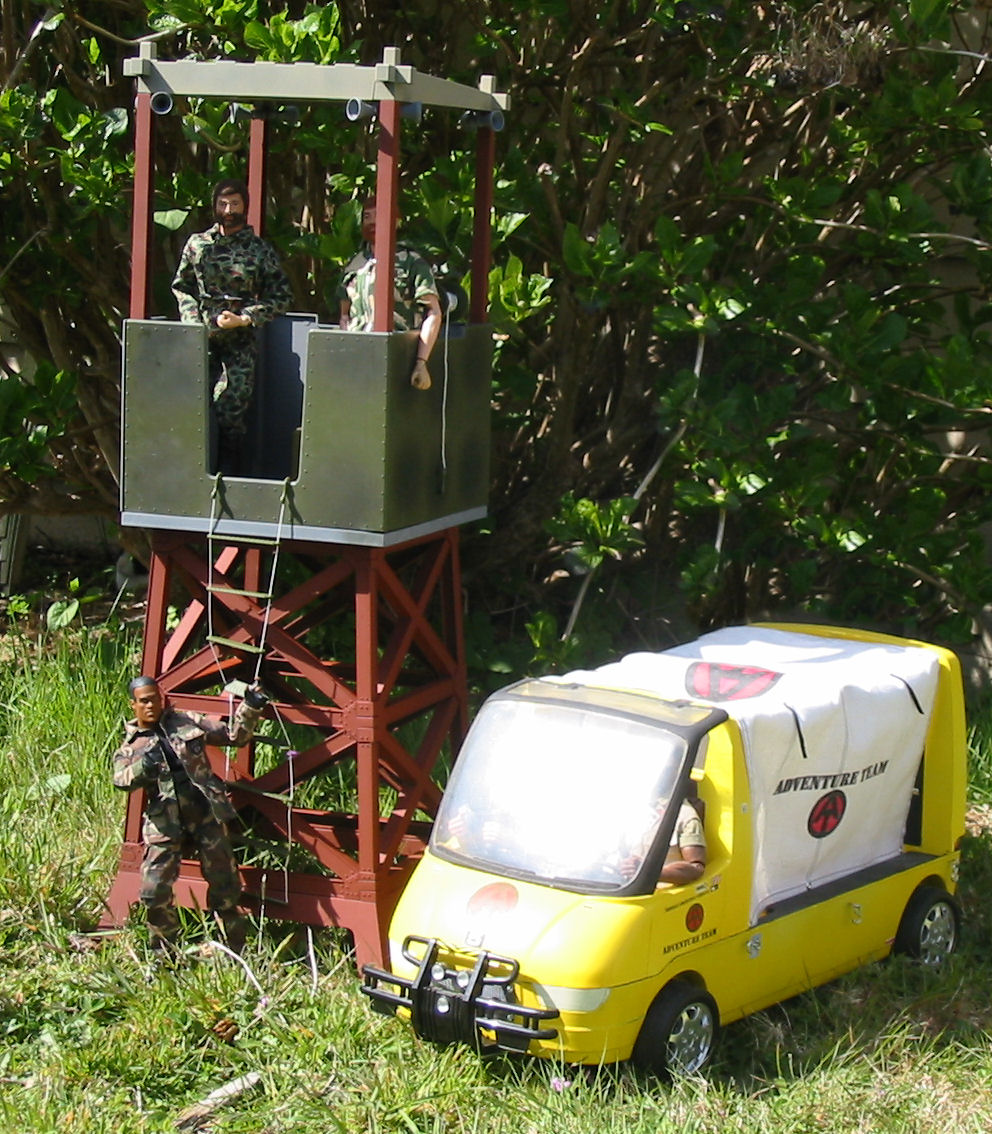
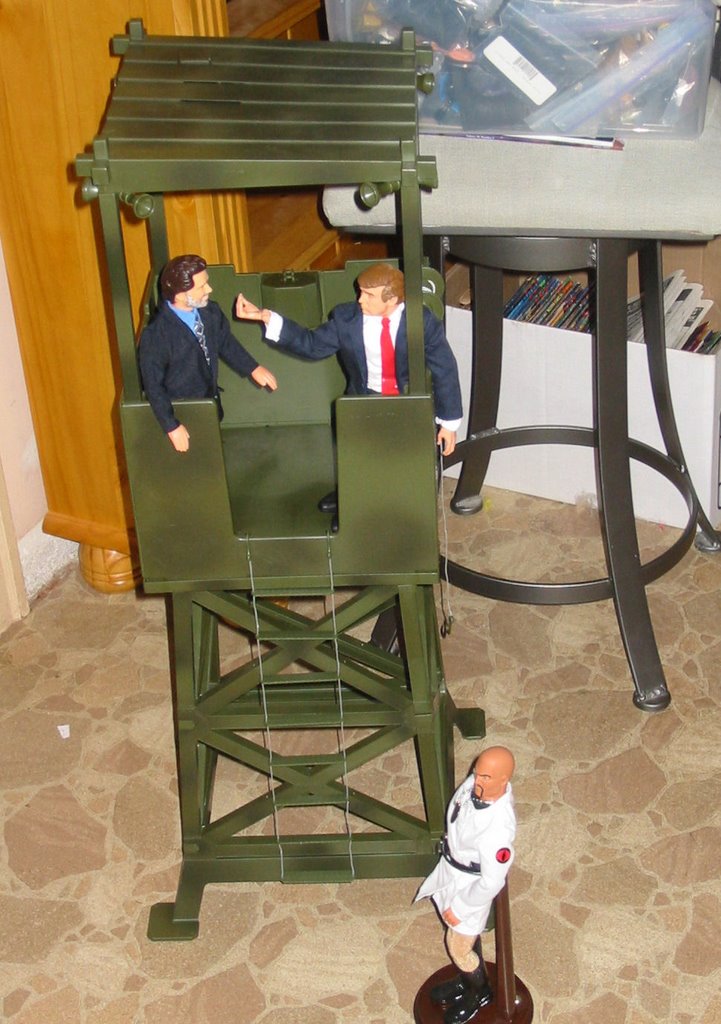
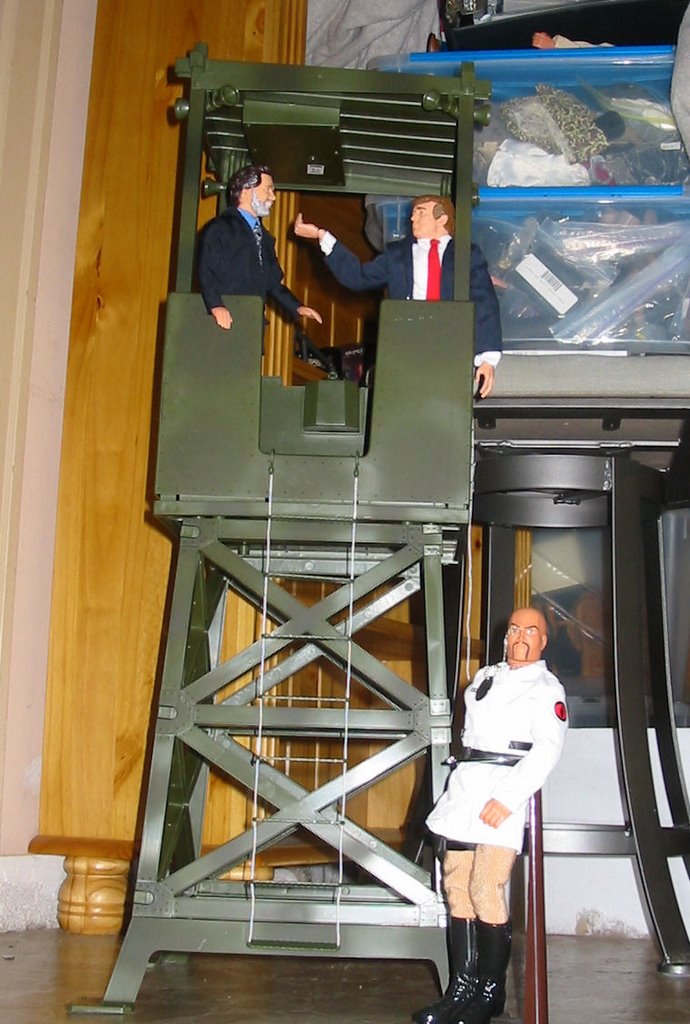
A few weeks ago I was lucky enough to pick up a Power Team guard tower at Goodwill. Much as I liked it, the monochrome dark-green look wasn't working for me. It made it look too plain and toy-like.

Today it was sunny and warm (a rarity around here lately) so I decided to take it out for a quick paint job. Used a combination of red and gray primer along with some dun-colored flat-camo paint. Here's a photo after I put it back together, along with an outdoor shot featuring some AT Joes, old and new.


I'll probably do some more detail painting using a brush, most likely painting the top of the roof-piece weathered silver, to represent corrugated metal.

Tuesday, April 11, 2006

Talk about lighting

There's been some discussion over on the Sandbox lately about photo lighting, prompted by a photo-lighting article in the magazine Fine Scale Modeler. Their techniques emphasize seamless backdrops and defuse lighting. My take was that while this technique works well enough and shows well the details of whatever you're photographing, Joe-photos often benefit from more dramatic lighting.

One friend e-mailed to tell me that the FSM techniques were used by the "Twisted Toyfair Theater" feature in Toyfair magazine. Good enough. But those features are played for broad comedy and emphasize that the things being photographed are toys.

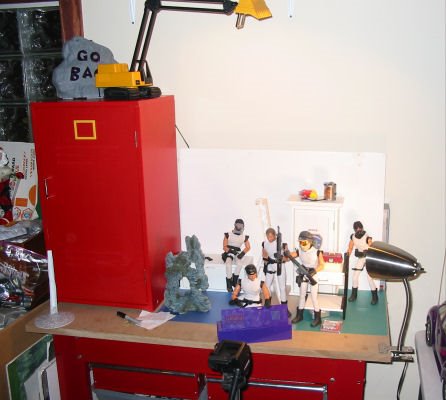
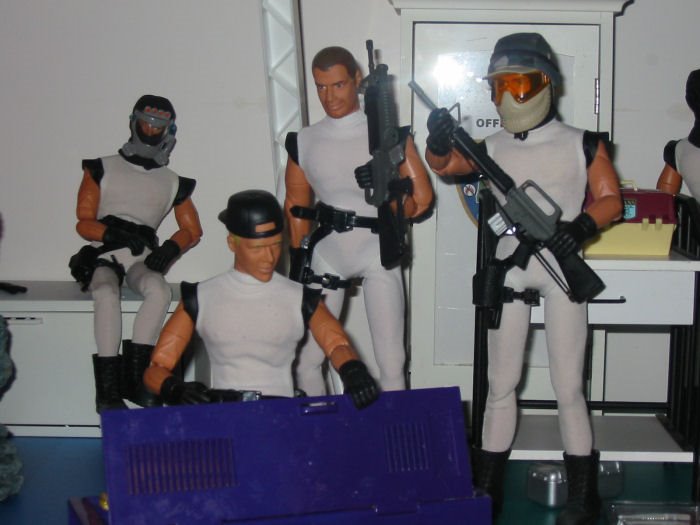
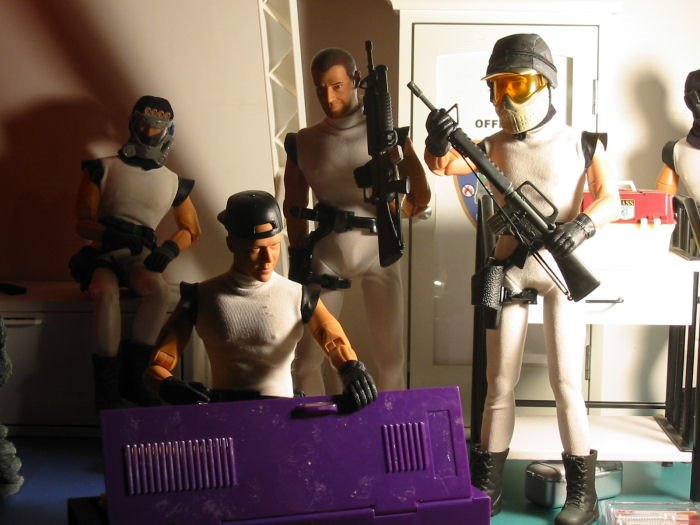
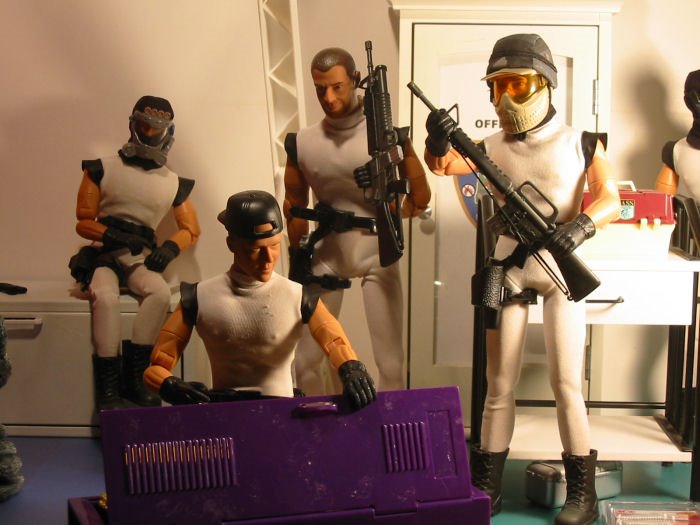
Different lighting techniques can increase realism and enhance mood. To illustrate, I set up some very quick examples of how lighting can greatly change the mood of the shot. I set up a random assembly of my "Minions" figures and some props. (Actually, most of them were already there. I just removed a few things and reposed the figures a bit.)
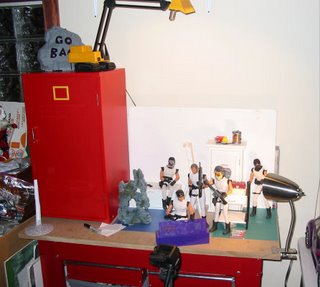


This first shot shows the setup on my bench. There are two main light-sources, a high-intensity arm lamp on top of the cabinet to the left (yes, it looks like a back-hoe) and a small incandescent (60w) goose-neck lamp clamped to the table. The lights are on in this shot, but largely washed out by the on-camera flash.
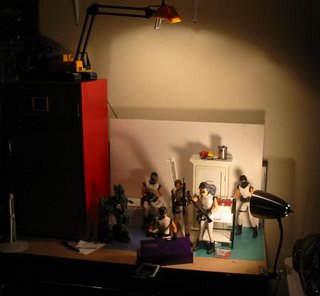


The flash was turned off for most of these shots, as here. You'll see why we turned off the flash in a minute. Since my lighting sources aren't very bright, all of these shots are long exposures (which my Powershot A40 handles very well, though not all digital cameras). For that reason, I used a solid tripod and a ten-second shutter delay (so as to avoid camera-shake when I pressed the button). I like time exposures, as they keep the lights low-power and low heat. They also allow for some nifty tricks if you know what you're doing.

As for camera settings, other than the things I've mentioned (flash-off, shutter-delay), I let it handle its own exposure settings. It does a good job, though you could get different results by fiddling with them manually.
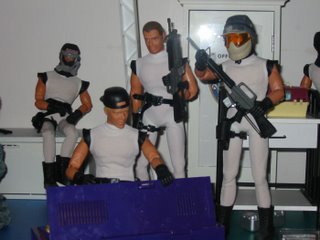


This first example simply uses the on-camera flash. Note that the lighting is very flat, in more ways than one. There's no sense of depth here. The background could be right behind the front characters instead of the foot or so that it really is. There's no texture in the uniforms, and the faces look plastic and artificial. There's also a reflected flare off the glass door in the background. Though you could use something like that as an effect, it's generally not something you want.
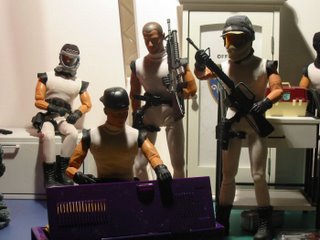


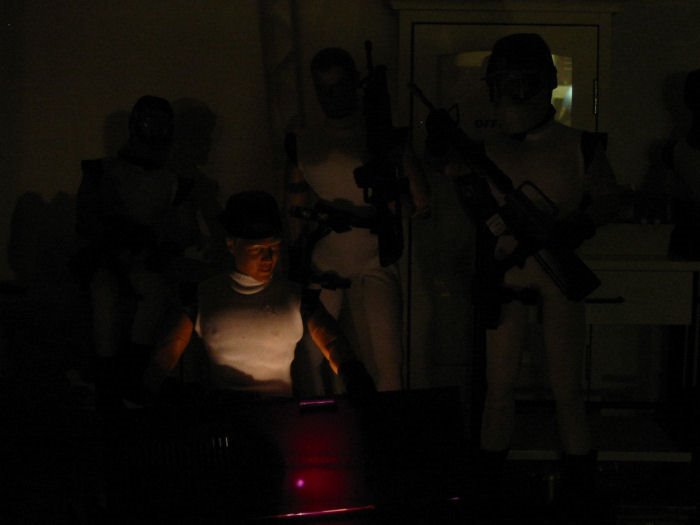
This next shot uses only the high-intensity arm-light, located above and behind the main-figures. This gives us a strong back-light with a lot of soft fill reflected off the white wall and props.

You can see there's a huge difference. Suddenly we have depth. The shadows and reflections make things "pop" as 3-D, and add plenty of drama. Trouble is, the HI light is harsh, making plastic look like plastic, and the position leaves faces in shadow. Maybe we want them in shadow, if these are supposed to be anonymous folks skulking about, but let's say we want to put emphasis on them as characters.

We'll get to that in a minute, but one more thing about this. Notice how the strong "light of god" attracts your attention up to the source of the light. Is there a hole blown in the roof? Is there a helicopter up there? There's a feeling that what's really important here is somewhere else, off-camera. Again, if that's what you want to do, great. If not...
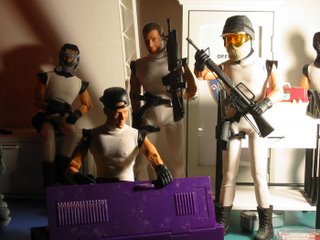


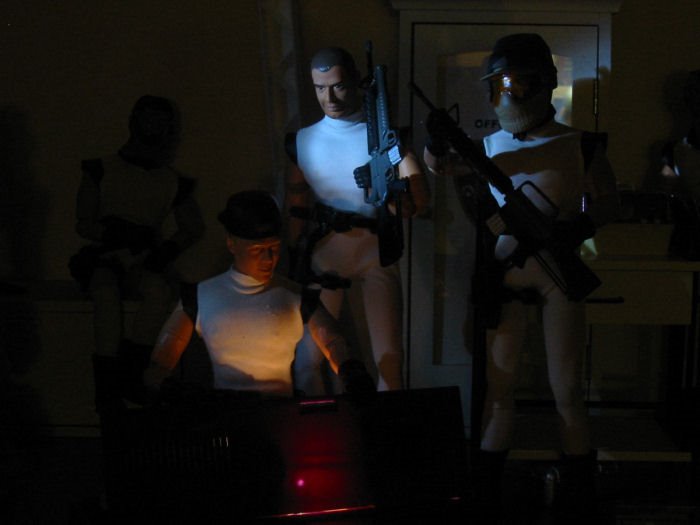
This shot uses only the clip lamp on the right of the bench. Again, depth. Again, dramatic. But this is totally different.

The incandescent bulb is more defuse and warmer than the HI light, making the plastic look less plastic. The faces are not only lit, but the dramatic shadows really add depth, mood, and character to the faces.

Because the light is close and bright though, it "blooms-out" on the right of the picture. It draws your attention, but less-so that the overhead light because your eye is drawn to those faces. Notice too how the angle of the light really brings out the textures in the uniforms and adds to the realism.
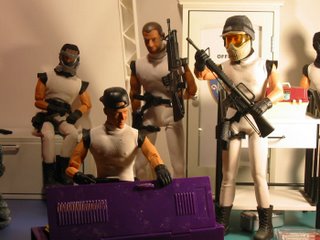

Now we start mixing light-sources. We're still using the clip-light on the right, but now I've turned the overhead HI light on and turned it to shine on the white wall behind it and a white shelf-overhead. The result is a dim, soft, fill-light that is mainly visible in the background and in the shadowed areas.

Notice that the figure in the background suddenly seems more important, and what they guys in the foreground are doing, less-so. It's much less spooky, but this shot still has nice texture and depth. If you were playing for comedy or casual drama, this might be a good setup.
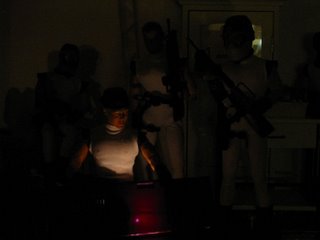


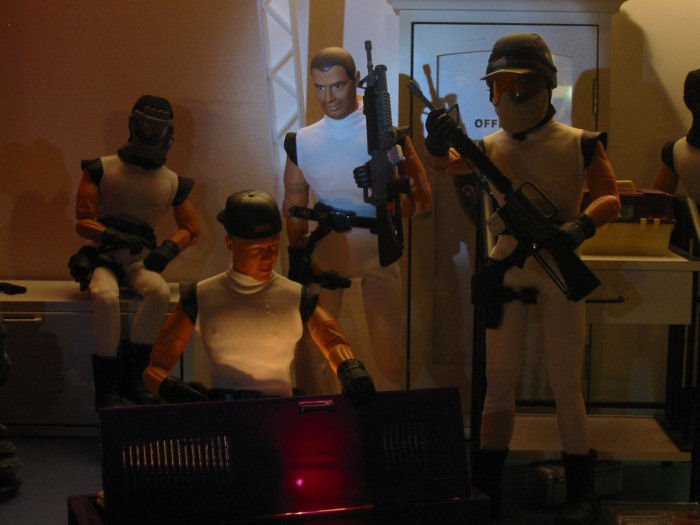
Now we're going to play with two other light sources that I haven't mentioned yet. Here's the first one, a small (two AA cell) incandescent lantern-type emergency light hidden behind the door of the locker. Basically it's a bare bulb with a tiny bit of diffusion. There's also a tiny bit of fill light on the background here, basically reflected lights from the dimly-lit office. The bit of greenish light in the upper right quadrant of the picture is the far wall of the office reflected in that glass door.

Obviously, this puts all the emphasis on the figure opening the locker, though there's just enough light to show you that there are things and people around him.

This is part of why I like time exposure. A light like my little lantern would likely be way too dim for a normal hand-held snapshot.
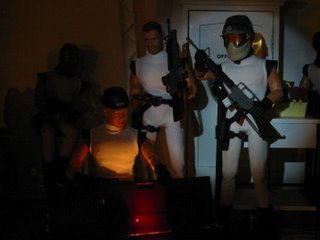


Now we add one more new light-source, a small single-LED flashlight. It provides a somewhat focused circle of bluish light that suggests it could be coming from an in-the-scene light source, such as a flashlight or spotlight, invisible just off camera.

The flashlight is actually near the camera and just to the side, so the lighting is rather flat. By aiming it low, it reveals the figures behind without drawing undue attention to them (the faces are in shadow).
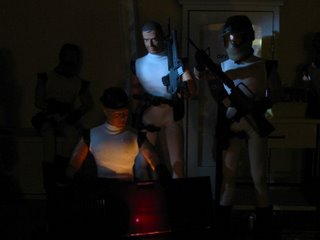


Here's the LED flashlight again, but this time I've moved it off to one side for more dramatic shadows, and aimed it at the face of one of the figures standing behind the lead-Minion. Again, the emphasis shifts to him watching. Is he delighted at what he sees? Alarmed? Is he planning to steal it? Clearly, something is up. The lighting says so.
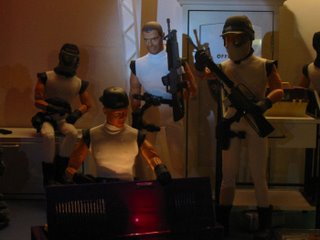


Finally, we add a soft bounce-fill from the overhead light to the previous elements. The emphasis is still on the two foreground characters, but we're aware of their surroundings (which are far less frightening) and the people around them. Still moody, but far less sense of dread. One nice touch is the variety of colors provided by the different light-sources, though all are what you'd think of as "white" in other circumstances.

So there you go, a lot of different results using some pretty simple equipment that most anyone would have around. This isn't intended to be an instructional feature, just some examples that my inspire you to experiment on your own.

Tuesday, April 04, 2006

Saturday, April 01, 2006

Sunday, March 26, 2006

Weekend finds


I confess, I do love to shop. This Saturday I drove into Salem, Oregon, to see my niece's last high-school play (she's about to graduate) and managed to slip in a few hours of shopping time. Not only did I find the solar yard lights and the new TV stand I was looking for, but I also snagged a couple of good 1/6th deals.

The first was a Goodwill find, a huge set of plastic bags taped together which obviously had all or most of a Power Team lookout tower. I've been looking at these for a while, but they've never quite seemed worth the expense to me. But when I saw this bag marked at $12.99, I obviously couldn't pass on it. I grabbed it and ran for the checkout without examining it further. There were clearly some helmets and weapons and other items in there, but I just considered it gravy and didn't inspect closely.

Only later did I untape the two bags for a closer look, and discovered that, not only did I have the tower, I also had a Power Team "Military Life" play set! While the tower seems to be missing a couple pieces (the weapons, which I probably wouldn't have mounted for AT duty anyhow), the Military Life set seems complete, and many of the accessories were still in unopened bags! The bunk had never been assembled, and a clear rubber band still held the locker closed (with the bag of soft-goods still inside). I already have two Military Life sets and have been thinking about getting another, so this is excellent. The local AT now has a serious bunk-room available.


My other find was at Big Lots. Most of the Power Team (except for some Trailwalker sets on a high shelf) stuff was gone, and Joe was missing in action. But I did spot a stack of boxes, and the name "Dennis Miller" caught my eye. Sure enough, it was a stack of 12" talking Dennis Miller figures, all marked at $5. The figure looked like crap (a decent head on a sub-Ken doll body) but for $5, the suit looks good. I took home two.

Add this to the "Unknown Soldier" and Donald Trump I picked up at Tuesday Morning, and suddenly I have a bunch of excellent suits available for kitbashing.

The Dennis suit isn't as nice as the Donald's (not quite as crisp, Velcro closures, and the shirt has no sleeves under the coat) but it's decent, and unlike Donald, Dennis has real socks and shoes (Trump's are molded on). But both are excellent for the bucks, even if you toss the figures straight into the trash.

Overall, a good Joe day.

Friday, March 24, 2006

A V-22 Osprey for Joe?

Today I've decided to talk about the scaling of Joe-sized vehicles. In more contemporary terms, this is a source of great controversy. Many fans of accurate military Joes have complained about vehicles sold as "1/6th scale" which are in fact a good deal smaller. Some of the more notorious are the 21st Century Bradley Fighting Vehicle, the Hasbro M8 armored car, and the 21st Century Little Bird. Most of these vehicles were 1/8th scale or smaller, and that made a lot of people unhappy.

But the fact is, most military (and civilian) vehicles are simply too large to be practical as mass-market items in true 1/6th scale. An F-22 Raptor scales over ten feet long. An M1A1 Abrams tank would be over five feet long and two feet wide. A Chinook cargo helicopter (including rotors) would be sixteen and half feet long! You aren't going to find these on the shelves at Wal-Mart any time soon. So something has to give. Either the vehicles have to be made smaller than scale, or they don't get made at all.

Fact is, shrunken vehicles are part of the great history of our hobby. Yet there's more than one way to shrink a vehicle, as we'll soon see. Other than just anal attention to scale, one of the major complaints about the not-quite 1/6th vehicles I mentioned above is that they didn't work well with figures. Pilots have to be jammed into the front of the Little Bird (which didn't even have room to include the pedals). The M8 really doesn't have room for a driver with legs attached, and troops don't fit well in the Bradley.

Fact is, near as I can tell, these vehicles are more or less scale, just not the scale people wanted. They were reduced, in all dimensions, to fit some arbitrary specification (to fit a box, or to be produced at some price point, or to fit a shelf, or to be shippable).

But that isn't the only way to do things. The other way, the better way I think, is "selective compression." Selective compression reduces dimensions individually with an eye to both the requirements and the intended use. For instance, if the goal is to make a vehicle fit in a box 48" long, the engine compartment might be reduced in size, leaving the cab area unchanged and large enough for a full-scale figure. Of the dimensions of the vehicle might all be reduced, and then the roof-height increased enough so the figure will fit.


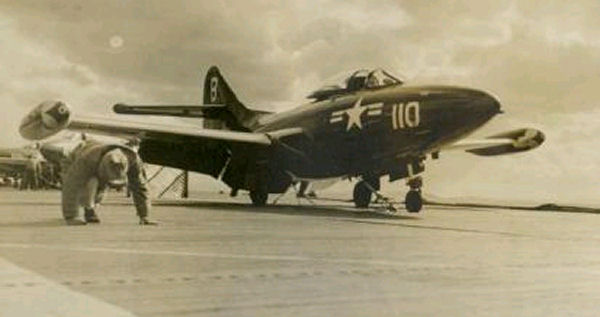
When done well, one can hugely change the dimensions of a vehicle and still capture "look and feel" of the original. One classic example, even if it takes things to extremes, is the vintage Irwin Panther jet airplane seen below, along with the real-life Grumman Panther jet on which is it based.

Mind you, not a single dimension or line of the jet remains unchanged. In fact, a scale Panther jet would have a length and wing-span both over six feet! I don't have the dimensions of the Irwin Jet, but I'd guess it's under a third of that. Yet there is no doubt that one plane is based on the other. Irwin designers boiled the panther down to a form that preserved its essence, but that a child could pick-up and fly around the room. On top of that it would hold (just barely) a 1/6th GI Joe figure.


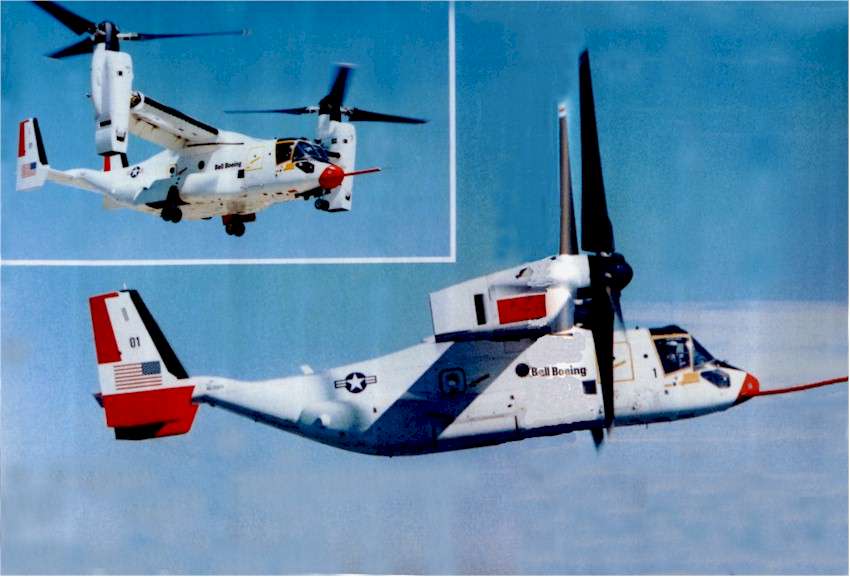
Let's try applying these principles to a modern military vehicle that seems very Joe-worthy, the V-22 Osprey tilt-rotor. The Osprey is a cutting-edge hybrid vehicle combining some of the best features of a helicopter and a fixed-wing cargo airplane. It can fly rapidly and smoothly to a distant target, hover or land vertically to deploy or recover troops, and then fly rapidly back to base. It's an ambitious aircraft that's had it's share of problems, but if the bugs can be worked out its truly revolutionary.

Trouble is, for Joe purposes, it's just way too big. Each rotor alone would be over six-feet in diameter! The fuselage would be nearly six feet long. The span, including rotors, would be almost 14 feet! Young Hercules himself couldn't lift this monster and fly it around the room, even if he had a room big enough.

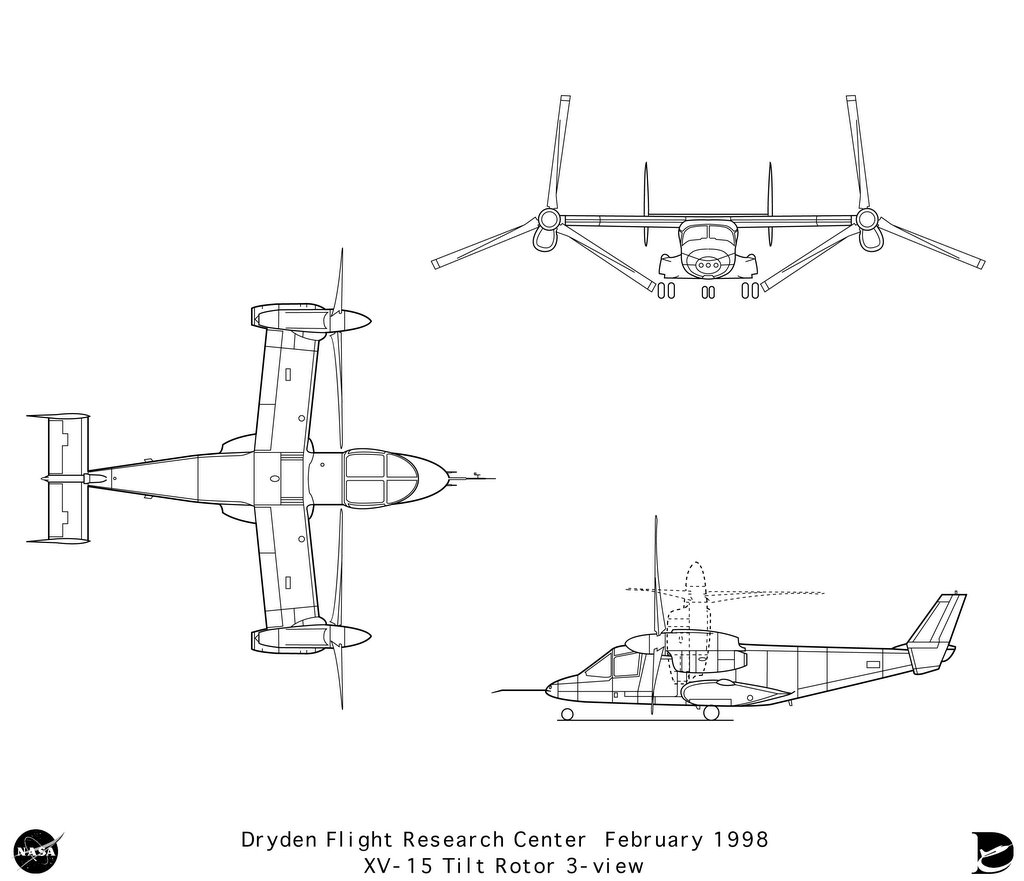
So, how to make a "kid friendly" version that would fit Joe and still be recognizable ? Well, my first move is to drop the V-22 entirely, and go to its predecessor, the experiment XV-15. Though the two vehicles look a lot alike, the XV-15 is already 20% smaller. Still not nearly small enough, but that 20% is something we don't have to cut.


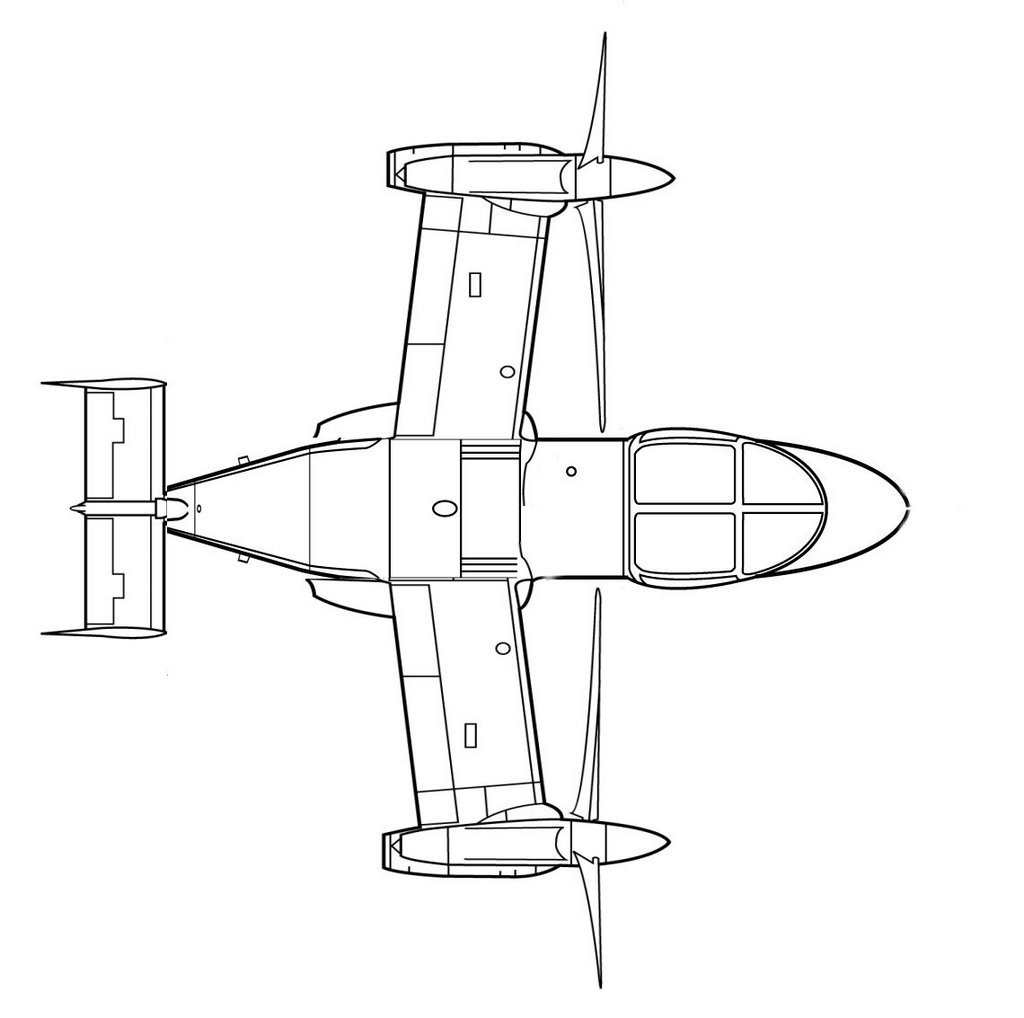
Here's a 3-view drawing of the XV-15, courtesy of NASA. I used this (specifically, the top view) as the basis of my compression. My first move was to load it into my paint program and chop it into individual parts: cockpit, wings, rotors, tail-cone, tail surfaces, rotors.

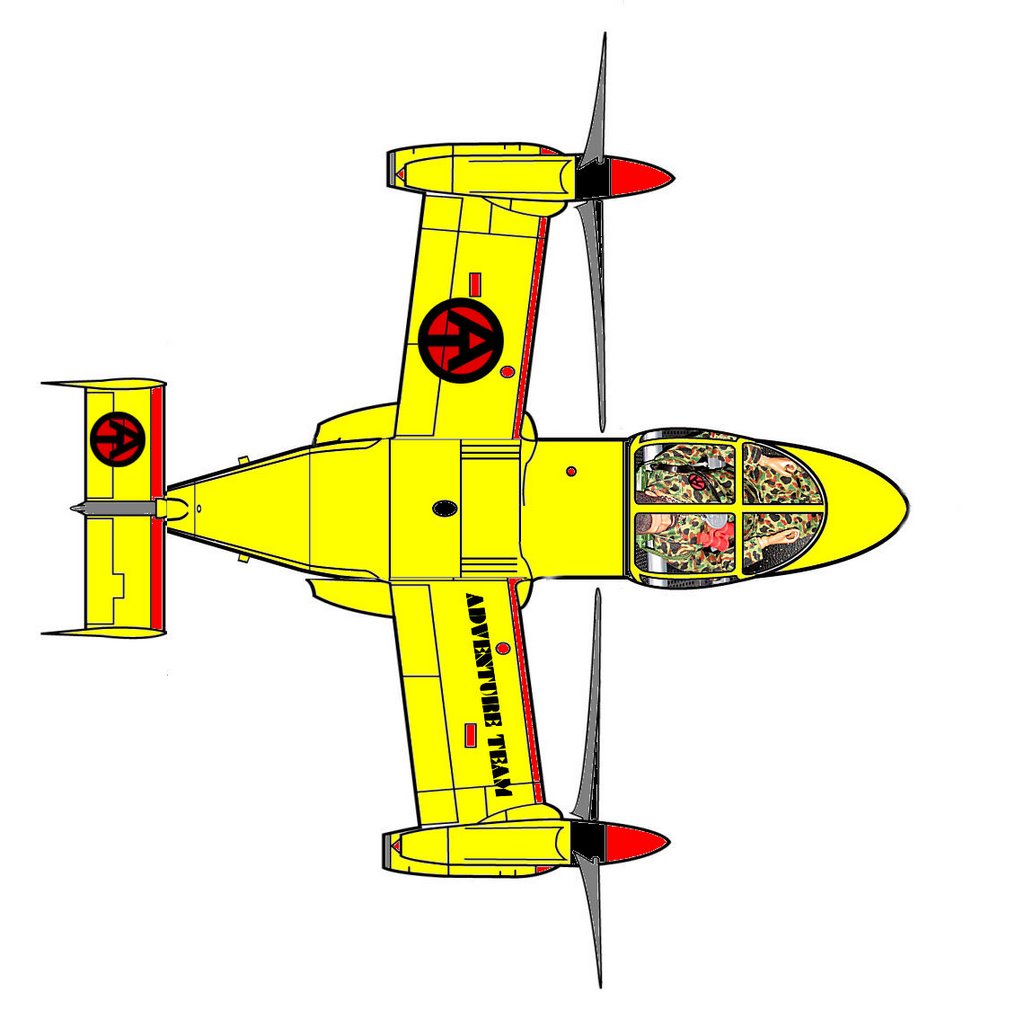
Then I started eliminating anything that wasn't necessary. The straight sections of the fuselage fore and aft of the wing were cut out and discarded. The tail was still too long, so I shortened it a bit, and then shrunk the tail surfaces. The wings were made smaller as well. The engines weren't reduced quite as much, but the rotors were made much smaller. The original V-22 has a large cockpit for two flight crew sitting side by side, but I'm assuming the Joe version will have a single seat in the middle. Suddenly, things overall can be MUCH smaller.


What's left still has the recognizable flavor of the V-22, but it's a fraction of the size, I'm guessing about three-feet long. That's still big by kid-standards, but perhaps not impossibly so. (A Sigma-6 or 3 3/4" version would make a very attractive retail product.) The tail and wings would be removable for storage (or for the retail box).


Of course, by now the question that must be burning in all your brains is, "Steve, what does the Adventure Team version look like? Glad you asked...


What's the point of all this, designing a toy that will never be made for a line that no longer exists? I'm not sure, really, except that it's in the spirit of the toys I loved as a kid. Maybe I can't be ten again, and find this thing under my Christmas tree, but I can at least imagine...

Monday, March 20, 2006

Minions! We got minions!

It's been a while since I posted here. Sorry about that. We had a new front door installed last week, and that's put me on a bit of a home improvement kick. I put up new curtain-rods in the living room (and curtains, that my wife picked up), installed new fire alarms, and have been doing some serious reorganization of the clutter, much of it Joe-related.

You see, while I was in deadline hell over the last year-and-a-half, one of my few escapes was retail therapy. I'd go out and hit the local Goodwill, looking mainly for Joes or 1/6th scale props and accessories. Several times a week, I'd find something and bring it home. Once I got home, it was straight back to work, meaning that the thing I'd bought just got tossed somewhere. I also did trades and shopped on-line. Same deal. Get it home, put it -- somewhere. Ignore it.

This stuff if the cholesterol of our household circulatory system. My wife didn't know what to do with it, her attempts to do something with it just made things worse (lots of poorly packed boxes of unsorted stuff), and then we got into double deadline-hell mode with both of us on book deadlines (me on Conan and Mechwarrior, her on Alias). With Chris also working a full-time office job, housework around here has become more rumor than fact. For the most part, we couldn't even afford the interruption to pay somebody to come do it. So the place is a disaster area, mostly thanks to me and Joe. The worst areas have been my office and the dining room, which have become catch-alls, and look more like warehouses than rooms in a house.

So, we've given away some over-large furniture to make some maneuvering room, bought a new, smaller dining set that I haven't had time to assemble yet, and I'm just tunneling through the clutter. I've made huge strides in the office ("look, there's floor under there!") and the dining room, and I'm finding stuff I'd forgotten I'd bought. Through a process of sorting and repacking, I think I can probably halve the volume, and hopefully I'll get the construction materials out of the garage so I can put most of this stuff out there where it belongs, not in our living space. That's my goal for the summer anyway.

Of course, that doesn't mean you can't take a few minutes out to play with your Joes. As one pauses, looks around at all the work to be done, one starts to think, "I could really use some mindless, expendable, and interchangeable minions..."


What world-dominating super-villain, be they Goldfinger, Darth Vader, or Cobra Commander, can get by without minions? Darned useful they are, and as any hero can tell you, they make better targets than ducks in a shooting gallery. But minions are hard to come by in the 1/6th world. Oh, there are some troops in Hasbro's 12" Cobra lines, but it was hard to put together enough of them to really be effective as minions. Maybe better you should make your own.
Here's the thing about minions. Minions don't need to be cool. In fact, a bit of dorkiness is a good thing for the drones that keep your secret missile silo or nuclear reactor going. They don't need the best gear, because most of the time they're seen only in passing, or from a distance, or in a crowd, or flying through the air because the missile silo/nuclear reactor just exploded thanks to our hero. What's more important is that they be somewhat uniform. Heck, if they had much in the way of individuality, we might actually have sympathy for them as we blow them away, and that's not a good thing in this formula.

So, my suggestion when making minions is to look around and figure out what it is you have too many of, and especially what you have too many of and don't like or will never use. Not realistic? Looks goofy? Doesn't matter. If you've go multiples, it's minion material!

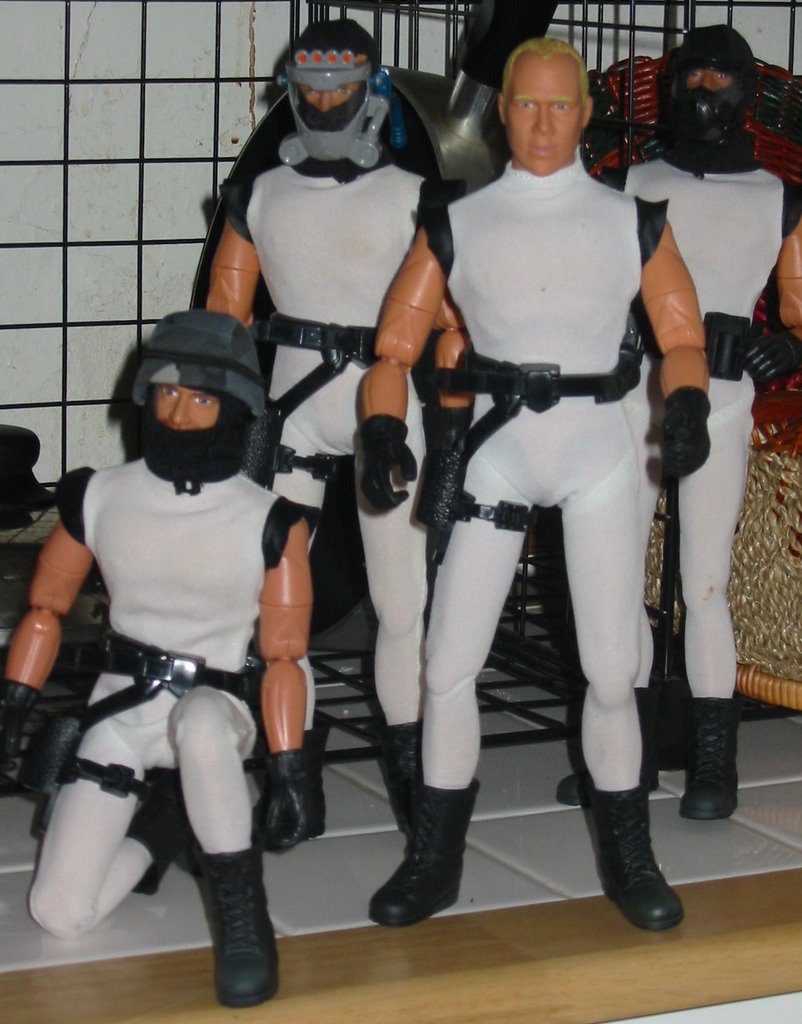
First, you need base figures. Just about anything will do, and you could use the cheapest Action Man knock-offs you have laying around, but I went a different way. I had an number of G3 Power Team bodies with black gloved hands and less-than-wonderful head-sculpts. The gloves were a good minion accessory, and there was a good chance I'd be hiding their faces anyway. So my minions sacrafice nothing in the way of articulation.

As for the rest, during my clean-up, I realized that I'd bought a lot of storms Shadows at Goodwill. I mean a lot. At the moment, I count eight nude storms Shadows stacked up in my office closet waiting for some unknown future project (or trade).

Why so many? Well, ask Rudy. Hasbro made huge numbers of those Snake Eyes/Storm Shadow two-packs and they were sold as loss-leaders. For the last six to eight months, those have been cycling out of kids rooms and into thrift stores. Mind you, you may find an occasional Snake Eyes, but they don't show up in equal numbers. At some point the kids pick their favorite, and Storm Shadow has to go. Good move kids. What kind of idiot ninja dresses in white anyhow?

So anyway, enough were dressed that I have five or so jumpsuits, and several of those still had their gun-belts, so that became the basis of my minion uniform. For boots, I picked the basic, early release Power Team, black combat boots. I just don't like the looks of these, but for minions, they're fine. Finally, all but my "officer" get black balaclavas, another thing I have lots of and rarely use. Minion often have their face covered anyway. Beyond that, several of them have been issued gas-masks of various sorts so as not to be killed by the fumes from the rocket fuel/reactor coolant.

The minions are still a work in progress. My officer could still use some kind of head-gear (maybe headphones, I like his widow's peak and hate to cover it), and none of them are armed (still looking for my box of pistols, though I suspect this will be a good use for over-sized Hasbro .45s). I may add a few other accessories if I can find the right stuff in bulk, and it would be nice if they all had matching gas-masks.

So, got any minions? Want to make some? Send me pictures, and I'll post them here.

Tuesday, March 14, 2006

Temple guardians (a how-to)


If you read my writing blog, Multiplex of the Mind, you may have seen this recent post about my intention to build an interesting garden feature as a tribute to my departed kitty-friend Banzai. My idea is to build a (roughly) 1/6th scale "lost tomb of Banzai" out of paving stones, earth and plantings. It actually will be built over his burial-place, currently just marked with some old bricks.

Some friends of mine bury all their cats (and they've had lots over the years) in

their yard, and mark each with a special plant. But plants die (as they discovered to their distress recently when the plant marking a favorite cat's grave went south on them). Besides, a plant is just a plant as far as I'm concerned. I'm thinking about the far-future here.

So I've been staring at various kinds of stone and brainstorming what this would look like and how I'd build it. Once thing I wanted was for it to have some statuary and carvings. But how to do that? There are all kinds of lawn statuary, but most are the wrong scale for my tomb, and most are painted in a way that I'd have to undo anyway. I also needed something that looked like it could have been carved thousands of years ago by some lost civilization of cat-worshipers. Here's what I came up with:

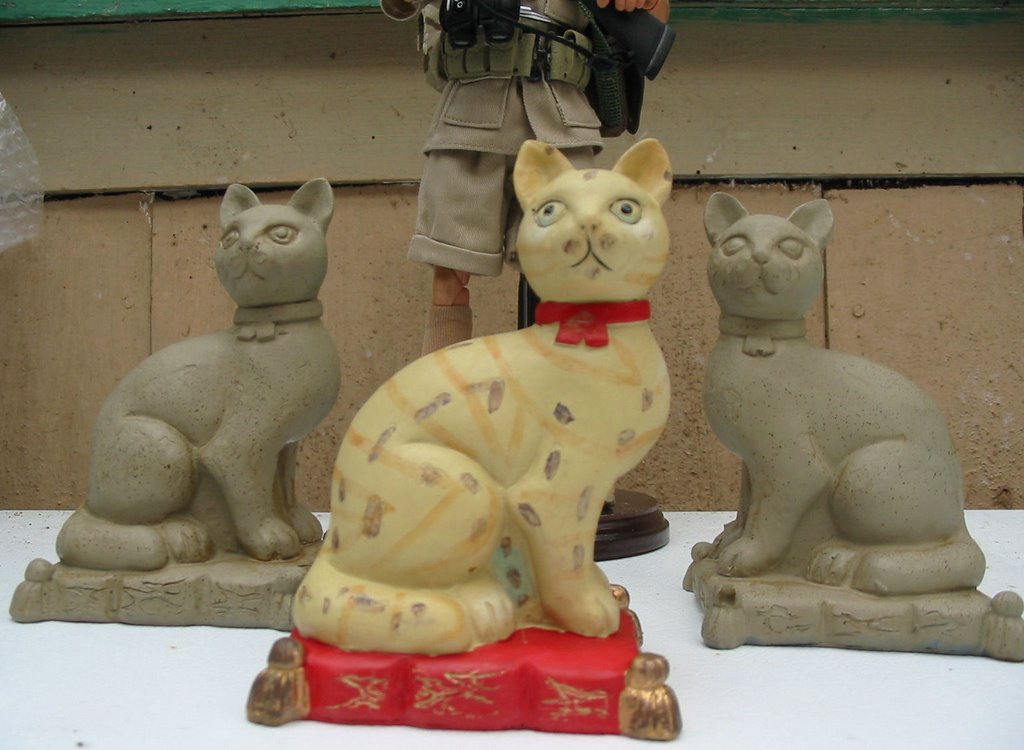
I think these look pretty good, but I'm almost ashamed of how little they cost. In actuality, my stone statues are actually a couple of cheap and garish resin-cast statues that I bought at a dollar store. See the second picture for what I started with.

I almost passed on these, but something about the shape caught my eye, and I gave them another look. Resin, cheap or not, should be durable enough to last a good long time outside, and the scale was good. I bought six of them, thinking that would allow me to mess things up experimenting on a few of them, but the first pair turned out pretty well I think. Here's how I did it, in case you'd like to turn some cheap resin of your own into ancient statuary.

First, I sprayed them with gray primer to make sure the shape was as good as I thought it was. I was quite satisfied with the result, but it looked nothing like stone. So after searching around, I got some camouflage color spray paint in a color called "Khaki."

A good coat or two over the gray gave it a much better color, but it still didn't look like stone. To do that, I took a can of brown spray paint and sprayed it into the air several feet over the cats. A cloud of brown particles drifted down, adding dark flecks that suddenly make them look like stone. New stone unfortunately. They needed to be aged.

I boiled up some water in the kettle, threw a couple of Lipton tea-bags in a cup, brewed up the thickest, nastiest cup of tea you've ever seen, and broke out a small paint brush.

First, I washed a coat of tea over the entire cat and set it aside to dry. I repeated it, with a special emphasis on the crevices and folds in the statue. Then I repeated it several more times, concentrating on cracks, folds, and imperfections in the resin. Sometimes I'd slop the tea on, then wipe it off when it was partially dry. Finally, I had the ancient look I was searching for.

The cats you see here aren't quite through though. I'll give them a final clear coat of spray matt medium to protect the tea stains while keeping it dull. Then they'll be ready to decorate the steps of my temple, whatever it looks like.

That still leaves me four cats to play with. I'm thinking about taking a saw to one and find out if I can cut the head off. If so, I may be able to embed it in a mortar wall, or use it to top a pole or column.

I'm still trying to think of other decorative touches that are appropriate. We used to call Banzai the "monkey cat" for the way he'd swing down his cat ladder rather than jump, so adding some monkey figures to the temple would be appropriate too. I'd also like to work in his name somehow, disguised in some kind of ancient writing. I'll keep you posted on my tribute to my little friend.

Banzai always enjoyed sneaking into my Joe photos, so I think he'd like being able to stay in them for years to come.