Saturday, January 20, 2007

A Fossil T-Rex for the Adventure Team


I've been so involved with the Minions lately, that I haven't had much time for my old friends the GI Joe Adventure Team. But today, while picking up a bag of cat food at Petco, I spotted this great T-Rex fossil skull in the aquarium department, and had to have it. I love 1/6th "artifacts" for the Adventure Team to dig up and bring back to the Adventure Team headquarters for display, and this is a doozie.

I always thought that Hasbro missed a bet not making AT "Dinosaur Hunter" figure sets, each of which would include a fossil skull or skeleton accessory for a kid to dig out of the sandbox. This gives you a pretty good idea of what I had in mind, though a toy version would obviously be made of lighter and more durable materials.


The skull is made of hard resin (heavy!) and has an air hose on the back that I'll cut off (even the tag is still attached in this photo). The top of the skull is hinged (so it can open and close as it fills with air). Price was about $10, and money well spent. Actually, big as it is, it STILL isn't full scale for an adult T-Rex skull, but I figure it's close enough.

It looks pretty good in the greenish-gray paint it came with, but I'm at least going to use some acrylic paint to darken the eye sockets, nostrils, and other openings in the skull. I'll post some more photos when I get around to it.

Monday, January 15, 2007

1/6th working engine hoist


I picked up this nifty cast-aluminum engine hoist with working hydralics at a Harbor Freight store. I've never seen it in their catalog or web page(though they have listed the 1/6th jack stands, mini-floor jack and 1/5th tool cart). I think it cost me about $15, which was shockingly cheap (the floor jack is closer to $30). It didn't come with a hook. Instead, there's a metal weight shaped like a tiny engine. I used some hardware store chain and an "S" hook from the same source to hook up my Lincoln Mint 1/6th Ford V-8. Seen here with a GI Joe Collector's Club "Foreign Adventurer" for scale.

Wednesday, January 10, 2007

Amazing 1/5th Scale Ferrari 250GTO


Been a while since I posted here. When I've had a few moments of Joe-time lately, I've been pretty busy with my weekly 1/6th photo-comic Minons at Work. If you haven't visited for a while, check it out. New cartoons every week, and we just opened a Cafe Press shop so you can buy Minions at Work shirts, mugs, and other gear.

But I just had a hole open up in my schedule, allowing me a little time to catch up some things. Last year we made a stop in Las Vegas and I got to do a little sight-seeing. While wandering through the Grand Canal shopping area of the Venetian Casino and Resort, I spotted this incredible near-Joe-sized Ferrari in a shop window and took a couple shots. It was late at night, and the shop was closed (things DO close in Las Vegas, despite what they tell you) so I couldn't see the price tag or description. My best guess based on the level of detail and craftsmanship was "if you have to ask, you can't afford it." From what I've been able to find out, that's close. Here are some more details here. 3,600 Euros folks, shipping NOT included. Still, it was cool to see.

Wednesday, August 23, 2006

Making an easy weapon-rack


Maybe you've seen those cool grid-type weapon racks in 1/1 size. If nothing else, you might have seen them in the ballistics lab set on CSI: Las Vegas. I've always liked those, and I even think that somebody (BBi or Hot Toyz maybe?) made a 1/6th version, but somehow I never ended up with one.

Now maybe you've heard about the concept of a "one-sixth eye." It developing the sense of looking at everything you see as a potential 1/6th prop, and evaluating it accordingly. The other day I was in my local Ace Hardware store looking around (while fending the over-helpful sales people off with a stick, as usual) when I spotted something in the paint department that sent my One-Sixth-O-Meter right to stop.

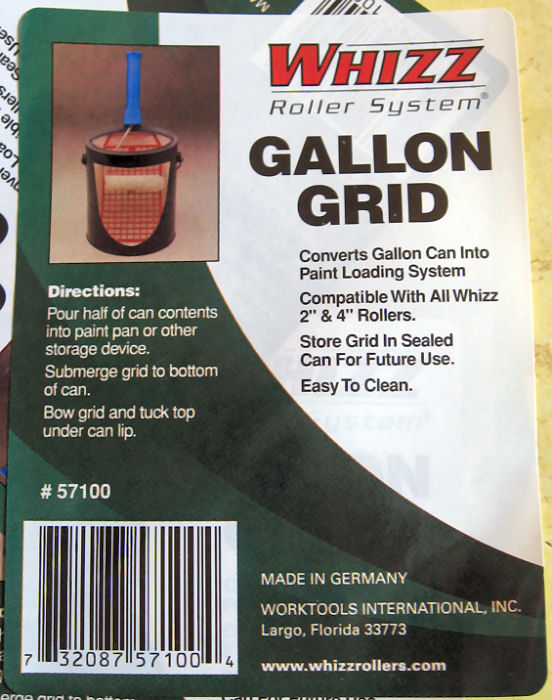
It was a cool little plastic grid molded in off-white speckled plastic, part of some sort of fancy roller system, the Whizz Roller System It wasn't even in a package. It was just a plastic grid with a sticker on it, hanging on a peg. Price: 99 cents. At first I couldn't be sure what it was good for, but I knew there would be something I could do with it. I almost bought just one, but on impulse, I picked up all four that they had in stock.

It didn't take me long to realize that they'd be interesting attached together edge-to-edge. I looked around for an easy way to do that, and ended up settling on small, black-plastic wire-ties that I already had on hand. I used two along each edge, pulled tight, and cut the excess off with scissors.

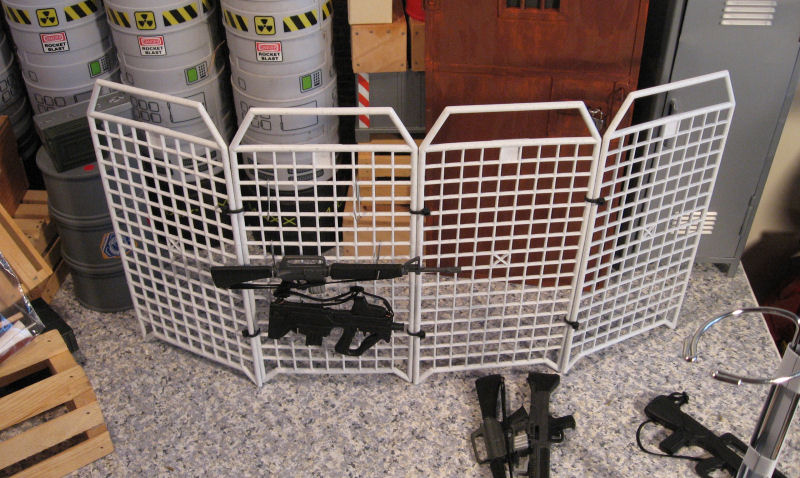
By now, I was starting to think weapon rack. My intent was to make a free-standing, four-sided rack, but for maximum flexibility as a prop, and for easy storage, I didn't tie the final corner together. That way, it could be folded into a square footprint, fanned out as a screen-type rack, or even be used as a safety or crowd-control fence.

The next issue was how to make hooks to hang weapons on the rack. Whatever I did had to be cheap and easy to mass produce. After several dead-end ideas, I settled on using light-duty, wire, paper clips. I used the inner loop of the clip intact, bent the larger loop out about 45-degrees, then cut it off (using wire cutting pliers) leaving about a half-inch stub, I then bent up the last eight of an inch or so using pliers, to make it more of a secure hook.

The small loop from the clip goes over the grid. The weapon itself hangs on the cut-off stub. (It occurs to me that another alternative that might work would be to use wire Christmas ornament hooks, and they'd probably work unmodified)


Here's the final result, with only a few weapons installed on one side. This would look equally at home in the firearms locker for an assault team, in a ballistics lab, a police property room, or an arms-dealer's show-room.

Friday, July 28, 2006

Tree how-to follow-up

I was gratified, and maybe a little surprised at all the positive feedback in email and many forums, you're only seeing a tiny fraction of it here) I've gotten on the "make a tree" post. Given all the quick-and-dirty set and prop building I'm doing for "Minions," you'll probably see more in the future. Please let me know what particular things you'd like to see, and what you like (or don't) about the posts I do make.

As always thanks for reading! (And viewing!)

Wednesday, July 26, 2006

Only God (and now you and me) can make a tree


In my photo dioramas I've been making lots of use of pre-printed papers sold in the scrapbooks sections of craft stores. I've successfully used them to represent grass, sand, brick walls, and even water. But after doing last week's park-scene for Minions, it got me thinking about other "stock" props I could build for future use.

One thing it occurred to me would be nice to have would be a bunch of tree trunks for forest scenes. Yes, you can use real wood, but the stuff is heavy, dirty, hard to store, and sometimes just doesn't look right. Maybe there was a better way.

I started to wonder if I could find a "bark" paper to use, but I trip to the craft store turned up nothing. Then I had another thought: why not print my own?

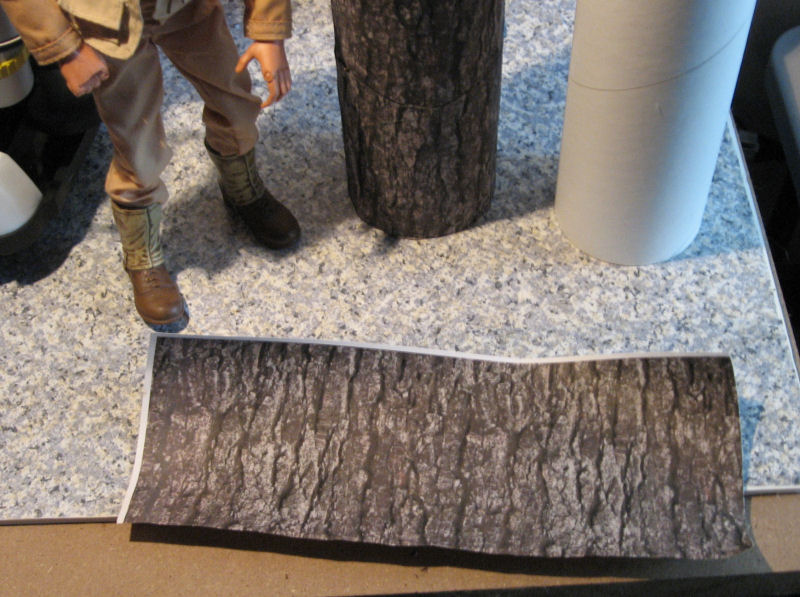
I used Google's handy image-search function (searching on "bark") to come up with a couple of likely source images. Then I picked my favorite and used Paint-shop Pro to "clone" the image three across to make it wider. Finally, I printed it on my inkjet printer using the "stretch to fit page" option. I printed three copies, to give me enough sheets to work with.

My thought was that I could glue them around cardboard tubes. Yes, they'd be smooth, but my experience is that realistic textures usually don't look flat to the 2-D eye of the camera. I figured if I just wrapped it around a tube or dowel, it would look good enough, especially if it appeared in the background of a scene.

This is the same trick that computer game makers use when they "map" a detailed texture onto a fairly simple 3-D object to achieve a realistic look without bogging down the computer or console rendering the scene. In this case, I was "mapping" the flat bark texture onto my simple tube shape.

Thinking about it, however, I realized that I could go the computer one better, and easily add some real texture to my printed sheets. Here's how I did it...

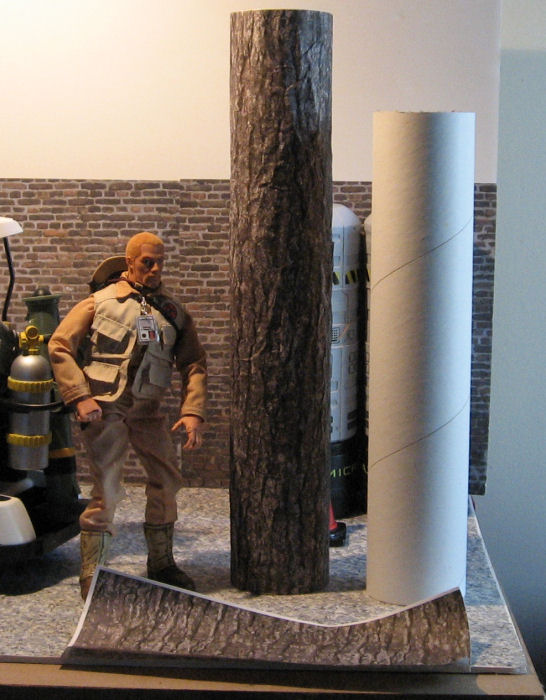
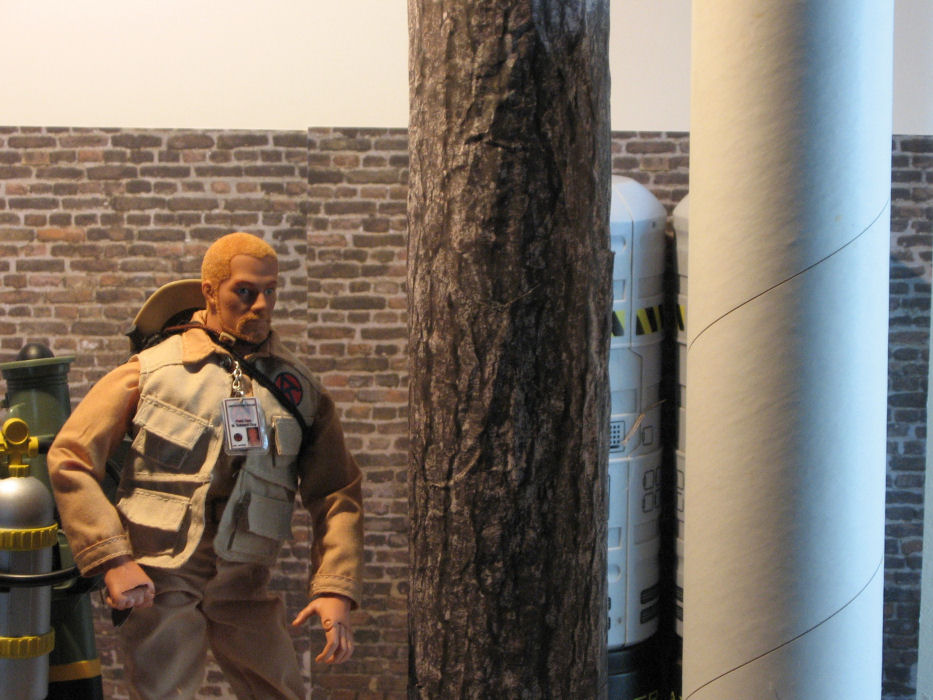
First, I selected my core form, a 3-inch mailing tube that I had laying around my shop. You can see a piece of the "naked" tube on the right side of the pictures. Most any cardboard tube would work, from a couple of paper-towel tubes spliced end-to-end, to a piece of carpet-tubing to create giant redwoods.

I determined that it would take most of three sheets to cover the tube, and that the long direction of my printed sheet would go around the tube with minimal overlap. For ease of construction, I decided to use transparent tape instead of glue. I carefully lined up all the joints so that the tape and seams are all hidden on the back side of the tree. (This is a key trick for pulling this stuff off easily. Don't build or detail things that people aren't going to see. The viewer's mind will fill in the rest of the bits that you leave off.)

I started at the bottom, trimming the white edges off the sheet where they'd show. This is where the real texture comes in. I then took the sheet and rolled it up into a small tube, then crushed it, rolling the resulting mess between my hands to add more folds and creases. Then I carefully flattened the sheet, which now had nifty texture that would pick up highlights and make the profile edges of my tree trunk look more realistic.

Razor-straight lines are a dead-give-away that something is artificial, and the human eye is very good at spotting straight-lines.

I took this in consideration when rapping the second sheet around the trunk. I planned to overlap the sheets slightly anyway, so I hand-trimmed the bottom of the sheet in a kind of "wave" that would help disguise the seam. After taping the sheet (both the lower sheets were also taped to the tube at the top, where the tape would be hidden by the overlap from the sheet above) I finished off with the final one.

I've got some ideas on how to add roots and limbs to my tree, but I haven't tried them out yet, and for a forest scene, the trunk is the most important part. You can whip up a whole grove of these in an evening while watching TV. Remember to used a variety of tube sizes and bark textures and colors for a more realistic "forest" You could even print out some "knot holes" and other tree features, cut them out, and paste them on for a more realistic look.

One other advantage of using multiple tube sizes is that you can store them compactly nested inside one another. Try that with something you rescued from your wood-pile!

Wednesday, July 19, 2006

Making a MinionMobile


For some time, I've been considering making a custom vehicle for my "Minions" photo cartoons. I thought about a Barbie camper conversion or a Jeep or something in that size range, but it occurred to me that I had a possibly more useful candidate on hand. After all, any super-secret complex back in the 60s and 70s (good or evil) used industrial golf-carts to shuttle through its cavernous depths.

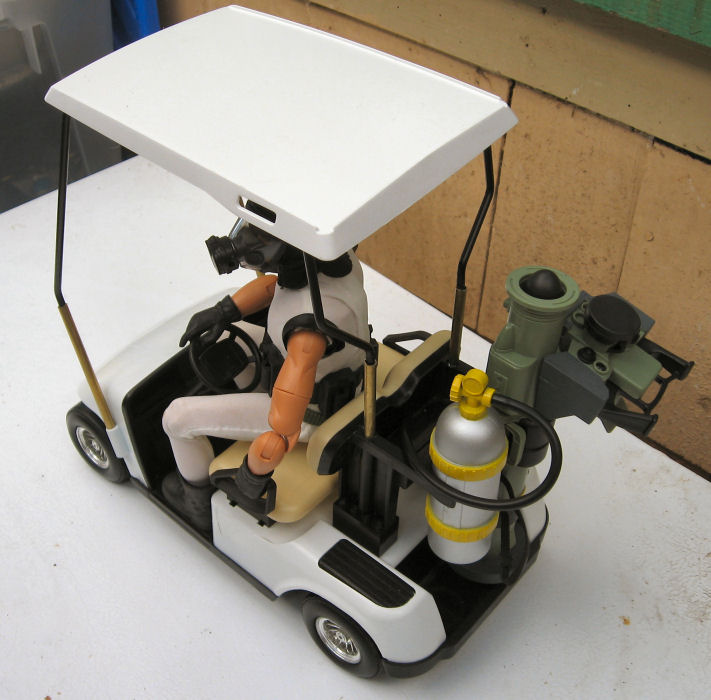
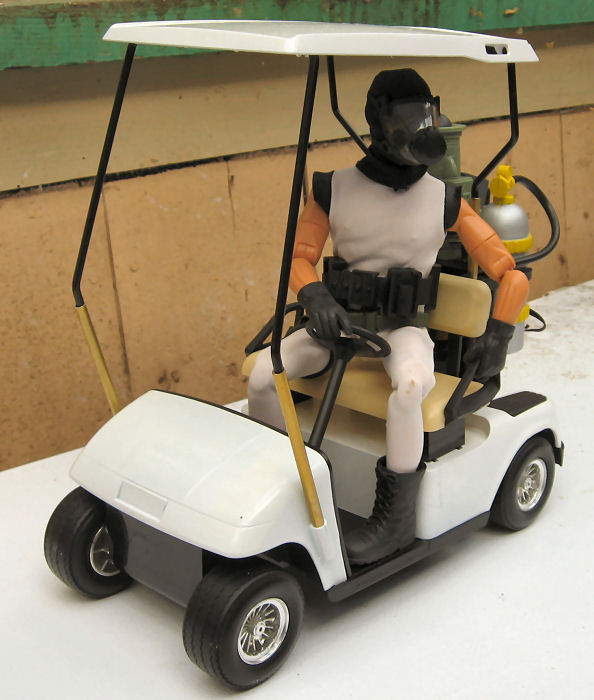
A while back, KB Toys had a nice looking toy golf cart for sale. Unfortunately, they were maybe 1/10th scale, just too small for 1/6th figures, so I passed on it. Then, some months back, I spotted one for cheap in a thrift store and couldn't pass on it. The body and roof are plastic, and the roof supports are heavy metal rod, and I thought perhaps I might be able to modify it for use with GI Joes.

I completely disassembled the toy for inspection, cleaning, and painting. I decided the original green body panels weren't industrial enough, so I went for a sterile, Krylon Fusion "satin white." The roof was already white, but I painted it as well, to make it more opaque and hide the plastic sheen.

My initial thought was that the cart could be stretched between the front and rear body sections to provide more leg room, and then the roof raised slightly. But as I looked at it, I realized that would be very complicated, and weaken the structure of what was actually a pretty rugged little toy. There was also the matter of the roof, which would either have to be stretched, removed, or have heavily modified supports.

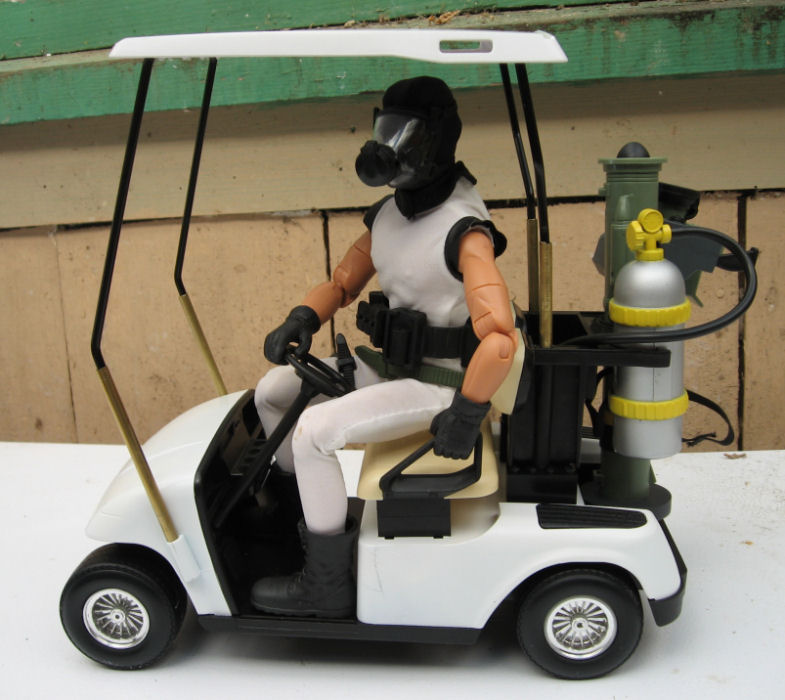
It was my wife, Chris, who came up with a better solution. She suggested that if the seat were simply raised so that the figure's knees weren't up in his chest, it would look much more in scale. It seemed possible that I could put some washers on the screws holding in the seat to raise it a bit, or perhaps even build a riser of some sort for it to sit on. The job was made somewhat more critical by the fact that the screws that hold on the seat and seat back assembly also hold on the rear body and contribute to the strength of the entire structure.

I decided that some kind of riser was going to be necessary, and before I started fabricating something new, I started digging through my parts boxes for something sturdy and ready made. Just for sizing purposes, I dug out some Lego blocks to see how high the seat should go. But after looking at the blocks for a while, I realized that they'd be ideal as the risers themselves.

I have to admit, adding Legos to a permanent construction project seemed somehow "wrong," especially since I had to drill a hole through the centers of the blocks for the screw, and modify the "buttons" on top of the rear risers so the seat-back/cargo holder assembly would sit flat. But Legos are cheap, and I have a ton of them (I can't resist buying them when I see them cheap in thrift stores, so I've got quite a collection). Not only were they sturdy and perfectly sized, but I was even able to get black ones so no painting was necessary!

The seat sits on a pair 2x4 block risers, two-blocks tall. Same for the seat-back assembly. I replaced the original screws with longer #6 sheet-metal screws selected from the hardware store.

That done, it was time to raise the roof. This was complicated in that not only did it now need a "scale" adjustment to allow for the taller figure, but now the seat itself was higher. I used threaded rod from the hardware store to make pins that fit in the original roof mounting holes, then cut sections of brass tubing (hobby shop metal stock) to slide over the pins and the bottoms of the original supports, connecting them together. These are just friction fitted at the moment. Some epoxy may eventually come into play, and I'll paint the tubing black to match the existing support posts.

The very tall appearance has a bit of "clown car" aspect to it, but it isn't bad, and the Minions ARE supposed to be funny, after all. I looked around for some accessories to fit in the club rack in back, and found first a scuba-tank from one of those cheap 14" Action Man knock-off figures that Wal-Mart used to sell. Poison gas, maybe? Something radioactive? Then I noticed a Hasbro javelin anti-tank missile, and sure enough, it was a perfect fit in the other side of the rack! The Minions are loaded for bear! I thought the idea of this silly little cart with a missile on it was just funny in itself.

I'm still not finished. The steering column needs to be longer and more vertical, and I may add a larger steering wheel while I'm at it. Not sure. I'll probably add a few markings as well, but I'm still thinking about that. "Official Lair Business Only," maybe?

Monday, July 17, 2006

DVD Extras for "Minions: Walking the Dinosaur"


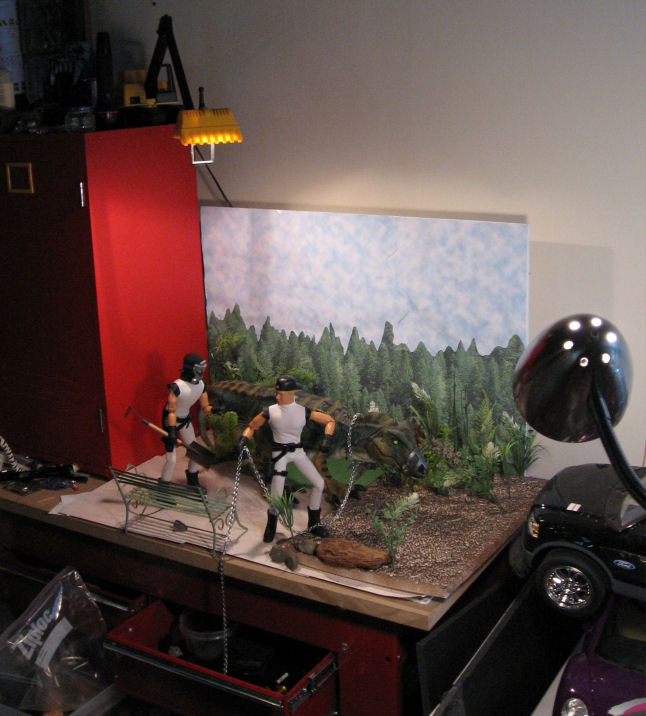
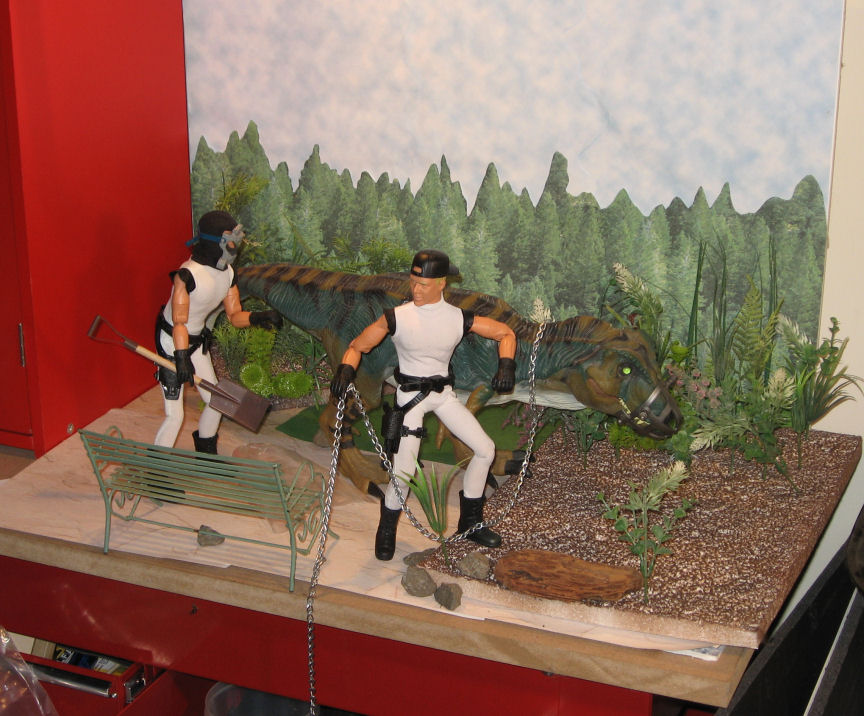
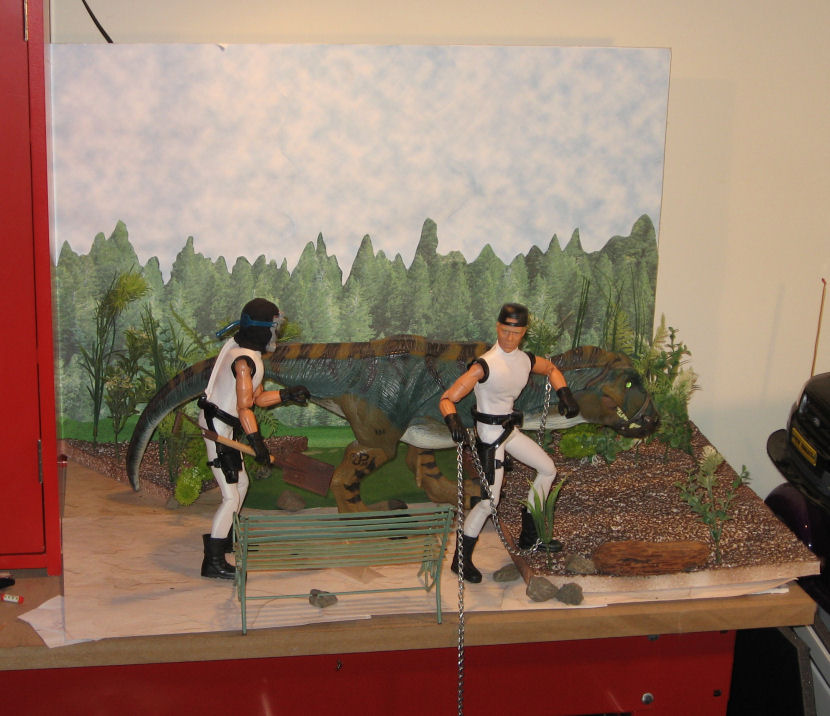
I'm really pleased with how this installment of "Minions," titled "Walking the Dinosaur" turned out visually, so here are some "behind the scenes" shots of the set.

I made extensive use of printed papers sold in craft stores for scrapbooking in this set. The ground is simply overlapping sheets of a "stucco" print. There are also some small scraps of a "grass" print to break up the lines. The backdrop is a cut-and-paste job onto a sheet of foamcore, using pieces of two different sheets, a "cloudy sky" sheet, and a "pine forest" pattern. I covered most of the sky with overlapping sheets of the sky pattern, then filled in the horizon with hand-cut pieces from the "forest" sheets. I probably used about four sheets of each.

The "dirt" area is actually a sheet of scrap packing foam hit with brown spray paint. I didn't use foam-safe paint, so it melted the surface into an irregular texture, and bits of white foam are showing up through the foam. I wasn't sure how it would work, but seen from the side, the white actually breaks up the dark brown and makes it look more like a natural ground-cover.

The plants are all plastic, consisting of bits of aquarium plants (bought cheap at a thrift store), and some dollar-store mixed greenery that I took apart to make smaller plants. The rocks are just some driveway gravel I picked up right outside my office door. The brown "log" is actually a piece of driftwood, the only real plant mater in the shot.

The park bench is metal. I found it in a thrift store (in metal housewares, not in toys) for about two bucks. The shovel is a craft-store item. The chain was purchased by the foot at the hardware store. The dinosaur is a "Jurassic Park" T-Rex, possibly one of the nicest toy dinosaurs ever made. I currently own three of them, and I'm always keeping my eyes open for more.

I did do a slight bit of digital retouching in Paint Shop Pro, using the "clone" tool to hide the edges of the foam sheet, and the "smear" tool to break up the edges of my cut-out trees and make them look more realistic.

The whole thing only took me twenty minutes or so to set up using things I had on-hand. I pays to think ahead and stockpile basic backgrounds and props like these.

Tuesday, July 04, 2006

Cut and Paste

Astro-Dan has been posting a series of figures computer blended into historic photo backgrounds, and over on the Sandbox we've been discussing tips for realistically blending a figure with the background. This is more art than science, and requires supplying the eye with cues that trick it into thinking the overlaid foreground is part of the photo background. You could write a book about it, but here are a few tips from this non-expert:

1: Match the shadows and light sources. The eye and brain are really good in picking up these cues, especially in photos, where this is how we judge the depth and size of the objects in the 2D picture. At the very least, try to match the primary light source.

Look at your figure. Where are the shadows on the face? If they're on the left, the light source is on the right. If they're on the right, the light source is on the left. If they're under the brows, nose, and chin, then the light is coming from above. This should match your background photo as close as possible. If there are no distinct shadows, or the shadows aren't pronounced, then the light on the figure is diffuse. If there are strong shadows in your background, it won't match.

One trick that sometimes works: if your figure has the light source on one side, and the background has the light on the other, its sometimes possible to flip one or the other (mirror image) and make it match. Obviously this doesn't work if there's something in the image to establish the "handedness" of the image. Any flipped writing will be backwards. Car steering wheels will be on the wrong side (but hey, we could be in England!). And Joe's scar could be on the wrong cheek!

2: Match the contrast of the background. Nothing will give away a "paste job" faster than a high-contrast figure against a washed-out background shot. Your photo editing software will probably have a brightness and contrast tool. It may have other brightness tools that are even more powerful (though they can be more difficult to figure out and use).

3: Match the color tone. Figure photos taken inside under incandescent lights are often "warm" in color tone. Fluorescent light sometimes results in a greenish tone. Photos taken outside under sunlight usually have a bluish tone. Your photo editing software probably has tools to fix this.

4. Match the color saturation. Modern photos taken under artificial light often have bright, over-saturated, colors. Historic photos taken outside often have muted, washed-out colors. Foreground should match background.

5. Match size and perspective. It's pretty basic that things that are closer are bigger, and that things which are farther away look smaller. In a photo scene, things contract towards an imaginary "vanishing point," which (on a flat plain, anyway) will lie along the horizon.

I could go into a big, not very informed lecture about perspective here. Trust it to say that your eyes and brain judge the size and distance of an object in a picture by its position in the picture in relation to other objects.
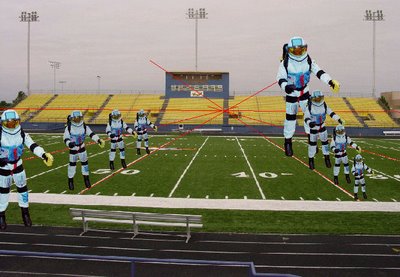

Take a look at this example I whipped up. The lines on the football field converge on our "vanishing point," illustrated with the red lines converging on the (hidden) horizon). On the left, I've arranged four figures positioned to appear the same height, even though each is about 20% smaller than the next. Note that as they stand on a line towards the vanishing point, another such line connects the tops of all their heads. Yes, I know that they look about 12-feet tall, but they ALL look 12-feet tall. That's what's important.

Now look at the figures standing along a similar line on the right. Believe it or not, these are the SAME four figures. I've just reversed the order. The monster standing back-rightis EXACTLY the same size as the more normal-looking guy standing front-left. The tiny shrimp front right is EXACTLY the same size as the fellow back left.

Likewise, any figure you paste into a photo background has to relate properly to the objects around them, or they're going to appear to be a giant, or a shrimp, or just hanging in the air in front of a distant scene, or worst of all, just pasted on a flat background like a stamp on an envelope.

Experiment with size and position relative to the background, and trust your eye on this. One trick I find useful is to look at the figure's feet. Though the imaginary plain leading off to the horizon may be flat, to your eye it SEEMS steeper as it's closer to the observer, and flatter towards the horizon. If you're looking down at the tops of a figure's feet, then it probably belongs close to the front of your image. If that makes him look gigantic, then he needs to be made slower. If, on the other hand, you seem to be looking at the sides of the shoes straight-on, then he belongs off in the distance, and should be positioned and resized accordingly. Use people, doorways, and other such details as reference in positioning your foreground picture.

Notice how the giant on the right rear seems to be up on his toes, about to topple forward, or to launch himself into the sky. That's a foot position cue at work. He needs to be closer to the bottom front of the picture.
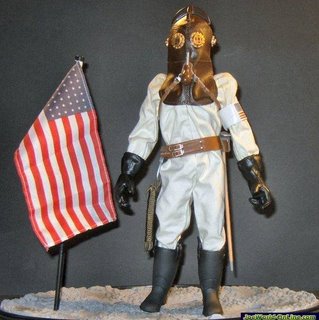

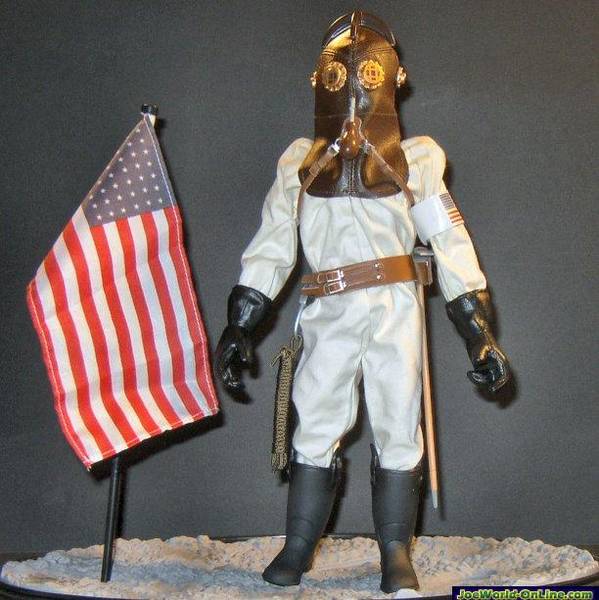
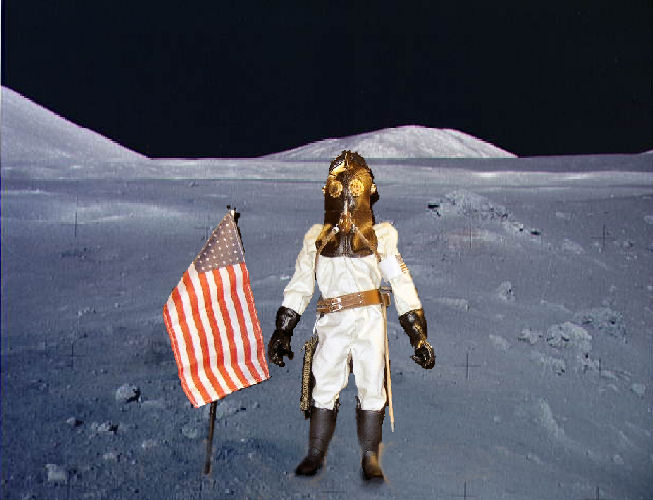
Okay, this is a quick example of putting these rules into practice, hijacking one of Dan's own images, his 1912 lunar astronaut. I've dug a NASA lunar photo out of my files and added him in.
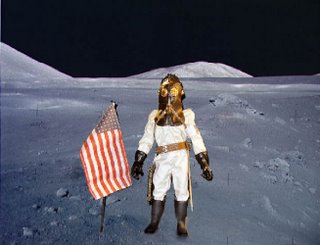
This first example is done wrong. First of all, the position of the figure is wrong. He's too close to the front, and seems to be tipping backwards on his heels. One would expect light on the moon to be bluish and colors somewhat subdued. Instead, the figure is very saturated, and the colors warm. At best, he looks like he's standing in front of a photo backdrop. At worst, it's the stamp and envelope effect.
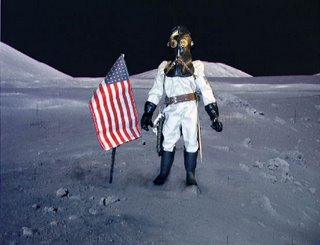
Now this next one isn't perfect, but it's not bad. I've cooled off the colors in the figure, increased the contrast, and reduced the color saturation, to make him fit with the background better. A couple of additional tricks. I added some blotchy shadows under his feet and to the right of him and the flag. These don't exactly match either the sharp shadows on his suit, of the washed-own and almost shadow-free background, but they do help to "ground" him in the scene. One other little trick, I copied a rock from the background (and reshaped it a bit, but that isn't necessary) and put in in FRONT of the toe of one of his boots. Again, that helps to "stick" him to the scene.

Again, though the figure in the "bad" image seems bigger, it's exactly the same size relative to the background as the "good" image.

This post really just scratches the surface, but hopefully it will provide some useful tips to apply in creating your own photos.

True undersea adventure


I'm going to break from the usual around here to review a book I just finished. It's called Dark Waters: An Insider's Account of the NR-1, the Cold War's Undercover Nuclear Sub, by Lee Vyborny and Don Davis.

The 1960s were a period of stunning technological change and exploration, both in space, in the air, and under the water. It was the era that excited the young imaginations of so many of us, and inspired the GI Joe Adventure Team. But while many of these developments and adventures took place in the public eye, some went on in near secrecy.

A prime example of this is the NR-1, a one-of-a-kind, deep-diving, nuclear powered mini-sub developed by the US Navy. Announced under the cover of being a scientific vehicle, in truth the little sub was primarily designed for military applications (though in later years, its unique capabilities would lead to many scientific discoveries).

The NR-1 could dive at least 3000 feet, hover above the bottom like a helicopter, roll along the ocean bottom on a pair of retractable wheels, view the bottom through cameras and manned viewports, and manipulate objects using a robot arm, and lift heavier objects with tines like a forklift. Most significantly, it's nuclear power plant could supply its small crew (no more than a dozen men) with air and drinking water indefinitely, drive powerful lights, and allow stays on the bottom for up to a month (though in cramped and inhospitable conditions).

Many of the NR-1's missions remained classified, but this book still provides a fascinating and thrilling account of the little sub's creation, testing, and many of its adventures. Seemingly every mission of the NR-1, even the seemingly most routine, was filled with peril and the constant threat of disaster. Access to the interior of the sub was through a single, tiny, hatch, it routinely dived into depths and locations where no other sub on Earth could come to its rescue. It challenged uncharted canyons, unknown currents, abandoned mine-fields, and lost fishing nets in its missions, and being the first-ship of its kind, the crew was literally making up the rule-book as they went along.

One of the most fascinating accounts deals with the recovery of a lost American fighter-plane and the then-new and top-secret Phoenix missile from the bottom of the Mediterranean. Not only was the mission dangerous and technically challenging in itself, but it was complicated by the layers of secrecy (the men on the submarine were not even told what the missile they were looking for looked like!) and aggressive Soviet spy ships that circled like hungry wolves, desperate for any opportunity to snatch the missile for themselves.

Though the NR-1 often operates under the cloak of secrecy, since the fall of the Soviet Union it has increasingly cooperated in scientific missions, and among its high-profile assignments was recovery of wreckage from the Space Shuttle Challenger that lead directly to solving the cause of that terrible disaster.

This is a wonderful book, much of it derived from Lee Vyborny's own experiences as a member of the NR-1s first crew. It sheds light on a fantastic machine and the men who created it, a machine in its own way as bold and advanced as the Apollo Moon missions. But unlike the Apollo program, the NR-1s missions are ongoing, and it continues to sail today.

Unfortunately, I'm not sure if this book is still in print. I discovered my copy in a book liquidator, and Amazon claims to be able to order a new copy in "1-3 weeks" of which I am doubtful. But it's well worth tracking down on Amazon or through a library or used bookstore.

Saturday, June 24, 2006

Speaking of flying Joes


(Posting on the road from Lake Elsinore, California)
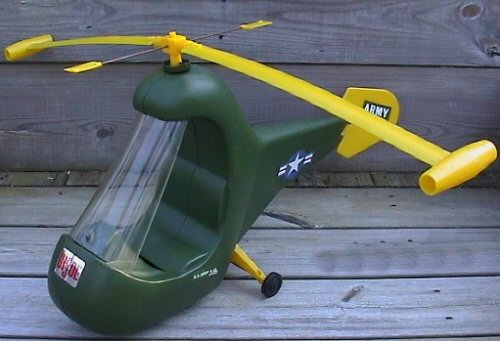
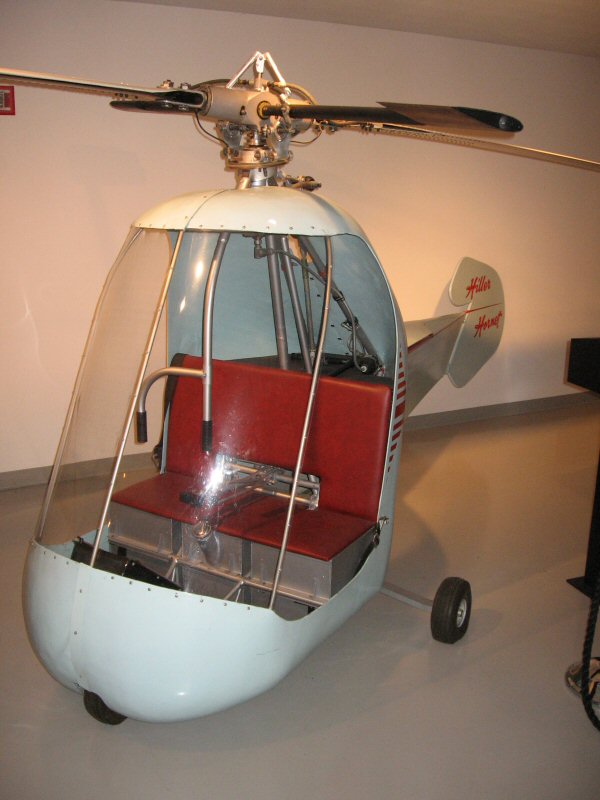
Did you know the GI Joe Irwin Helicopter from the 60s painthead era was based on a real aircraft? The Hiller Hornet was one of a family of simple and light helicopters built by Hiller aircraft in the 50s, with rotors driven not by an engine inside, but by ramjet engines in pods on the rotor tips. So not only is this aircraft the basis of the Irwin helicopter, but also the Adventure Team Turbocopter and, to a lesser extent, the AT Helicopter. Earlier this week, our vacation took us through the bay area where I visited the Hiller Museum, where I took these (and many more) pictures of the Hornet and it's near-kin. Hopefully these will be the basis of some articles I hope to write for the GI Joe Collector's Club newsletter.

Monday, June 19, 2006

You will believe a Joe can fly!

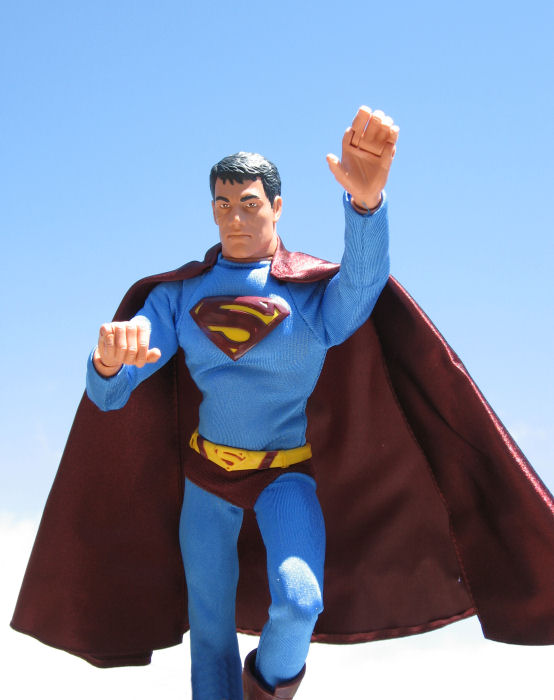
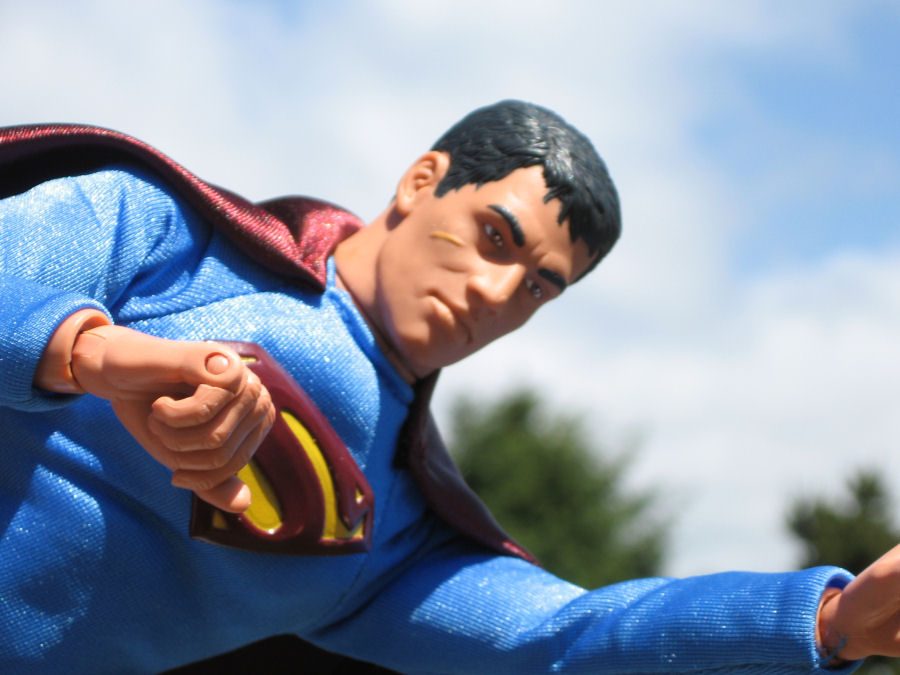
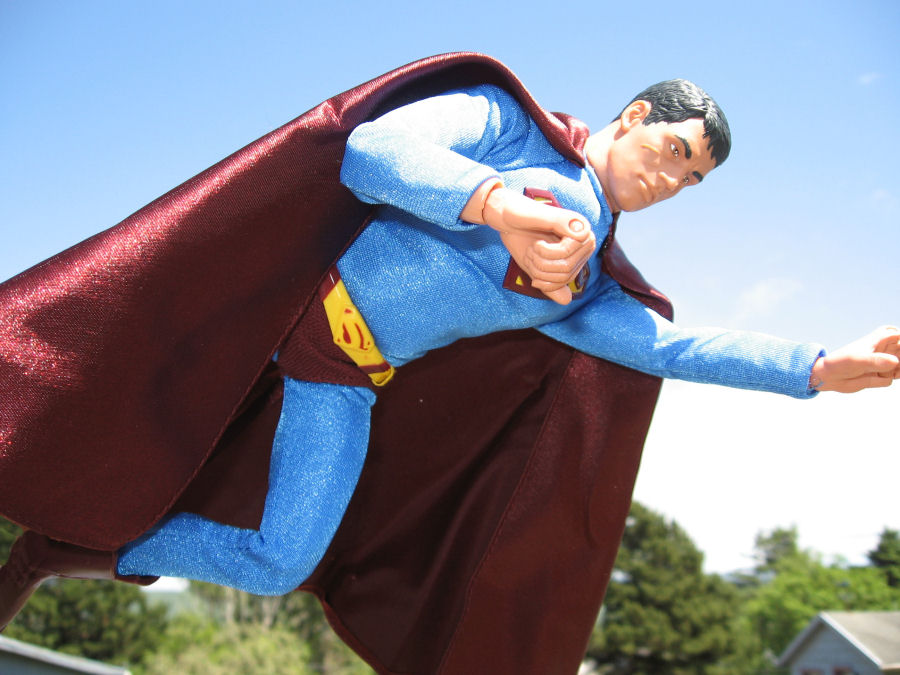
I broke down and bought a "Ken as Superman" doll at Wal-Mart the other day for the costume. It galled me a bit to buy a suit of unknown quality and fit for $14.95, but now that I have it home, it was a bargain. I tossed the Ken and replaced it with an SA Joe. The Gung-ho Grip hands are good for flying poses, and he has the small feet, which fit the boots just fine. The bottom of the Velcro doesn't quite close, but it's well-covered by the cape.

I like the textured logo and the logo-belt-buckle, and while I was initially put off by the dark red, it's really growing on me. This is just a really nice Superman costume, and I doubt an expensive collector's figure could have done much better.

So how did Superman get a scar on his face? Well, he cut himself shaving, of course!